
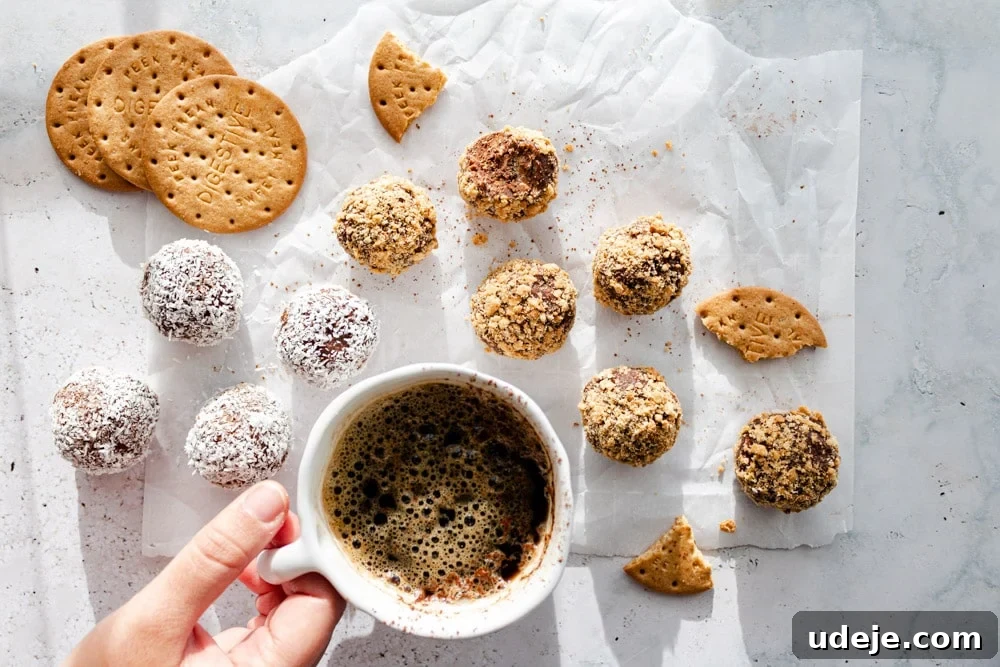
Welcome to the world of effortless indulgence! If you’re searching for a dessert that’s incredibly easy to whip up, requires no baking, and delivers maximum satisfaction, you’ve hit the jackpot. These delightful chocolate biscuit balls are your new go-to sweet treat, demanding just three simple ingredients and minimal effort. Perfect for last-minute cravings, busy schedules, or simply when you want a quick fix of chocolatey goodness, these no-bake wonders are guaranteed to become a household favorite. But be warned: their irresistible charm is highly addictive!
Imagine a rich, fudgy chocolate bite combined with the comforting crunch of biscuits, all rolled into a perfectly portioned ball. This isn’t just a recipe; it’s a testament to how extraordinary flavors can emerge from the simplest combinations. Forget complex techniques or endless ingredient lists – we’re stripping dessert making back to its delicious core. Ready to dive into the ultimate easy treat? Let’s get started!
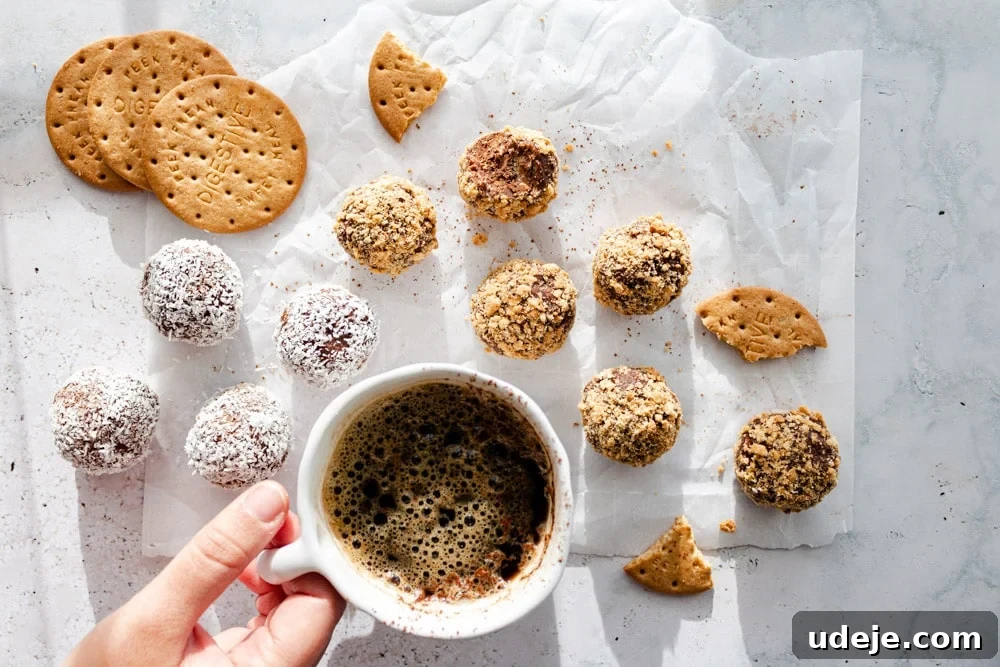
The Magic Trio: Essential Ingredients for Your No-Bake Chocolate Biscuit Balls
True to our promise of simplicity, this recipe relies on just three star ingredients to create a truly magical dessert. Each component plays a crucial role in delivering the perfect texture, sweetness, and decadent chocolate flavor. Let’s explore them in detail:
- Digestive Biscuits or Marie Biscuits: The Foundation
These popular tea biscuits are the backbone of our chocolate biscuit balls. Their mild, slightly sweet flavor and crumbly texture make them ideal for crushing and absorbing the other ingredients, creating that signature fudgy yet slightly textured bite. Digestive biscuits, with their subtly wheaty flavor, add a comforting depth, while Marie biscuits offer a lighter, crispier base. Both are excellent choices! While these two are highly recommended for their superior flavor and ability to form fine crumbs, feel free to experiment with other plain tea biscuits or even Graham crackers if you’re in a pinch. The key is to ensure they can be crushed into a fine, consistent powder, which is essential for the mixture to bind properly and achieve that smooth, rollable consistency. - Sweetened Condensed Milk: The Sweet Binder
This thick, sweet, and creamy milk product is the absolute hero of this no-bake recipe. It acts as both the primary sweetener and the binding agent, holding all the biscuit crumbs together to form a pliable, rollable dough. The rich, caramelized notes of sweetened condensed milk perfectly complement the chocolate and biscuit flavors, creating an irresistible taste. It’s absolutely crucial to use sweetened condensed milk for this recipe, as it’s the only source of added sugar. Unsweetened evaporated milk will not work as a substitute here, as it lacks the sugar and thickness required. - Unsweetened Cocoa Powder: The Chocolate Heart
For that deep, delicious chocolate flavor, we turn to unsweetened cocoa powder. Using unsweetened cocoa powder allows us to control the sweetness level, ensuring our biscuit balls are rich and chocolatey without being overly cloying. It’s vital that the cocoa powder is unsweetened; using a sweetened variety would make the final product far too sweet, given the presence of sweetened condensed milk. We recommend using a good quality unsweetened cocoa powder for the best flavor. If you opt for cacao powder, be aware that it typically has a more intense and slightly bitter flavor. In this case, you might consider adding a small amount of granulated sugar to the mixture to balance the bitterness, or slightly reduce the amount of cacao powder used.
With these three simple yet powerful ingredients, you’re just moments away from creating a dessert sensation that will impress everyone!
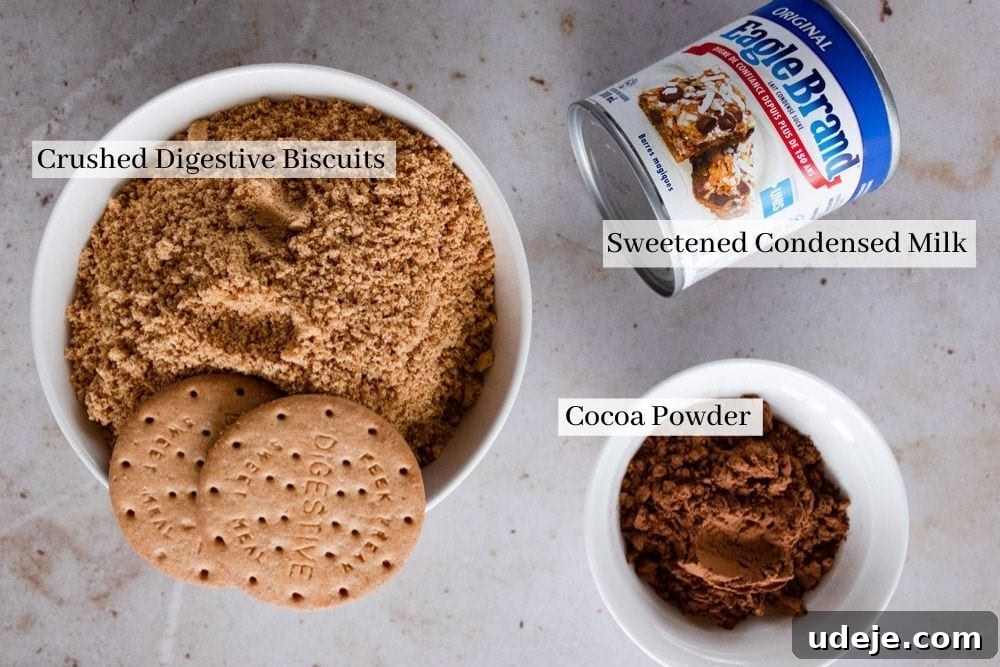
Let’s Make Irresistible Chocolate Biscuit Balls: Step-by-Step Guide
Creating these delectable chocolate biscuit balls is a straightforward and enjoyable process. Follow these simple steps to ensure perfect results every time:
- Step 1: Prepare the Chocolate Base
In a large mixing bowl, combine the sweetened condensed milk with the unsweetened cocoa powder. Stir these two ingredients together thoroughly, using a whisk or a sturdy spoon, until the cocoa powder is completely dissolved and beautifully integrated into the condensed milk. You want a smooth, uniform chocolatey liquid with no lumps. This is your chance to taste the mixture! If you prefer a more intense chocolate flavor, feel free to add a little more cocoa powder. If using cacao powder, which is naturally more bitter, and you desire extra sweetness, a tiny spoonful of granulated sugar can be incorporated at this stage. Ensure it’s well mixed before proceeding. - Step 2: Crush the Biscuits to Perfection
The next crucial step is to transform your digestive or Marie biscuits into fine crumbs. The easiest and most efficient way to achieve this is by using a food processor. Simply place the biscuits into the food processor and pulse until they form fine, even crumbs, resembling coarse sand. If you don’t have a food processor, don’t worry! Place the biscuits into a sturdy Ziploc bag, seal it, and then use a rolling pin or a heavy object (like a meat tenderizer or the bottom of a pan) to bash them repeatedly until they are reduced to fine crumbs. This method can be quite satisfying and works just as well! Ensure the crumbs are as fine as possible for the best texture in your biscuit balls. - Step 3: Combine and Form the Dough
Once your biscuits are perfectly crushed, add the fine biscuit crumbs to the chocolate and condensed milk mixture in the bowl. Mix everything together really well. You can start with a spoon, but you’ll likely find your hands are the best tools for this job. Knead and press the mixture until all the biscuit crumbs are fully coated and a cohesive dough forms. The mixture should be firm enough to hold its shape but still pliable. If, by any chance, you find the mixture too runny (though following the precise measurements should yield perfect results), you can gradually add a little more crushed biscuit crumbs until you reach the desired consistency. Conversely, if it seems too dry and crumbly, add a tiny bit more condensed milk, a teaspoon at a time. - Step 4: Chill and Roll
For easier handling and shaping, cover the bowl and refrigerate the mixture for at least 30 minutes. This chilling period allows the mixture to firm up, making it much less sticky and simpler to roll into perfect balls. Once chilled, prepare a plate or tray lined with parchment paper. To prevent the mixture from sticking to your hands, lightly moisten your palms with a bit of water before you start rolling. Scoop out about 1 tablespoon of the mixture (or more, if you prefer larger balls) and gently roll it between your palms to form a smooth, uniform ball. Continue this process until all the mixture is used up. - Step 5: Add Your Favorite Toppings
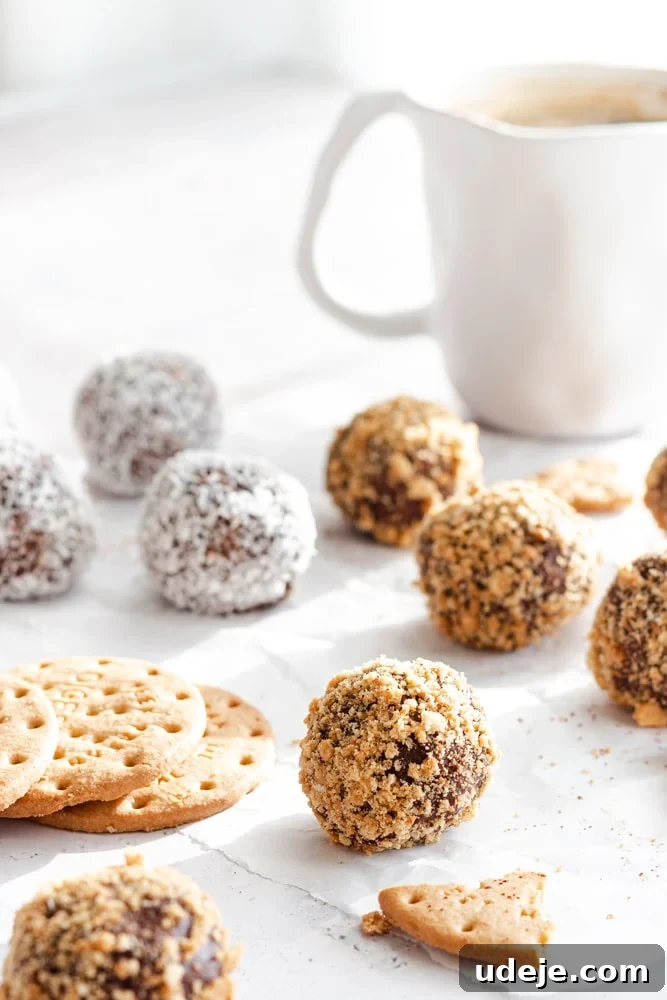
Now for the fun part – customizing your biscuit balls with delicious toppings! Roll each ball in your chosen topping. Some popular options include additional crushed biscuits for extra texture, shredded coconut for a tropical twist, or a dusting of cocoa powder for an intense chocolate experience. We’ll delve into more topping ideas shortly!
And there you have it! Store your freshly made chocolate biscuit balls in an airtight container in the fridge, ready to be enjoyed whenever a sweet craving strikes.
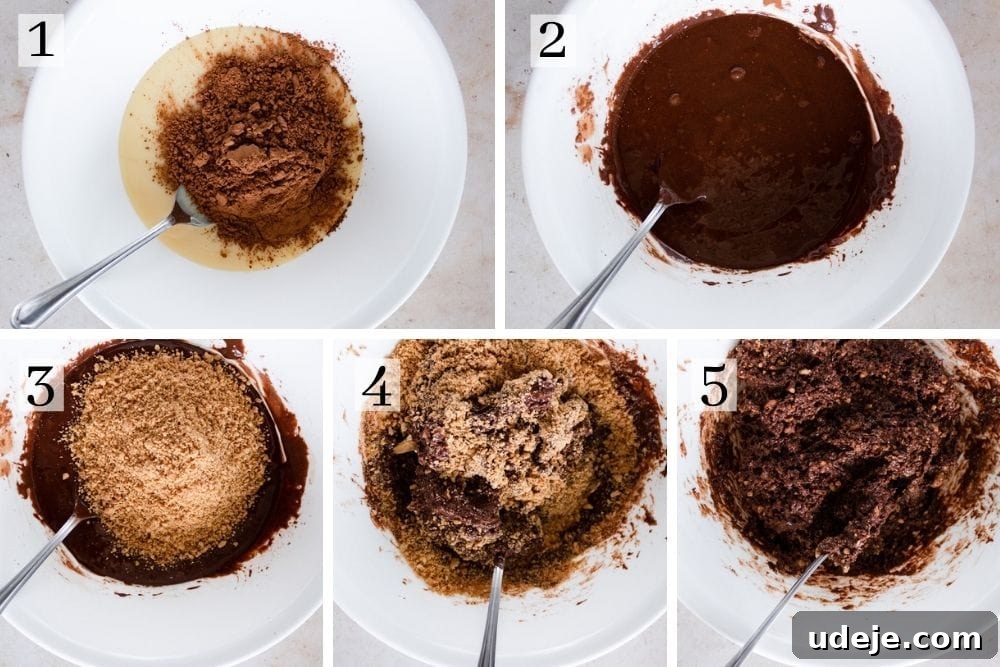
Endless Possibilities: Creative Topping Ideas for Your Biscuit Balls
One of the most exciting aspects of these chocolate biscuit balls is their versatility, especially when it comes to toppings! The slightly sticky surface of the balls acts as a perfect canvas for a wide array of delicious coatings, allowing you to customize each batch to your heart’s desire. Most toppings will adhere beautifully, but for larger or drier options, a quick dab with a wet finger can help create a little moisture for better adhesion. Here are some fantastic ideas to get your creative juices flowing:
- Classic Biscuit Crumbs: For a simple yet satisfying finish that reinforces the biscuit base, roll them in finely crushed digestive or Marie biscuit crumbs. This adds an extra layer of texture and a familiar flavor.
- Shredded or Desiccated Coconut: A timeless favorite, shredded coconut adds a delightful chewiness and a hint of tropical sweetness that beautifully contrasts with the rich chocolate.
- Dusting of Cocoa Powder: For the ultimate chocolate lover, a light dusting of unsweetened cocoa powder creates an elegant, slightly bitter finish that highlights the intense chocolate flavor of the balls.
- Colorful Sprinkles: Perfect for parties, holidays, or simply to brighten your day! Use chocolate sprinkles for a classic look or vibrant, colorful sprinkles to make them pop and appeal to kids (and adults!).
- Chopped Nuts: Add a sophisticated crunch and nutty flavor with finely chopped hazelnuts, pistachios, almonds, or walnuts. Toasting the nuts lightly beforehand can enhance their aroma and taste.
- Freeze-Dried Strawberries (Crushed): If you can get your hands on them, crushed freeze-dried strawberries offer a wonderful tangy sweetness and a beautiful pop of pink color. Their intense fruit flavor pairs exceptionally well with chocolate.
- Melted Chocolate Drizzle: For an extra layer of decadence, melt some chocolate (dark, milk, or white) and drizzle it over the finished balls after they’ve been rolled in another topping, or simply as a standalone coating.
- Confectioners’ Sugar: A light dusting of powdered sugar creates a soft, snowy appearance and a delicate sweetness.
- Mini Chocolate Chips: Press mini chocolate chips onto the surface for added chocolate texture and visual appeal.
- Matcha Powder: For an adventurous twist, a light roll in high-quality matcha powder can offer a subtle earthy bitterness and a vibrant green hue.
Don’t be afraid to mix and match or come up with your own unique combinations! These biscuit balls are as fun to decorate as they are to eat.
How to Store and Enjoy Your Chocolate Biscuit Balls for Maximum Freshness
One of the many benefits of these no-bake chocolate biscuit balls is their excellent shelf life and adaptability to various storage methods. Proper storage ensures they remain firm, delicious, and safe to eat for an extended period.
Refrigerator Storage
To maintain their optimal firm texture and fresh taste, it is essential to store your chocolate biscuit balls in the refrigerator. Place them in an airtight container to prevent them from drying out or absorbing any odors from other foods. When stored correctly in the fridge, these delightful treats will remain fresh and enjoyable for 3 to 4 weeks. They are perfect for preparing in advance for parties or for having a ready supply of sweet snacks throughout the month.
Freezer Storage
These biscuit balls are also freezer-friendly, making them an excellent option for meal prepping desserts or ensuring you always have a quick treat on hand. To freeze them, arrange the rolled and topped biscuit balls in a single layer on a baking sheet lined with parchment paper. Place the baking sheet in the freezer for about 1-2 hours, or until the balls are completely frozen solid. This prevents them from sticking together. Once frozen, transfer the solid balls into a freezer-safe airtight container or a large Ziploc bag. This method allows you to save space in your freezer and easily grab a few whenever you desire. They can be stored in the freezer for up to 2-3 months without compromising their quality. You can enjoy them straight from the freezer for a firmer, almost fudge-like texture, or let them thaw slightly at room temperature for about 10-15 minutes to return to their softer, fudgier consistency before eating.
Whether you prefer them chilled or even frozen, these chocolate biscuit balls are designed for convenient indulgence, ensuring you always have a delightful treat within reach.
If You Adore Super Easy Desserts, You’ll Love These:
If the simplicity and deliciousness of these chocolate biscuit balls have won you over, you’re in for a treat! We specialize in fuss-free, irresistible desserts that prove you don’t need to be a pastry chef to create something amazing. Here are a few more easy recipes from our collection that we think you’ll absolutely love:
- Lazy Cake (No Bake): Another fantastic no-bake wonder, this chocolate biscuit cake is a crowd-pleaser and incredibly simple to make.
- Easy Nutella Cookies: For all the Nutella lovers out there, these cookies are soft, chewy, and bursting with hazelnut-chocolate flavor, requiring minimal effort.
- 3 Ingredient Toffee Bars: Just like our biscuit balls, these toffee bars are unbelievably easy, requiring only three ingredients to create a rich, buttery, and utterly decadent treat.
- Cardamom & Tahini Energy Date Balls: For a slightly healthier but equally delicious no-bake option, these energy balls offer a unique blend of flavors and a satisfying texture.
Explore these recipes and expand your repertoire of easy, delightful desserts!
Chocolate Biscuit Balls (3 ingredients, no bake)
Leave a Review
Pin Recipe
Ingredients
- 300 g digestive biscuits, note 1
- 300 mL sweetened condensed milk
- 7 tablespoons unsweetened cocoa powder, note 2
- Shredded coconut for topping, optional
Instructions
-
Start by crushing the digestive biscuits into fine crumbs using your food processor. If you don’t have a food processor, do this by smashing them in a Ziploc bag until they are fine.
-
Mix together the condensed milk and the cocoa powder until the powder is dissolved and well combined. Taste and adjust – if you like a stronger chocolate flavour, add more cocoa.
-
Remove about 1/4 cup of the crushed biscuits and set aside for the topping.
-
Add in the remaining crushed biscuits and mix well until well combined and a firm dough forms.
-
Refrigerate the mixture for 30 minutes so it can firm up and become easier to roll.
-
Roll about 1 tablespoon of mixture into balls. To avoid it sticking to your hands, dip your hand in a bit of water and spread around your palm, then roll the mixture.
-
Roll the balls in your chosen topping (crushed biscuits, shredded coconut, or any other topping).
-
Store in an airtight container in the fridge and enjoy!
Notes
- You can also use Marie biscuits. Digestive and Marie biscuits I find offer the best flavour and texture, but you can use any other plain tea biscuit brand as well, as long as they crush into fine crumbs.
- If you use unsweetened cacao powder, note that it will be slightly more bitter than cocoa powder, therefore you may need to adjust sweetness by adding in a bit of granulated sugar or slightly reducing the amount of cacao powder.
- You can freeze these as well! Arrange them on a parchment-lined plate and freeze until solid. Once frozen, place them in a Ziploc bag or airtight container to save space. Enjoy them frozen or thaw slightly before eating for a softer texture.