
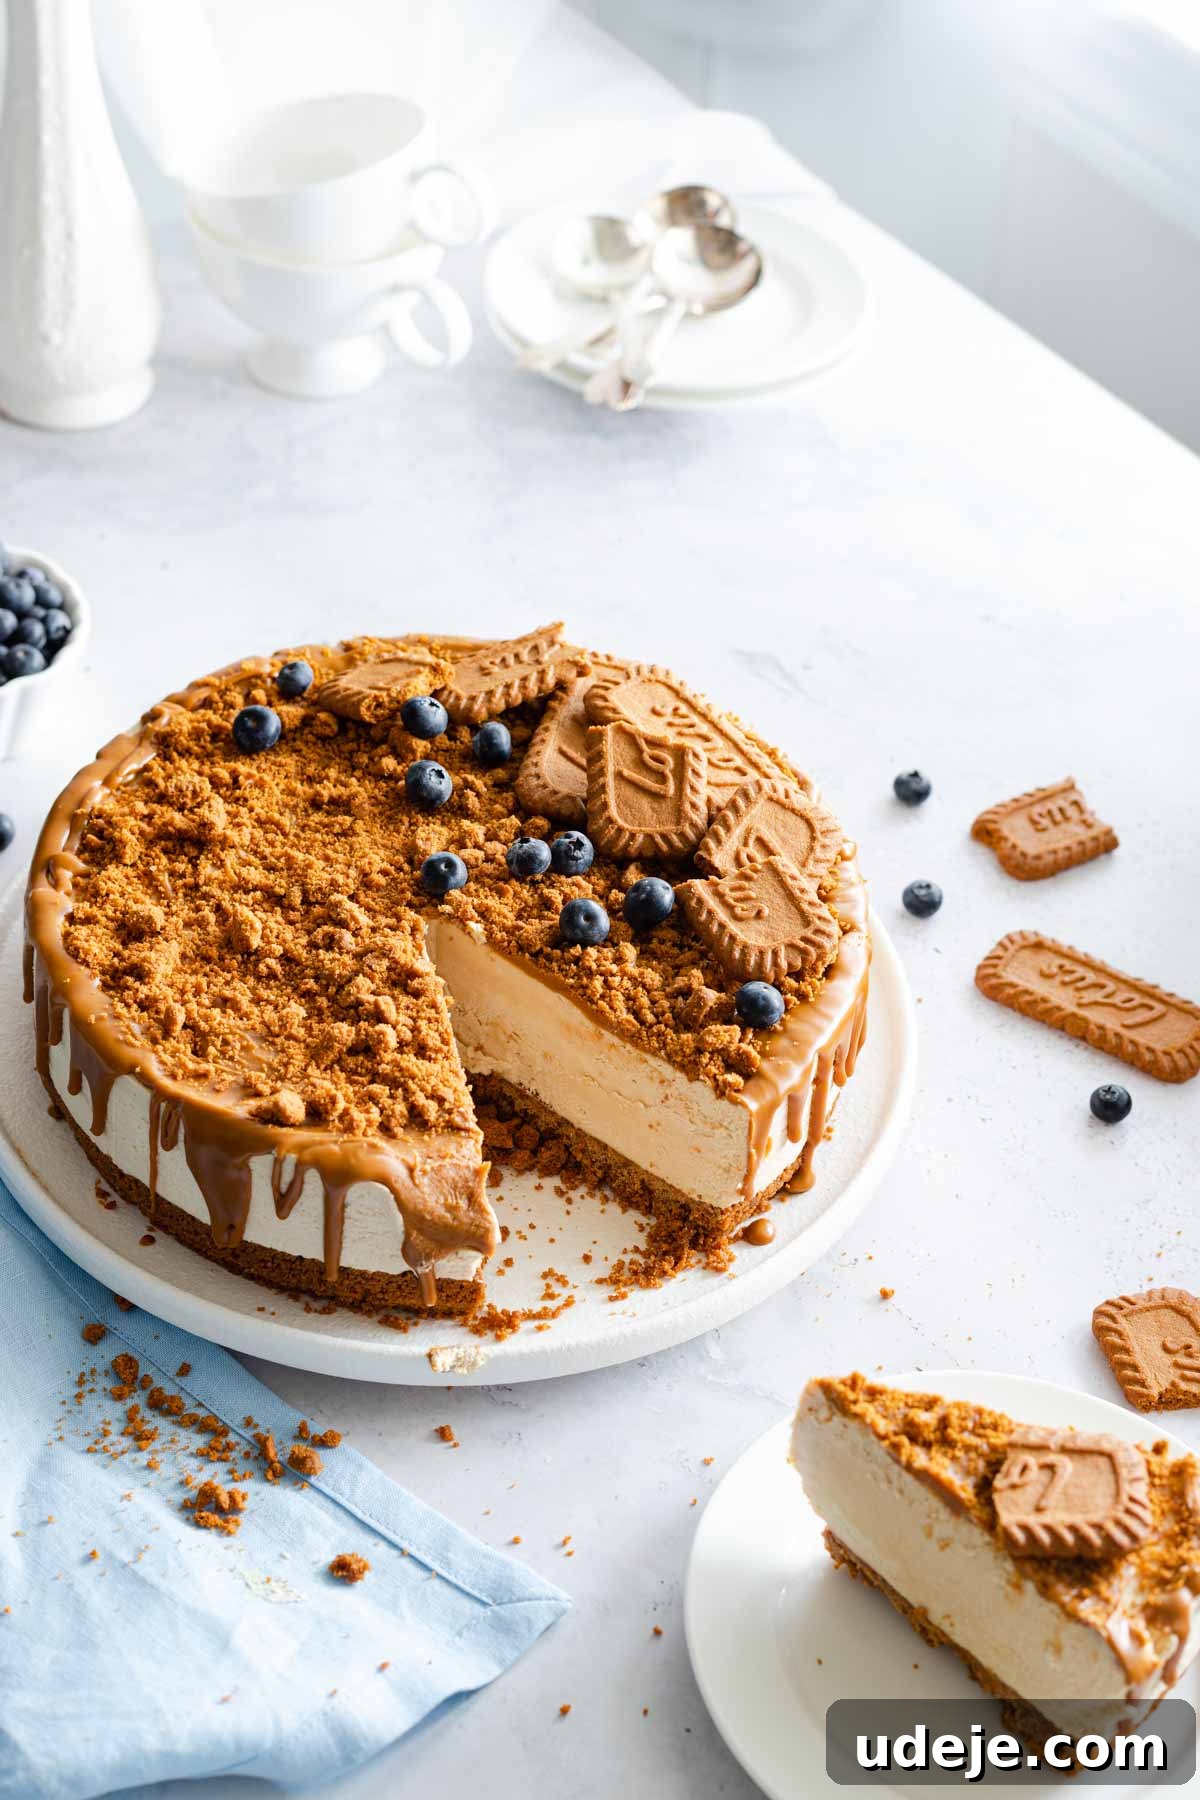
Effortless No-Bake Biscoff Cheesecake: Your Guide to a Speedy, Decadent Dessert
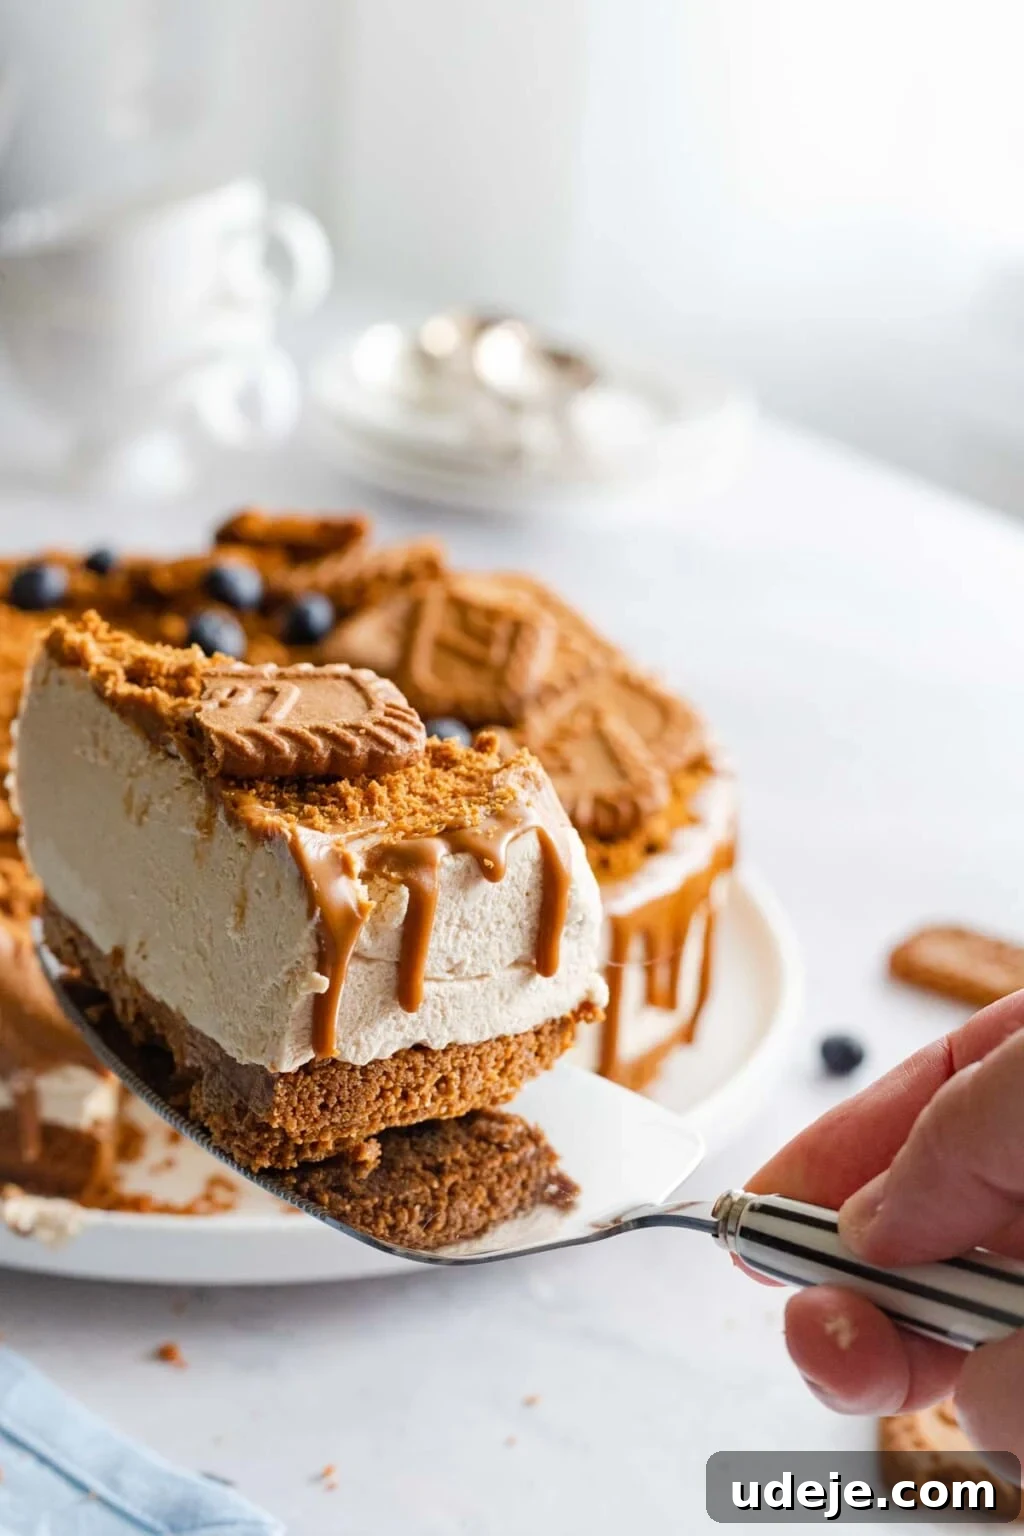
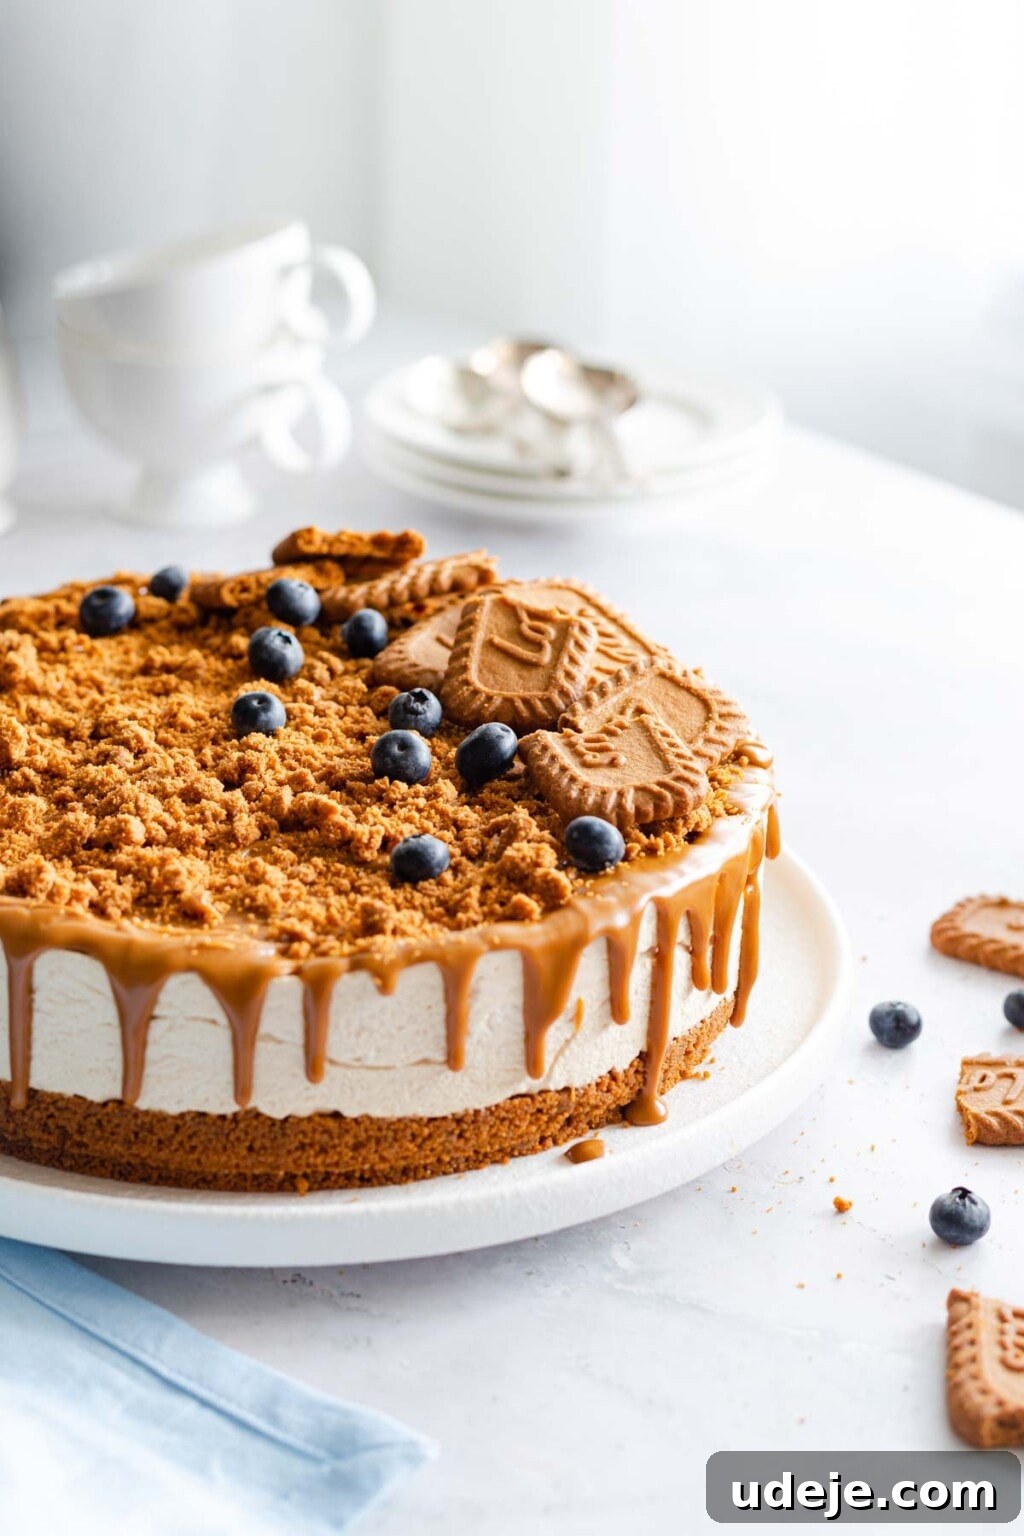
Craving a dessert that’s both stunningly impressive and incredibly easy to make? Look no further than this delightful no-bake Biscoff cheesecake. In just 20 minutes of active prep time, you can create a luxurious treat featuring a crunchy, buttery Biscoff cookie base, a lusciously creamy cheesecake layer infused with the signature flavor of Biscoff and a hint of espresso, all crowned with a smooth, glossy Biscoff spread topping and a sprinkle of more crunchy cookies. This recipe is a true showstopper, delivering maximum indulgence with minimal effort, making it perfect for any occasion, from casual gatherings to special celebrations.
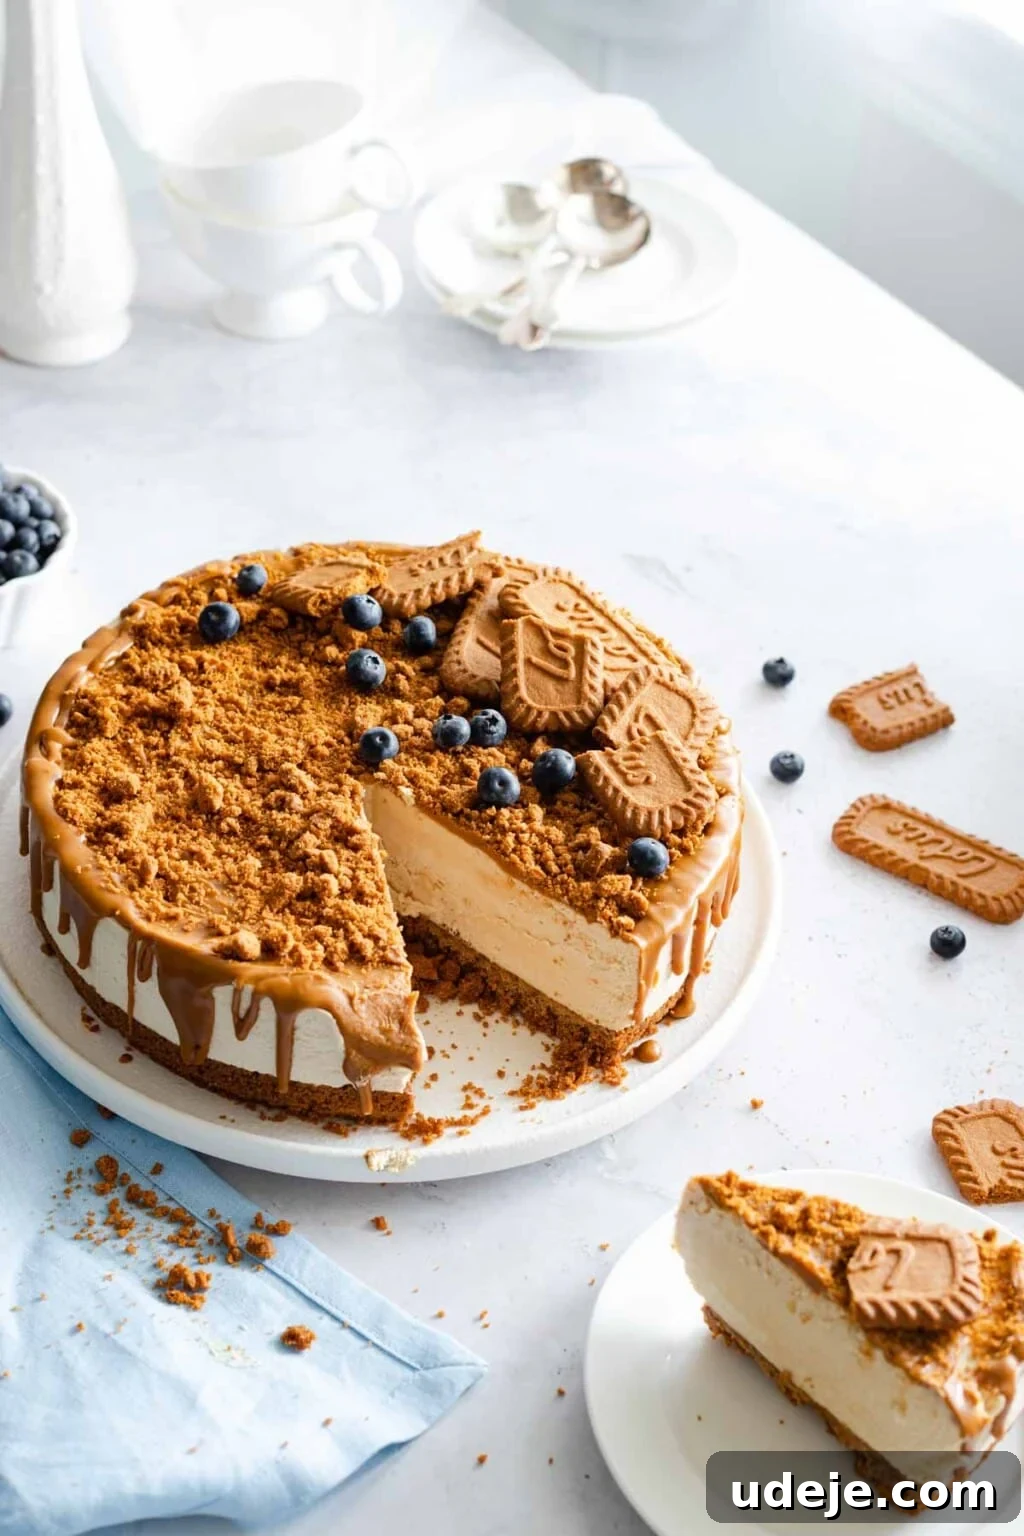
Why This No-Bake Biscoff Cheesecake is an Absolute Must-Try
This Biscoff cheesecake recipe isn’t just a dessert; it’s a revelation. The secret to its undeniable appeal lies in the star ingredients: the iconic Lotus Biscoff cookies and the velvety Biscoff spread. These caramelized biscuits and their spreadable counterpart are renowned for their uniquely addictive flavor profile, a warm blend of cinnamon and deep caramel that instantly transports you to a world of deliciousness. While they might sometimes be a treasure hunt in certain regions (don’t worry, online stores like Amazon often come to the rescue!), the effort to find them is always worthwhile for this extraordinary dessert.
What truly sets this recipe apart is its ingenious no-bake nature. Forget the stress of ovens, water baths, and cracked cheesecakes. This dessert relies purely on the magic of your refrigerator, transforming a handful of simple ingredients into a firm, creamy, and irresistible masterpiece. The process is incredibly straightforward: a quick blitz of cookies for the base, a swift mix for the rich filling, and a decadent topping – all culminating in a dessert that requires patience only for chilling, not for intricate baking techniques. It’s the ideal solution for busy hosts, beginner bakers, or anyone who desires an impressive dessert without the fuss. The combination of textures – the crisp cookie crust, the light-as-air yet dense cheesecake, and the smooth Biscoff topping – creates a sensory experience that is truly unforgettable.
Moreover, this Biscoff cheesecake offers a sophisticated flavor twist with the inclusion of espresso. While optional, the espresso doesn’t overpower the Biscoff; instead, it deepens the caramel notes, adding a subtle complexity and richness that elevates the entire dessert. It creates a harmonious balance, making each bite even more satisfying. If you’re a devoted Biscoff enthusiast always seeking new ways to enjoy its delightful taste, this cheesecake will quickly become your go-to recipe. And for those who can’t get enough, be sure to explore other Biscoff creations like these no-bake Biscoff truffles. If you lean towards classic digestive biscuits, you might also enjoy this lazy cake or these delightful biscuit balls – there’s a no-bake treat for every preference!
Key Ingredients for Your Decadent Biscoff Cheesecake
Crafting this phenomenal no-bake Biscoff cheesecake requires a selection of fresh, high-quality ingredients to ensure the best flavor and texture. Here’s a detailed look at what you’ll need:
- Lotus Biscoff Cookies: The foundation of our crust. These iconic caramelized biscuits provide a distinct flavor and a perfect crunchy texture. If you’re having trouble locating them in your local Canadian supermarkets, consider checking larger international food aisles or ordering them online.
- Lotus Biscoff Spread, Smooth: This velvety spread is essential for both the cheesecake filling and the glorious topping. While the smooth variety is recommended for its consistent texture, adventurous bakers might experiment with the crunchy version for added texture (though it hasn’t been personally tested in this recipe).
- Full-Fat Cream Cheese: Opt for full-fat cream cheese. Its higher fat content is crucial for achieving the rich, dense, and firm consistency characteristic of a superb no-bake cheesecake. Avoid low-fat versions, as they can result in a softer, less stable texture.
- Heavy Whipping Cream (36% fat): This provides the airy lightness and volume that balances the richness of the cream cheese and Biscoff spread. Ensure it’s very cold before whipping for optimal stiff peaks.
- Icing Sugar (Confectioners’ Sugar): Used to sweeten the cheesecake filling and help achieve a wonderfully smooth texture without any graininess.
- Espresso: A touch of espresso (1-2 shots) adds a sophisticated depth of flavor that beautifully complements the caramel notes of Biscoff. If you prefer to omit coffee, a teaspoon of vanilla extract can be a delightful substitute.
- Unsalted Butter, Melted: Binds the cookie crumbs together to form the sturdy and flavorful crust.
Step-by-Step Guide: Crafting Your No-Bake Biscoff Cheesecake
Making this impressive no-bake cheesecake is simpler than you might imagine. Follow these detailed steps to achieve a dessert that looks like it took hours but only required minutes of your attention.
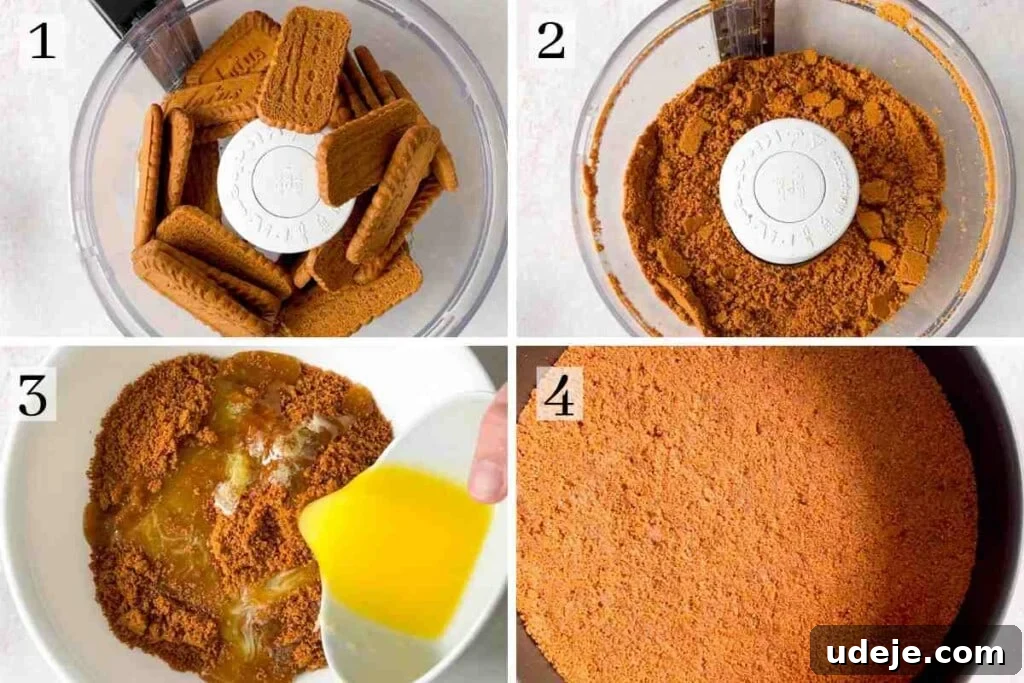
Preparing the Perfect Biscoff Cookie Crust
The crust is the delightful foundation of your cheesecake, offering a buttery crunch with every bite. The key is proper crushing and firm pressing.
- Crush the Cookies: Begin by taking your Lotus Biscoff cookies and processing them into a fine, sandy crumb. A food processor makes this task incredibly quick and efficient. If you don’t have one, don’t despair! You can achieve similar results by placing the cookies in a sturdy Ziploc bag and crushing them with a rolling pin or the bottom of a heavy pan until they reach a fine consistency.
- Combine with Butter: Once your crumbs are ready, melt the unsalted butter until it’s completely liquid. Pour the melted butter over the Biscoff crumbs and mix thoroughly. You want every crumb to be coated, resulting in a mixture that looks wet and holds together when squeezed. This ensures a firm crust.
- Press into Pan: Transfer the buttered crumbs into a 9-inch springform pan. Distribute them evenly across the bottom of the pan. To create a compact and stable crust, use the bottom of a flat-bottomed cup or a glass to press the crumbs down very firmly. This step is crucial for preventing a crumbly base when serving.
- Chill the Crust: Place the prepared crust into the freezer for 15-20 minutes while you prepare the creamy filling. This chilling period allows the butter to solidify, setting the crust and making it robust enough to hold the filling without softening.
Creating the Silky Smooth Biscoff Cheesecake Filling
The filling is where the magic truly happens, blending rich cream cheese with the distinctive Biscoff flavor and an ethereal lightness from whipped cream.
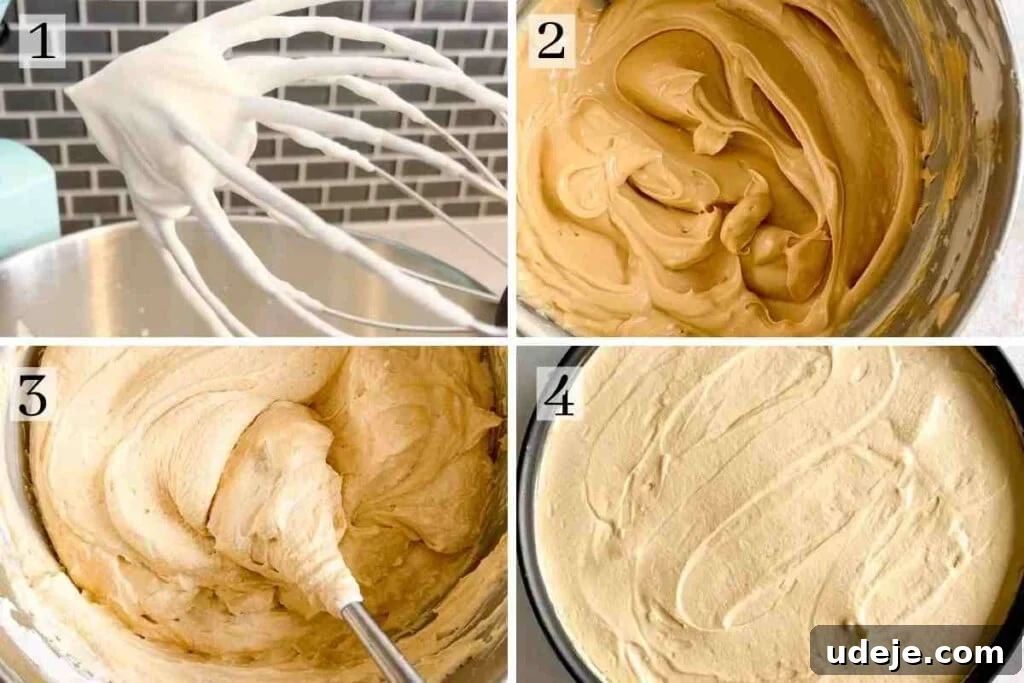
- Whip the Cream: For best results, ensure your heavy whipping cream is very cold. You can even chill your stand mixer bowl and whisk attachment in the freezer for about 5 minutes beforehand to help achieve stiffer peaks. Using a hand mixer or a stand mixer, whip the cold cream until it forms stiff peaks. This process usually takes around 1 minute. Be vigilant and avoid over-mixing, as whipping cream can quickly turn into butter if agitated for too long. Once whipped, gently transfer it to another bowl and set it aside.
- Prepare the Cream Cheese Mixture: In the same mixer bowl (no need to wash it!), combine the full-fat cream cheese, icing sugar, and espresso. Mix these ingredients until the mixture is completely smooth and free of any lumps.
- Incorporate Biscoff Spread: To ensure the Biscoff spread blends seamlessly, warm it slightly. Place the Biscoff spread in a microwave-safe bowl and heat it for about 40 seconds. This will loosen its consistency, making it much easier to incorporate into the cream cheese mixture without creating streaks. Add the warmed Biscoff spread to the cream cheese mixture and continue mixing until everything is thoroughly combined and boasts a uniform Biscoff-flavored creaminess.
- Fold in Whipped Cream: Now, gently fold the reserved whipped cream into the Biscoff-cream cheese mixture. The goal here is to maintain as much of the air and volume from the whipped cream as possible, so use a light hand and fold just until no white streaks of cream remain. Over-mixing at this stage can deflate the filling and compromise its airy texture.
- Chill to Perfection: Spread the exquisite Biscoff cheesecake filling evenly over your chilled cookie crust in the springform pan. Smooth out the surface with a spatula. Cover the pan tightly with plastic wrap and transfer it to the refrigerator. Allow it to chill for a minimum of 5-6 hours, or ideally, overnight, to ensure it sets perfectly. If you’re pressed for time, you can freeze it for 2-3 hours; just be sure to thaw it on the counter for 30-40 minutes before serving for optimal texture.
Adding the Signature Biscoff Topping and Garnish
The final touches elevate your cheesecake from delicious to truly stunning, adding another layer of Biscoff indulgence and visual appeal.
- Release from Pan: Once thoroughly chilled, gently remove the cheesecake from the springform pan. If you’re feeling adventurous and want a display-ready base, you can carefully slide a thin spatula underneath the crust to separate it from the pan’s base (this works exceptionally well if the cheesecake has been frozen briefly). If you prefer a simpler approach, leaving the crust on the base of the pan is perfectly acceptable and still looks fantastic on a serving plate.
- Prepare the Biscoff Topping: Melt the remaining Biscoff spread in the microwave for approximately 40 seconds, or until it’s completely smooth and pourable.
- Create the Drip Effect: For an elegant drip effect, transfer some of the melted Biscoff spread into a small Ziploc bag. Snip a tiny corner off the bag and carefully pipe the spread along the edge of the cheesecake, allowing it to drip attractively down the sides. Work quickly, as the spread will begin to set as it cools against the cold cheesecake.
- Smooth the Top: Pour the rest of the melted Biscoff spread onto the surface of the cheesecake and spread it out evenly with a spatula. Again, move swiftly to ensure a smooth, unblemished layer before it hardens.
- Final Chill and Garnish: Place the cheesecake back in the fridge for another 10-15 minutes to allow the Biscoff topping to set. Before serving, generously decorate the top with additional crushed Biscoff cookies. You can also add a few whole cookies or fresh berries for an extra touch of color and elegance. And there you have it – your magnificent, easy no-bake Biscoff cheesecake is ready to be devoured!
Expert Tips and Frequently Asked Questions (FAQs)
Frequently Asked Questions
- What flavor is Biscoff?
- Biscoff cookies are renowned for their distinctive deep caramel flavor, beautifully enhanced with subtle hints of cinnamon and other warming spices. They possess a delightful crispness, often described as being butterier than a standard digestive biscuit but slightly firmer than a shortbread cookie, offering a truly unique and addictive taste experience.
- What do you eat Lotus Biscoff with?
- Traditionally, Lotus Biscoff cookies are the perfect accompaniment to a cup of coffee or tea, their caramelized notes harmonizing wonderfully with hot beverages. However, their versatility extends far beyond that! This no-bake Biscoff cheesecake recipe is an exceptional way to utilize both the cookies and the spread in a fun, decadent, and incredibly delicious dessert. Biscoff spread can also be enjoyed on toast, stirred into oatmeal, or simply eaten by the spoonful for a quick treat!
- Will no-bake cheesecake firm up in the fridge?
- Absolutely, no-bake cheesecakes are designed to set beautifully in the refrigerator. The key is allowing sufficient chilling time. For a cheesecake that is perfectly firm and easy to slice, a minimum of 5-6 hours of refrigeration is required. For the most optimal results, especially if you desire impeccably clean slices, chilling it overnight is highly recommended. For an even firmer set, you can initially freeze the cheesecake overnight and then thaw it on the counter for 30-40 minutes before serving.
- Can I make this Biscoff cheesecake ahead of time?
- Yes, this no-bake Biscoff cheesecake is an excellent make-ahead dessert! It needs ample chilling time to set, so preparing it the day before you plan to serve it is ideal. The flavors also meld beautifully overnight, enhancing the overall taste.
- How long does no-bake Biscoff cheesecake last?
- When stored properly in an airtight container in the refrigerator, this cheesecake will remain fresh and delicious for up to 5 days. For longer storage, it can be frozen for up to a month. Thaw frozen cheesecake in the refrigerator overnight or on the counter for about an hour before serving.
Pro Tips for Biscoff Cheesecake Perfection
- Customize Your Crust: This recipe yields a cheesecake with a satisfyingly thick crust. If you prefer a thinner base, feel free to reduce the amount of Biscoff cookies used for the crust to your liking.
- Maximize Biscoff Flavor: This recipe ingeniously uses a full 400g jar of Biscoff spread – a generous portion that ensures the rich, caramelized flavor permeates both the creamy filling and forms a luscious topping.
- Espresso Alternative: The espresso in the filling adds a wonderful depth and complements the Biscoff beautifully. However, if you’re not a fan of coffee flavors, you can easily substitute it with 1 teaspoon of pure vanilla extract for a different, yet equally delicious, aromatic note.
- Storage Solutions: To keep your cheesecake fresh, store it covered in the refrigerator for up to 5 days. For longer enjoyment, slices or the whole cheesecake can be frozen for up to a month. Ensure it’s well-wrapped to prevent freezer burn.
- Conceal Imperfections: Don’t fret if your Biscoff topping doesn’t spread perfectly smoothly! The beauty of this cheesecake is that any minor imperfections can be effortlessly covered and disguised with a sprinkle of extra crushed Biscoff cookies. It’s the perfect, delicious solution!
- Serving Temperature: For the best texture and flavor, serve the cheesecake chilled directly from the refrigerator. If frozen, allow it to thaw partially at room temperature for about 30-40 minutes before slicing for easier cutting and a creamier consistency.
Other Easy Dessert Recipes You Will Love
★
★
★
★
★
★
★
★
★
★
★
★
★
★
★
☆
If you tried this recipe, please consider leaving a star ★★★★★ rating in the recipe card below and/or a review in the comments section further down the page – I’d love to hear from you! You can also hop on over to Instagram and say hello!
★
★
★
★
Biscoff Cheesecake (Easy, No Bake)
10
slices
20
mins
4
hrs
4
hrs
20
mins
Amina Al-Saigh
Leave a Review
Pin Recipe
Ingredients
For the crust
- 350 g Lotus/Biscoff biscuits, (approx 1.25x a package of 250g)
- 1/2 cup butter, melted
For the cheesecake layer
- 500 g cream cheese, full fat
- 300 ml whipping cream, (36% fat)
- 3/4 cup icing sugar, or confectionary sugar
- 1/2 cup espresso, 1-2 shots
- 1 cup biscoff spread, smooth, (approx. 250g)
For the topping
- 6-8 crushed lotus cookies
- 3/4 cups biscoff spread, smooth, remaining 150g of the jar
Equipment
-
Food Processor
-
Stand Mixer
-
Fridge/Freezer
Instructions
For the crust
-
In a food processor, blitz the cookies for the base until you get a fine crumb. If you don’t have a food processor, you can crush them inside a plastic bag using a rolling pin.
-
Melt the butter and mix it into the cookie crumbs until they’re coated well and look wet. Press firmly into a 9-inch springform pan. Use the bottom of a cup to ensure it’s packed in well and forms a solid base.
-
Place the prepared crust in the freezer for 10-15 minutes while you prepare the filling. This helps to set the crust and prevents it from crumbling.
For the cheesecake layer
-
Ensure your heavy whipping cream is very cold right before whipping. For even better results, you can place your stand mixer bowl and whisk attachment in the freezer for 5 minutes to chill them.
-
Whip the cream in a stand mixer (or using a hand mixer) until you achieve stiff peaks. This should take approximately 1 minute. Be careful not to over-whip it, or it will turn into butter, so keep a close eye!
-
Remove the whipped cream from the stand mixer bowl and set aside. In the same bowl (no need to clean), add the full-fat cream cheese, icing sugar, and espresso. Mix together using the paddle attachment until the mixture is completely smooth and well combined.
-
Place the Biscoff spread in a microwave-safe bowl and heat for 40 seconds to loosen its consistency. This helps it to incorporate into the cream cheese mixture more efficiently and smoothly.
-
Add the warmed Biscoff spread to the cream cheese mixture and continue mixing until the cheesecake layer is well combined and uniformly flavored.
-
Gently fold the whipped cream into the Biscoff cheesecake mixture. Use a spatula and fold carefully to avoid losing the air from the whipped cream, which is essential for the cheesecake’s light texture.
-
Spread the cheesecake mixture evenly over the chilled biscuit crust in the springform pan. Cover with plastic wrap and refrigerate for 5-6 hours (or overnight) for a firm set. Alternatively, for quicker setting, freeze for 2-3 hours.
To serve
-
Once fully chilled, carefully remove the cheesecake from the springform pan. If desired, you can use a thin spatula to gently separate it from the base of the pan (this method works particularly well if the cheesecake has been briefly frozen for an extra firm set). If you prefer, leaving it on the base to serve is perfectly fine!
-
Melt the remaining Biscoff spread in the microwave for approximately 40 seconds until it is completely smooth and pourable.
-
For a beautiful drip effect, transfer some of the melted Biscoff spread into a small Ziploc bag and snip off a tiny corner. Drip the spread along the edges of the cheesecake, working quickly before it sets. Then, pour the remaining melted Biscoff spread onto the surface and spread it out into an even, glossy layer. Again, work swiftly, as the cold cheesecake will cause the spread to harden. Place the cheesecake back in the fridge for 10-15 minutes to allow the topping to set.
-
Finally, decorate your stunning cheesecake with additional crushed Biscoff biscuits. Slice and enjoy this incredible no-bake dessert!
Notes
- I prefer cheesecake with a thicker crust, so if you don’t, feel free to use less cookies for the base. Adjust according to your preference!
- This recipe ingeniously uses a full 400g jar of Biscoff spread, with a portion going into the creamy filling and the rest serving as the luscious topping for maximum flavor.
- I add espresso to subtly complement and deepen the caramel notes of Biscoff. If you’re not a fan of coffee flavor, you can easily replace it with 1 teaspoon of pure vanilla extract for a classic touch.
- Keep the cheesecake refrigerated in an airtight container for up to 5 days, or freeze it for up to a month for longer enjoyment.
- If you find it challenging to achieve a perfectly smooth layer of Biscoff on top of the cheesecake, don’t worry! Simply cover up any imperfections with a generous sprinkle of crushed Biscoff cookies – it’s the perfect, delicious solution and adds extra texture.
Serving:
1
g
,
Calories:
678
kcal
,
Carbohydrates:
54
g
,
Protein:
9
g
,
Fat:
48
g
,
Saturated Fat:
21
g
,
Cholesterol:
97
mg
,
Sodium:
189
mg
,
Potassium:
526
mg
,
Sugar:
25
g
,
Vitamin A:
1132
IU
,
Vitamin C:
1
mg
,
Calcium:
99
mg
,
Iron:
1
mg
Did you make this recipe?
Please leave a star rating and review below!