
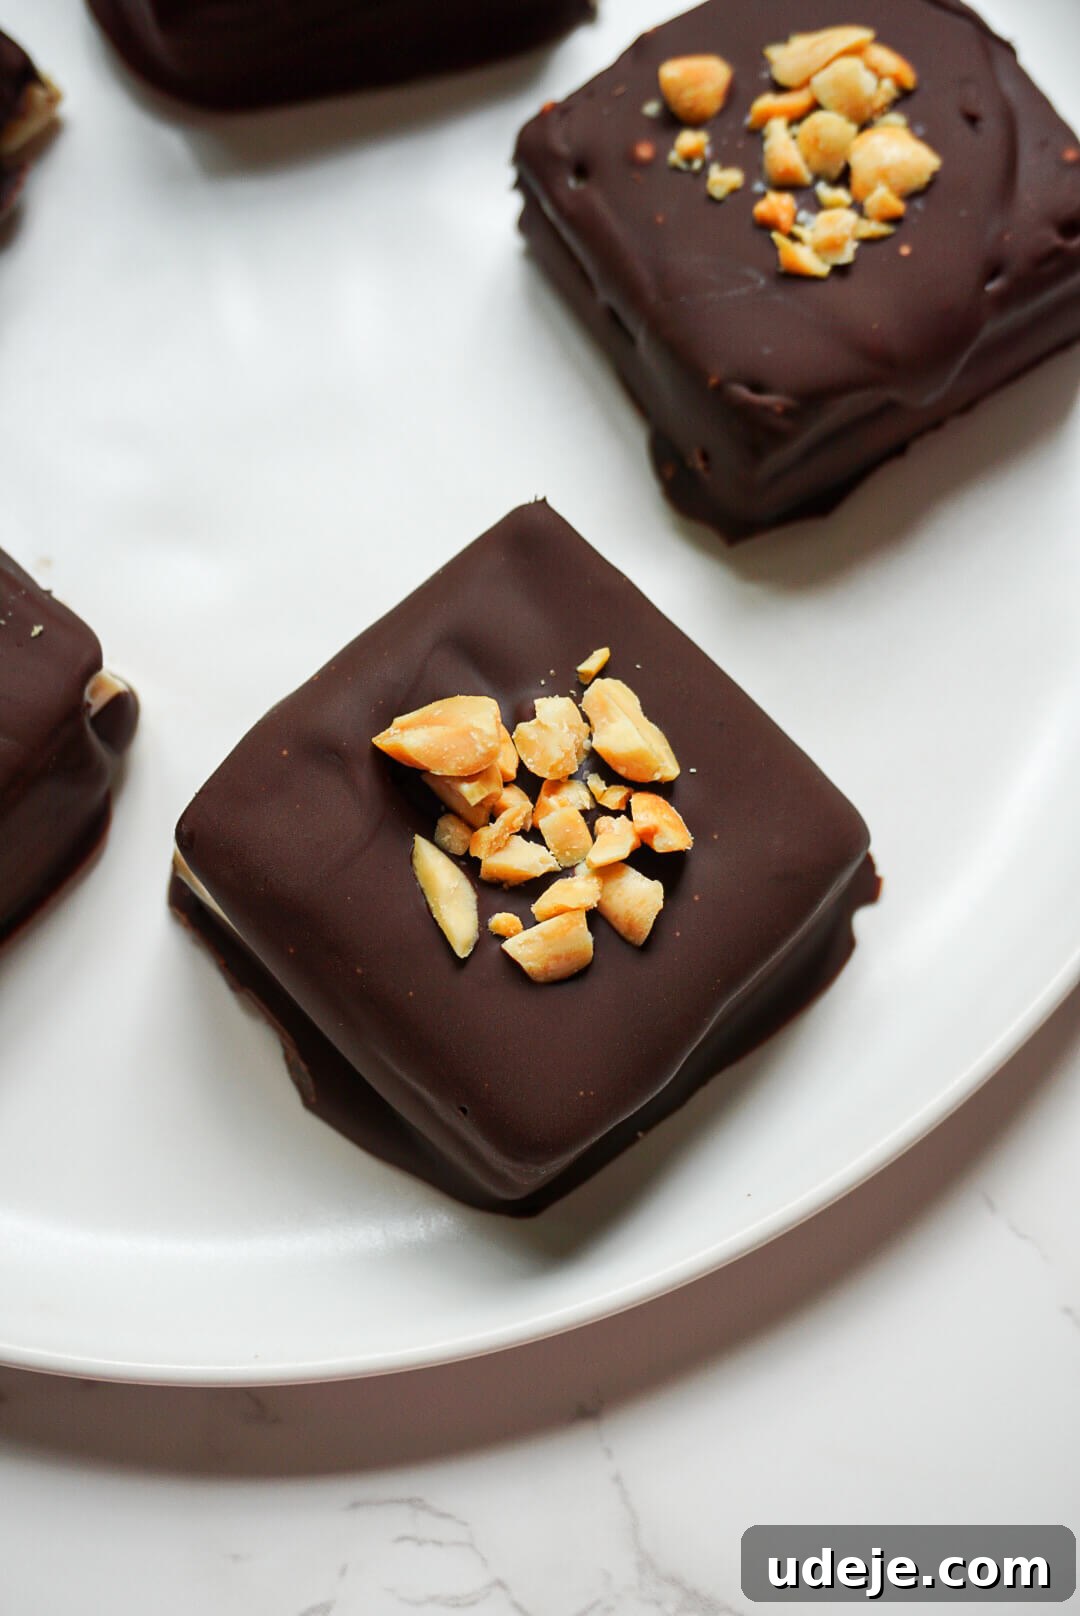
There’s a special kind of nostalgia that comes with classic summer treats, and for many, Klondike bars hold a cherished spot in those memories. The satisfying crack of a rich chocolate shell giving way to a creamy, cool vanilla ice cream interior was a pure delight, even if it often led to delightfully messy fingers and faces. While those childhood days of carefree indulgence were wonderful, our palates and dietary preferences evolve. What if you could recapture that beloved experience, but with a healthier, plant-based twist and an irresistible flavor upgrade?
Enter these homemade Vegan Klondike Bars with a Peanut Butter Twist. Imagine everything you loved about the original – the crisp chocolate, the smooth ice cream – but transformed into a better-for-you dessert that’s completely dairy-free, gluten-free, and free from refined sugars. Plus, we’ve infused them with the rich, nutty goodness of peanut butter, taking this nostalgic treat to a whole new level of deliciousness. This recipe isn’t just about making a vegan alternative; it’s about crafting an elevated dessert that’s both wholesome and incredibly satisfying.
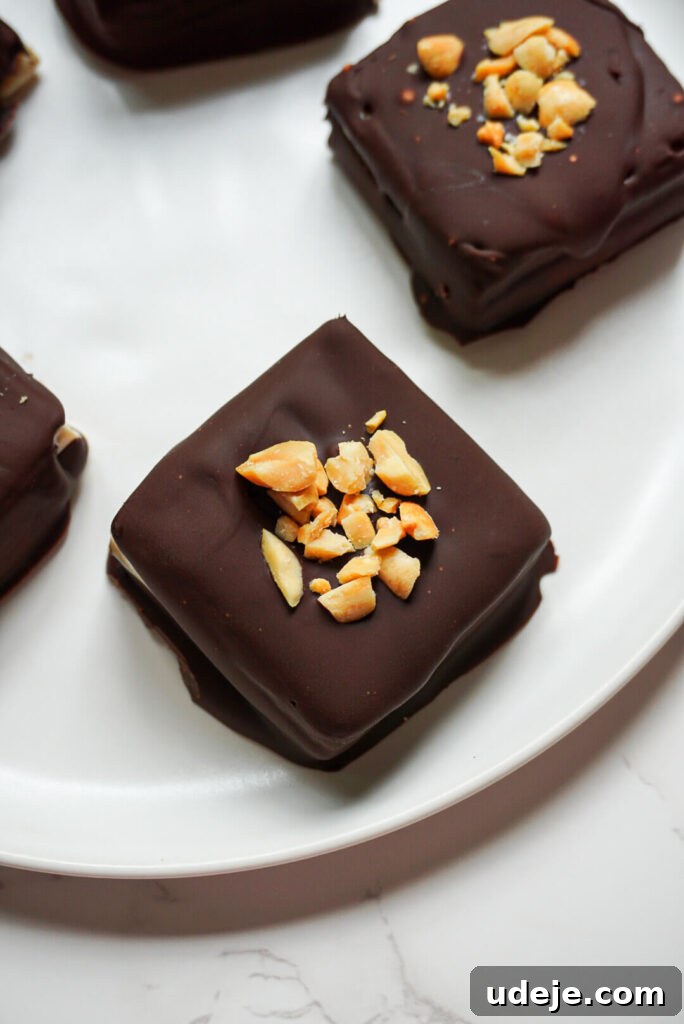
Making these healthier Vegan Klondike Bars is surprisingly straightforward. The secret to their perfect shape and easy preparation often lies in using the right molds, which make the process incredibly clean and efficient. These copycat Klondike bars feature a luscious, creamy peanut butter ice cream base, generously dipped in a hard, snappy chocolate shell, and finished with a scattering of chopped peanuts for an extra crunch. They are not only a delicious indulgence but also proudly vegan, gluten-free, refined sugar-free, and utterly satisfying. Get ready to impress your taste buds and share a guilt-free treat that evokes joyful memories.
Why You’ll Love These Homemade Vegan Klondike Bars
Beyond the sheer deliciousness, there are many compelling reasons to fall in love with these homemade Vegan Klondike Bars:
- Healthier Indulgence: By using natural sweeteners like maple syrup and wholesome fats from coconut cream and peanut butter, you get all the flavor without the refined sugars and artificial ingredients often found in store-bought treats.
- Dietary Friendly: These bars are a dream come true for those with dietary restrictions. They are 100% vegan (dairy-free), gluten-free, and egg-free, making them suitable for a wide range of eaters.
- Customizable: While the peanut butter twist is phenomenal, this recipe offers a fantastic base for experimentation. Easily swap nut butters, add different extracts, or experiment with various toppings to create your unique flavor combinations.
- Simple to Make: Don’t let the gourmet look fool you. With a blender and some freezer time, these bars come together with minimal effort, making them a perfect weekend project or a quick treat prep.
- Nostalgic Comfort: Recreate the joy of your favorite childhood ice cream bar but with the added satisfaction of knowing exactly what goes into it – all good stuff!
- Cost-Effective: Making desserts at home is often more budget-friendly than buying specialty vegan treats, especially when you can buy ingredients in bulk.
The Irresistible Peanut Butter Twist
While traditional Klondike bars feature vanilla ice cream, the addition of peanut butter in this vegan version is an absolute game-changer. Peanut butter brings a depth of flavor, a rich creaminess, and a wonderfully nutty aroma that pairs exquisitely with chocolate. It transforms the ice cream base into something truly special, offering a more complex and satisfying taste profile. We recommend using a natural, unsweetened creamy peanut butter for the best results, as it provides pure peanut flavor without any added oils or sugars that could alter the texture or sweetness of your ice cream. If you prefer a little texture, a natural crunchy peanut butter could also work, adding delightful pockets of peanut pieces within the creamy center.
Essential Ingredients for Your Vegan Klondike Bars
Crafting these delectable Peanut Butter Vegan Klondike Bars requires a few key ingredients, each playing a vital role in achieving that perfect taste and texture:
- Coconut Cream: This is the superstar ingredient for achieving a rich, thick, and creamy ice cream base without any dairy. For best results, chill a can of full-fat coconut milk in the refrigerator overnight. The thick, solidified cream will separate and rise to the top. Carefully scoop out only this thick cream, leaving the watery liquid behind. Alternatively, you can purchase cans of pure coconut cream, often found at specialty stores like Trader Joe’s or larger supermarkets like Target. Important: Do NOT confuse coconut cream with “cream of coconut,” which is a sweetened product typically used for cocktails. The good news for those wary of coconut flavor is that the robust peanut butter in this recipe beautifully masks any prominent coconut taste, leaving only a hint of tropical richness.
- Non-Dairy Milk: Any plain, unsweetened non-dairy milk will work perfectly here. Options like soy milk, almond milk, or oat milk are all excellent choices. Soy milk tends to be slightly creamier, contributing to an even richer texture, but feel free to use your preferred plant-based milk.
- Maple Syrup: To sweeten these bars naturally and keep them refined sugar-free, maple syrup is the ideal choice. Its subtle caramel notes complement the peanut butter and chocolate beautifully. You can adjust the amount to your taste, or experiment with other liquid natural sweeteners like agave nectar if preferred.
- Peanut Butter: The star of our twist! Use a good quality, natural creamy peanut butter with minimal ingredients (just peanuts and salt is ideal). This ensures a pure, rich peanut flavor and a smooth consistency that blends seamlessly into the ice cream base. Avoid brands with added sugars or hydrogenated oils, as they can affect the final texture and nutritional profile.
- Vanilla Extract: A touch of pure vanilla extract enhances all the other flavors, adding a warm, aromatic depth to the ice cream base.
- Vegan Chocolate Chips: What’s a Klondike bar without that iconic chocolate shell? Opt for your favorite brand of vegan chocolate chips or a high-quality vegan chocolate bar chopped into pieces. Dark chocolate often contains fewer or no dairy ingredients, but always double-check labels to ensure it’s certified vegan.
- Coconut Oil: While optional, a small amount of refined coconut oil is highly recommended for the chocolate coating. It helps to thin the melted chocolate, making it smoother and easier to dip the ice cream bars. More importantly, it helps the chocolate harden into that desirable snappy shell when it comes into contact with the cold ice cream. Make sure to use refined coconut oil if you want to avoid any coconut flavor in your chocolate shell.
- Chopped Peanuts (Optional Garnish): For an extra layer of texture and peanut flavor, a sprinkle of chopped peanuts on top of the freshly dipped bars is a fantastic addition. This also adds a beautiful visual appeal.
Step-by-Step Guide: Crafting Your Perfect Vegan Klondike Bars
Making these delightful homemade ice cream bars is incredibly simple. Follow these easy steps for a rewarding treat:
-
Step 1: Prepare the Ice Cream Base. In a high-speed blender, combine the thick coconut cream, non-dairy milk, maple syrup, peanut butter, and vanilla extract. Blend on high until the mixture is completely smooth and creamy. Ensure there are no lumps and the peanut butter is fully incorporated. Scrape down the sides of the blender as needed to achieve a uniform consistency.
-
Step 2: Freeze the Mixture. Carefully pour the blended ice cream mixture into your silicone molds. Fill each mold evenly, leaving a small space at the top if your molds have specific fill lines. Transfer the molds to the freezer and chill for a minimum of 4-6 hours, or ideally overnight, until the ice cream bars are completely solid and firm. This is crucial for easy dipping.
-
Step 3: Prepare the Chocolate Coating. Line a baking tray with parchment paper or a silicone mat and set it aside. In a microwave-safe bowl, combine the vegan chocolate chips and coconut oil (if using). Microwave in 30-second intervals, stirring well after each, until the chocolate is completely melted and smooth. Alternatively, you can melt the chocolate using a double boiler method over simmering water. The coconut oil helps create a thinner, snappier shell.
-
Step 4: Dip the Ice Cream Bars. Once the ice cream bars are frozen solid, carefully pop them out of their silicone molds. Working quickly, dip each bar entirely into the melted chocolate. Allow any excess chocolate to drip off for a few seconds before placing the dipped bar onto the prepared baking tray. Yes, it might get a little messy, but that’s part of the fun of homemade treats – and totally worth it!
-
Step 5: Garnish and Harden. If desired, immediately sprinkle the freshly dipped bars with chopped peanuts or other toppings before the chocolate sets. Place the baking tray with the dipped bars back into the freezer. Freeze for at least another 15-30 minutes, or until the chocolate coating is completely firm and snappy. Once hardened, your homemade Vegan Klondike Bars are ready to be devoured!
Pro Tips for the Best Vegan Klondike Bars
Achieve perfection with your homemade Klondike bars every time with these helpful tips:
- Use the Right Molds: Silicone molds designed for ice cream bars or popsicles are a game-changer. They make it incredibly easy to remove the frozen bars without breaking them. You can find excellent options on Amazon, such as these silicone molds.
- Chill Your Coconut Milk: For optimal coconut cream separation, place your full-fat coconut milk can in the refrigerator upside down overnight. This helps the cream solidify at what will become the bottom, making it easier to scoop out the thick cream and leave the watery liquid behind.
- Don’t Overfill Molds: Leave a little space at the top of your molds. As the liquid freezes, it expands slightly, and you want to ensure your bars have a clean, flat top.
- Ensure Bars are Fully Frozen: This is crucial for a smooth dipping process. If the ice cream bars aren’t rock solid, they might melt too quickly when they hit the warm chocolate, leading to a messier and uneven coating.
- Chocolate Temperature Matters: Ensure your melted chocolate isn’t too hot, as it could melt the ice cream instantly. It should be warm enough to be liquid and pourable, but not steaming. A good test is to dip a spoon – it should coat it smoothly.
- Work Quickly While Dipping: The colder your ice cream bar, the faster the chocolate will set. Dip swiftly and evenly, then allow excess chocolate to drip off before placing on parchment paper.
- Storage: Store your finished Vegan Klondike Bars in an airtight container in the freezer. They will keep well for up to 2-3 weeks, though they are usually devoured much sooner!
Exciting Flavor Variations & Customizations
Once you master the basic recipe, the possibilities for customizing your homemade ice cream bars are endless! Get creative and make them uniquely yours:
- Nut Butter Alternatives: Not a peanut butter fan, or have an allergy? Swap it out for almond butter, cashew butter, or even sunflower seed butter for a nut-free option. Each will lend a slightly different, but equally delicious, flavor profile.
- Chocolate Dream: For chocolate lovers, add a tablespoon or two of unsweetened cocoa powder to the ice cream base mixture before blending. This will give you a rich chocolate peanut butter ice cream center.
- Minty Fresh: Add a few drops of peppermint extract to the ice cream base for a refreshing mint-chocolate experience.
- Coffee Kick: Incorporate a teaspoon of instant espresso powder or a shot of strong, cooled espresso into the base for a delightful coffee-flavored bar.
- Berry Swirl: Gently swirl in a tablespoon of berry jam or purée (like raspberry or strawberry) into the molds before freezing for a fruity surprise.
- Crushed Cookie Delight: Mix in crushed vegan cookies (like Oreos) into the ice cream base before freezing, or sprinkle them on the chocolate coating for a cookies-and-cream vibe.
- Deluxe Toppings: Beyond chopped peanuts, consider other toppings such as flaky sea salt (excellent with chocolate and peanut butter!), shredded coconut, sprinkles, or even a drizzle of vegan caramel sauce for extra decadence.
Embrace the Joy of Guilt-Free Indulgence
Whether you’re nostalgic for a classic summer treat or simply craving a delicious, healthier dessert, these Vegan Peanut Butter Klondike Bars are sure to hit the spot. That satisfying snap of chocolate, followed by the melt-in-your-mouth creamy peanut butter ice cream, truly makes every bite a moment of pure bliss. And the best part? You don’t have to feel guilty about indulging! Made with wholesome ingredients, they offer a delightful way to satisfy your sweet tooth while sticking to your healthy eating goals.
Perfect for a scorching summer afternoon, a cozy winter evening, or anytime you need a little pick-me-up, these homemade Klondike bars are versatile and always a crowd-pleaser. They’re a testament to how delicious and satisfying healthier, plant-based desserts can be. So go ahead, get a little messy, and savor every moment of this incredible treat!
Frequently Asked Questions (FAQ)
- Can I use full-fat coconut milk instead of coconut cream? While technically possible, using only the thick, solidified cream from a chilled can of full-fat coconut milk will yield the creamiest and firmest ice cream base. If you use the entire can of full-fat milk (liquid and solid), your bars might be a bit icier and less rich.
- How long do these Vegan Klondike Bars last in the freezer? When stored in an airtight container, these bars can last in the freezer for up to 2-3 weeks. For the best taste and texture, try to consume them within the first week.
- Do I need special silicone molds? While silicone molds are highly recommended for their ease of use in releasing the bars, you can improvise. Small loaf pans lined with parchment paper, or even ice cube trays (for mini bars) could work, though demolding might be a bit trickier.
- Can I make these nut-free? Yes! Simply replace peanut butter with a seed butter like sunflower seed butter (SunButter). Ensure all other ingredients, especially chocolate chips, are certified nut-free if severe allergies are a concern.
- Why did my chocolate coating crack? Chocolate cracking can happen if the ice cream bar is too cold or if the chocolate itself is too thick. Adding a bit of coconut oil helps thin the chocolate, and ensuring your bars are solid but not overly frozen (e.g., just out of a deep freezer after months) can help minimize cracking. Rapid temperature change is often the culprit.
More Delicious Vegan & Gluten-Free Treats You’ll Love
If you enjoyed these healthier homemade Klondike bars, you’ll surely love these other delightful recipes, all of which are vegan, gluten-free, and refined sugar-free:
- 5-Ingredient Healthy Fudgesicles: Simple, rich, and incredibly satisfying, these fudgesicles are a quick and easy way to curb your chocolate cravings.
- Vegan Chocolate Peanut Butter Yogurt Cups: A perfect blend of creamy yogurt, rich chocolate, and nutty peanut butter in a convenient, portion-controlled treat.
- Peanut Butter Date Energy Balls: Fuel your day with these wholesome, chewy, and naturally sweet energy bites, packed with protein and fiber.
- No Bake Chocolate Turtle Cookies: Indulge in the classic flavors of caramel, pecans, and chocolate in a simple, no-bake cookie format.
- No Bake Vegan Snickers Cups: Recreate the beloved candy bar in a healthier, vegan cup with layers of nougat, caramel, peanuts, and chocolate.
- Samoas Date Bark: A unique take on the popular cookie, featuring dates, coconut, and chocolate in an easy-to-make bark.
- Easy Chocolate Date Bark: A quick and customizable dessert made with dates and chocolate, perfect for a sweet treat anytime.
Vegan Peanut Butter Klondike Bars

Megan
9
klondike bars
20 minutes
6 hours
6 hours
20 minutes
Pin Recipe
Ingredients
- 1 cup non-dairy milk
- ½ cup coconut cream, solid part from the top of a can of full-fat coconut milk, refrigerated
- ⅓ cup natural peanut butter
- ¼ cup maple syrup
- 1 teaspoon vanilla extract
- 2 cups vegan chocolate chips
- 1 tablespoon refined coconut oil, (optional, for melting chocolate)
- ¼ cup chopped peanuts, (optional, for garnish)
Instructions
-
In a blender, combine the coconut cream, non-dairy milk, maple syrup, peanut butter, and vanilla extract. Blend until completely smooth.
-
Pour the mixture into silicone molds and place in the freezer for 4-6 hours until solid, or overnight.
-
Line a baking tray with parchment paper. Melt the vegan chocolate chips and coconut oil (if using) in the microwave in 30-second intervals, stirring in between, until smooth.
-
Pop the frozen ice cream bars out of the molds. Dip each bar completely into the melted chocolate, allowing excess to drip off. Place onto the prepared baking tray.
-
Garnish with chopped peanuts, if desired, before the chocolate sets. Place back in the freezer for another 15-30 minutes until the chocolate hardens completely. Then, enjoy!
Equipment
Notes
- Coconut Cream Tip: For the best results, refrigerate a can of full-fat coconut milk overnight (or buy pure coconut cream) and only use the thick, solid cream that separates at the top. Avoid the watery liquid.
- Molds: These silicone ice cream bar molds are highly recommended for easy de-molding.
- Peanut Butter: Use natural, unsweetened creamy peanut butter for the smoothest texture and purest flavor.
Did you make this recipe?
Tag @booboosbakeryy with hashtag #booboosbakery on Instagram. We love to see what you make!