Word Gridlines: Turning Them On, Spacing Them Out and Working Around the Limits
Word's gridlines are easy to switch on but fiddly to tune. Here's how to show only horizontal lines, set ruling gaps and work around the missing color option.
Word's gridlines are a visual aid for lining up pictures, shapes and text boxes, and they're easy to switch on. Finding the controls that shape them is another matter. The on/off toggle sits on the View tab, while the settings that matter live in a separate dialog that's easy to miss. Once you know where they are, you can strip the grid down to horizontal rules, adjust the spacing and get close to a lined-paper look. You still can't recolor the lines, and that's the part that frustrates most people.
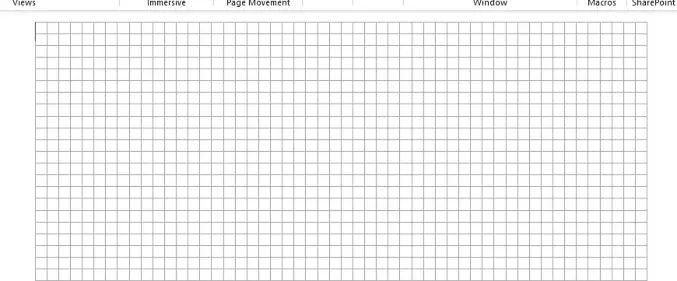
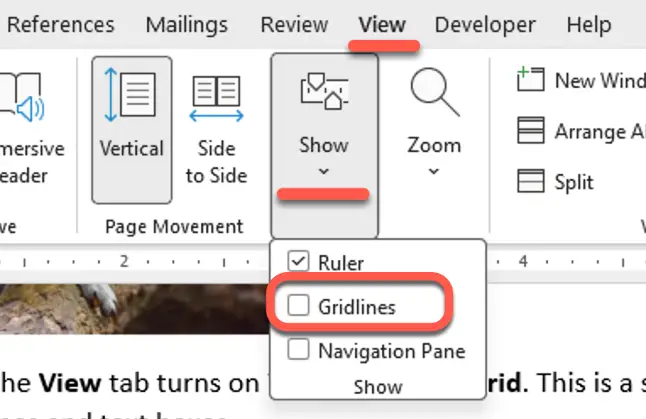
Start with the basics. The Gridlines checkbox on the View tab turns on Word's drawing grid. The lines are purely on-screen. They won't print, and switching them on or off doesn't change the document itself, so it's safe to experiment.
Showing only horizontal lines
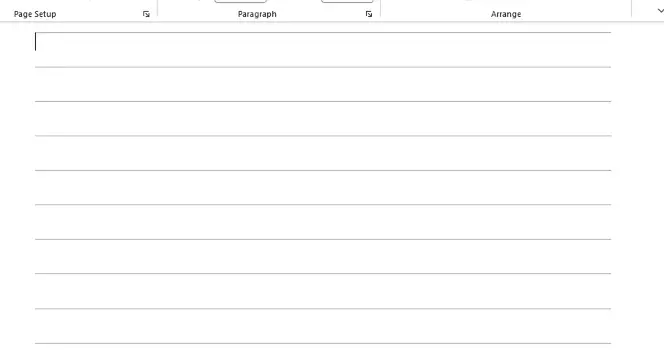
The default grid is dense, with vertical and horizontal lines packed closely together. For most jobs you only want the horizontal ones, and that's controlled from the grid dialog. Clear the Vertical every checkbox and the vertical lines disappear, leaving only horizontal rules. The number beside that box sets how many grid intervals sit between visible vertical lines.
Word for Windows
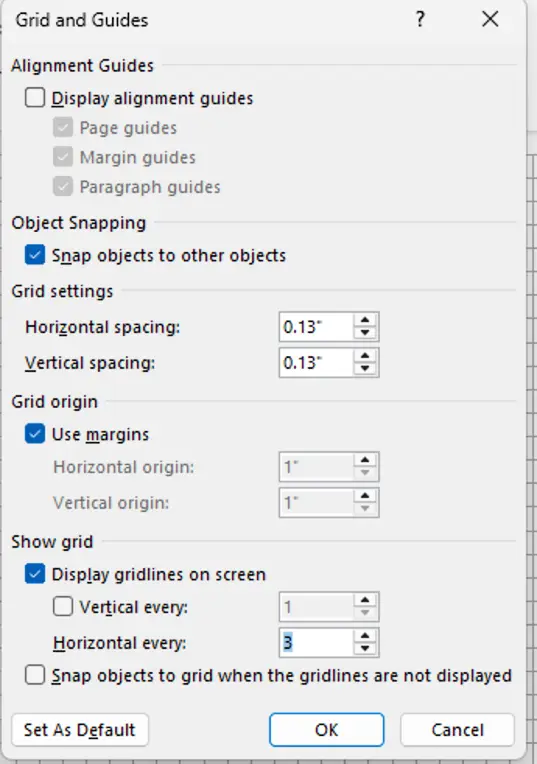
Go to the Layout tab, open Align in the Arrange group, and choose Grid Settings. The same Align button appears on the Shape Format and Picture Format tabs when an object is selected, so you can reach the dialog from there too.
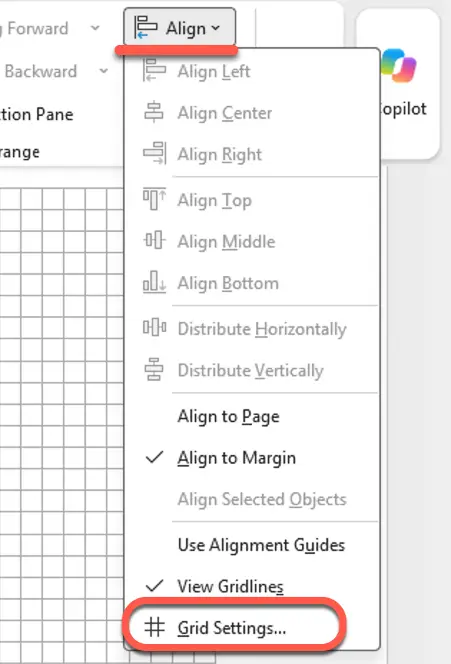
Under Show grid, tick Display gridlines on screen, then clear Vertical every. Leave Horizontal every at 1 to see every horizontal line, or set it to 2 or 3 to show every second or third line.
Word for Mac
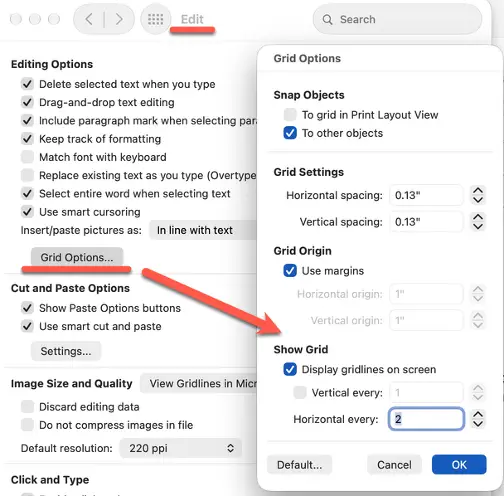
Open the Word menu, choose Preferences, select Edit, then click Grid Options. Under Show grid, tick Display gridlines on screen and clear Vertical every. After that, the Gridlines box on the View tab handles on and off.
Setting the gap between lines
The Vertical spacing value in Grid Settings controls the distance between the horizontal lines. It's a confusing name, but reading it as "the vertical distance between lines" makes it clearer. If you want a lined-paper feel, two values come close to real ruling:
- 0.28″ approximates college ruled (9/32 inch)
- 0.34″ approximates wide ruled (11/32 inch)
Grid settings are stored with the current document. If you want them in new documents as well, click Set As Default and confirm.
Watch out for snapping, though. With the grid visible, pictures and shapes tend to jump to the nearest line as you drag them. To place something freely, hold Alt while dragging on Windows, or Command on a Mac.
The missing color option
Word has no setting for gridline color, on Windows or Mac. Borders on tables, paragraphs, pages and text boxes can take a color, but the grid itself is fixed in gray. It's a notable gap, and it's one Excel doesn't share. Excel lets you choose a gridline color per worksheet under File, Options, Advanced. Word never got an equivalent, and macros won't help, because the grid settings only control whether the grid shows and how it's spaced.
Rule Lines as an alternative
If all you need is a lined page, Rule Lines are the quicker route. On the Draw tab, choose Format Background and pick Rule Lines or Grid Lines. This is a Windows-only feature, since Word for Mac doesn't support it. The Draw tab also doesn't appear in Word 2016; it shows up in newer versions such as Microsoft 365, Office 2021 and Office 2024.
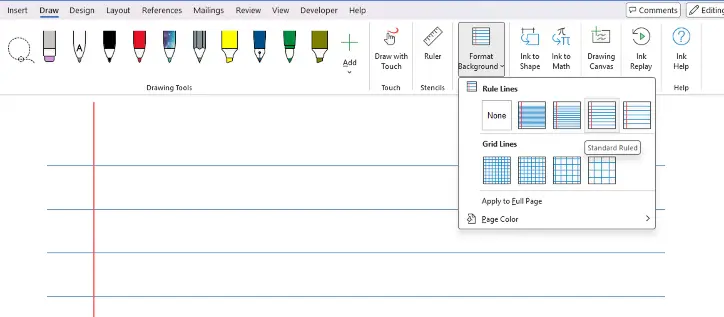
Rule lines are horizontal only, and like the grid they don't print. So they suit a quick on-screen layout, not a document that needs printed guides.
Colored or printable lines
When faint gray won't do, there are two workarounds that print and accept any color. Both take a bit of setup.
Paragraph borders. Enter around 30 empty paragraphs, select them, and open Home | Borders | Borders and Shading. Choose a color and width, then apply the bottom border and the between-paragraphs border from the Preview. You end up with ruled lines in your chosen color.
A borders-only table. Insert a one-column table with as many rows as you need. On Table Design, set the border color, then apply only the Inside Horizontal and Bottom borders. Use Layout | Height to fix the row height exactly.
Table gridlines are a separate feature
Don't mix up the document grid with table gridlines. Tables have their own feature that shows dashed lines around cells without borders. You toggle it with the View Gridlines button on the Table Layout tab, and it has no effect on the document grid on the View tab.
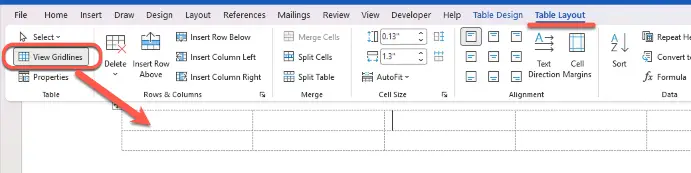
Table gridlines share the same limitation: they're always gray. If you need colored lines inside a table, apply real borders, knowing they'll appear in the printed document.
Do you need the grid at all?
Gridlines have been in Word for a long time, but they've largely been supplemented by alignment tools. Two are worth knowing about, and both live in the same Grid Settings dialog.
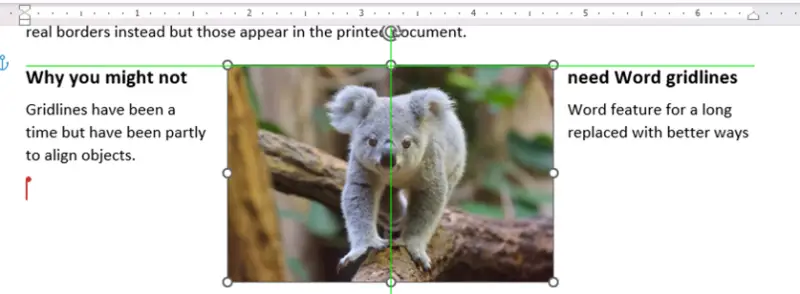
Alignment Guides are a Windows-only feature. As you drag an object, green guide lines appear when it lines up with the top of a paragraph or a margin horizontally, or with the left, center or right edge vertically. Page, margin and paragraph guides are controlled via Align, then Grid Settings, then Alignment Guides.
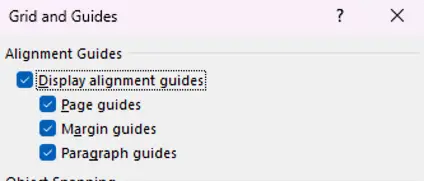
Snap objects to other objects works like a magnet. When you drag an object close to the edge or alignment point of another, Word nudges it into line. Snap objects to grid when the gridlines are not displayed pulls objects toward intersections of an underlying grid, even when you can't see it.
For most layout jobs, my read is that guides and snapping will get you further than the visible grid. Keep the grid on when you need precise rules for a lined-page look, and turn it off when you just need objects to sit neatly relative to each other.


