
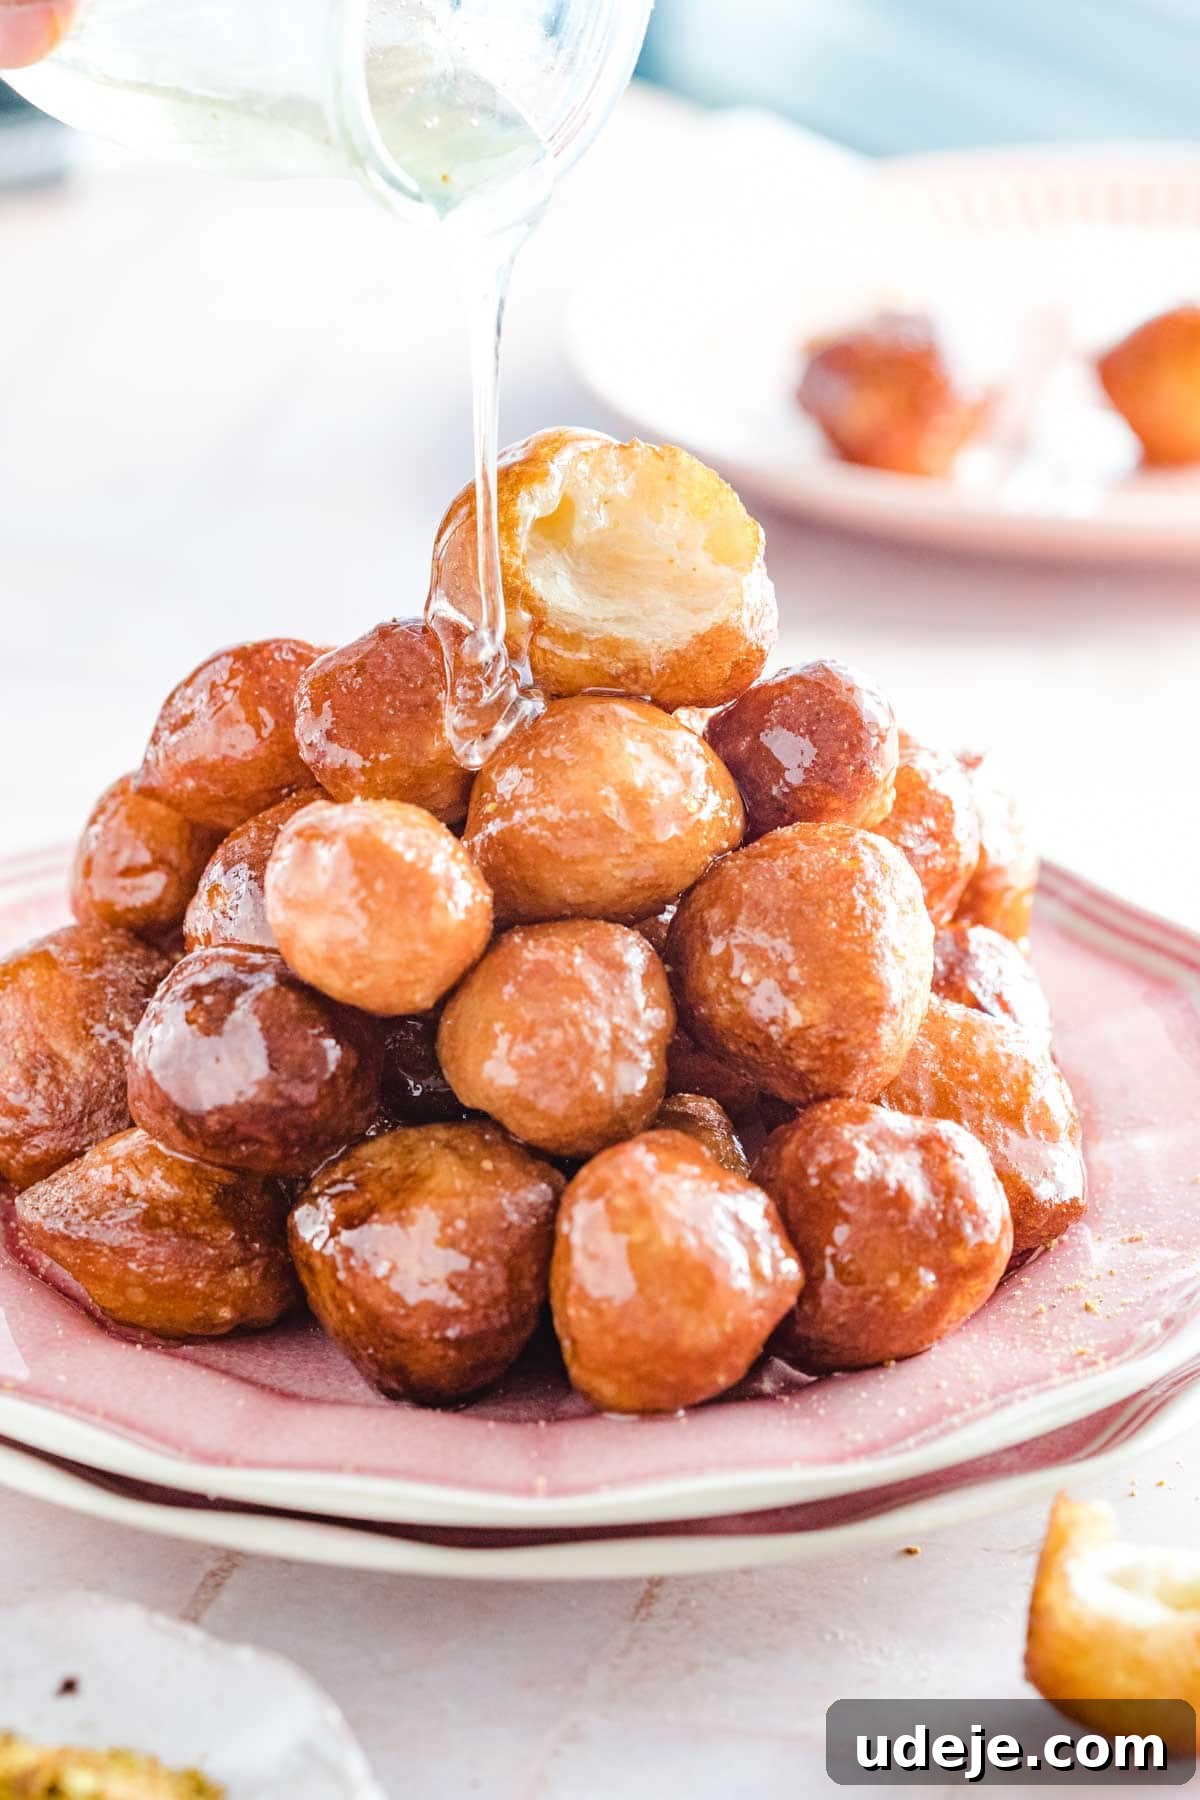
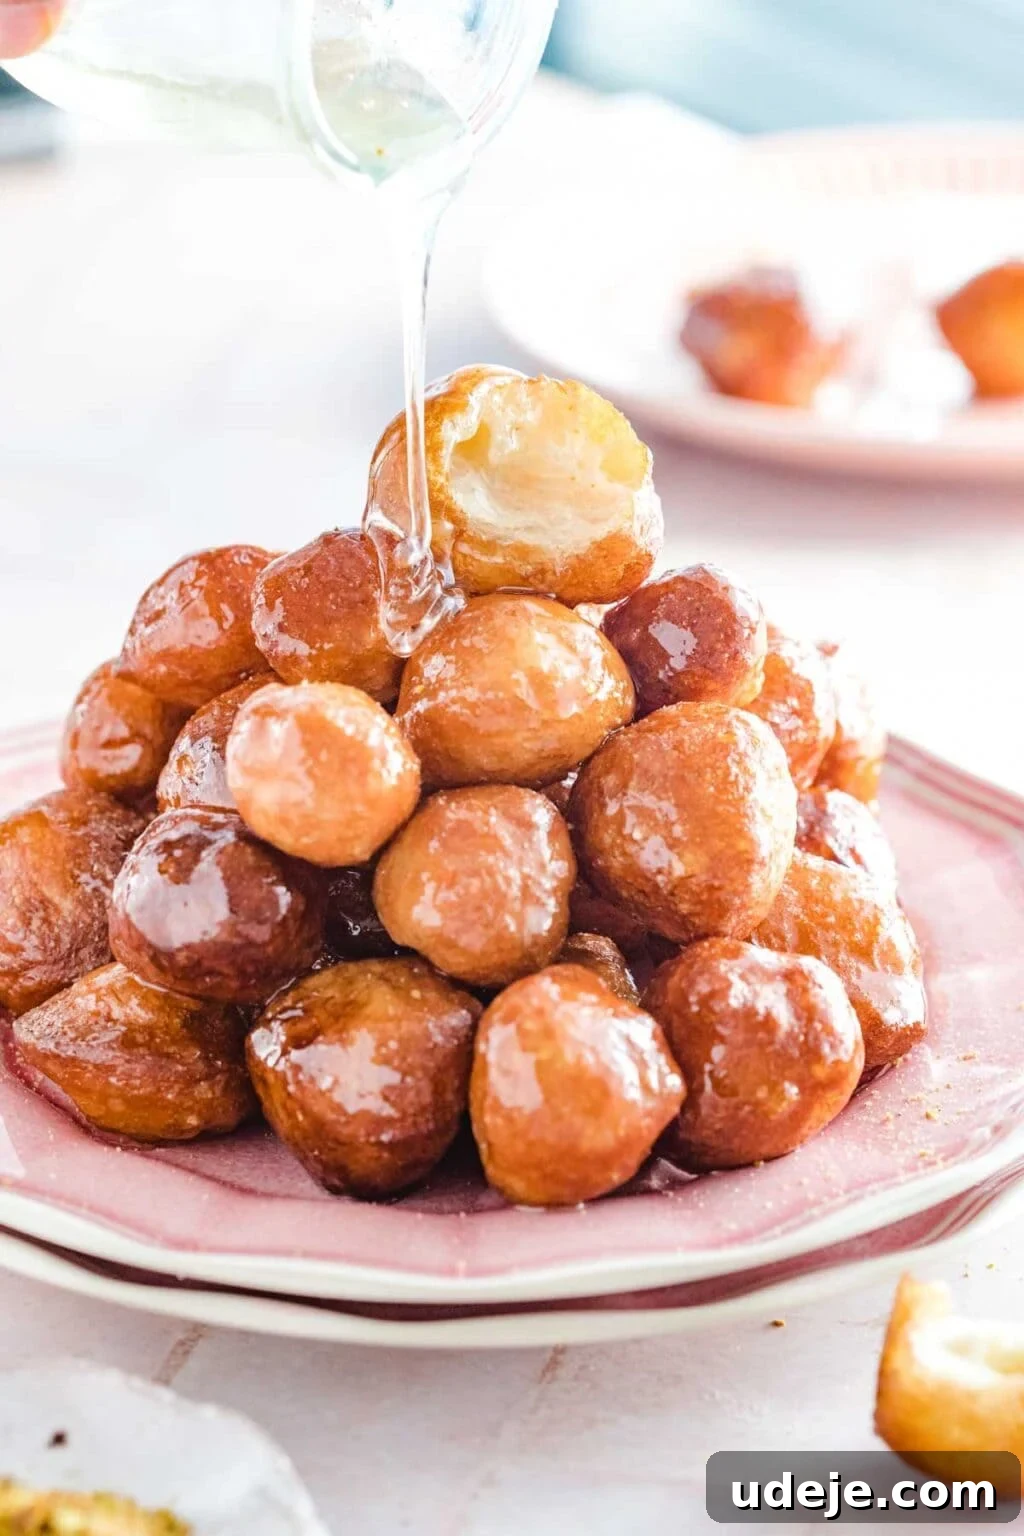
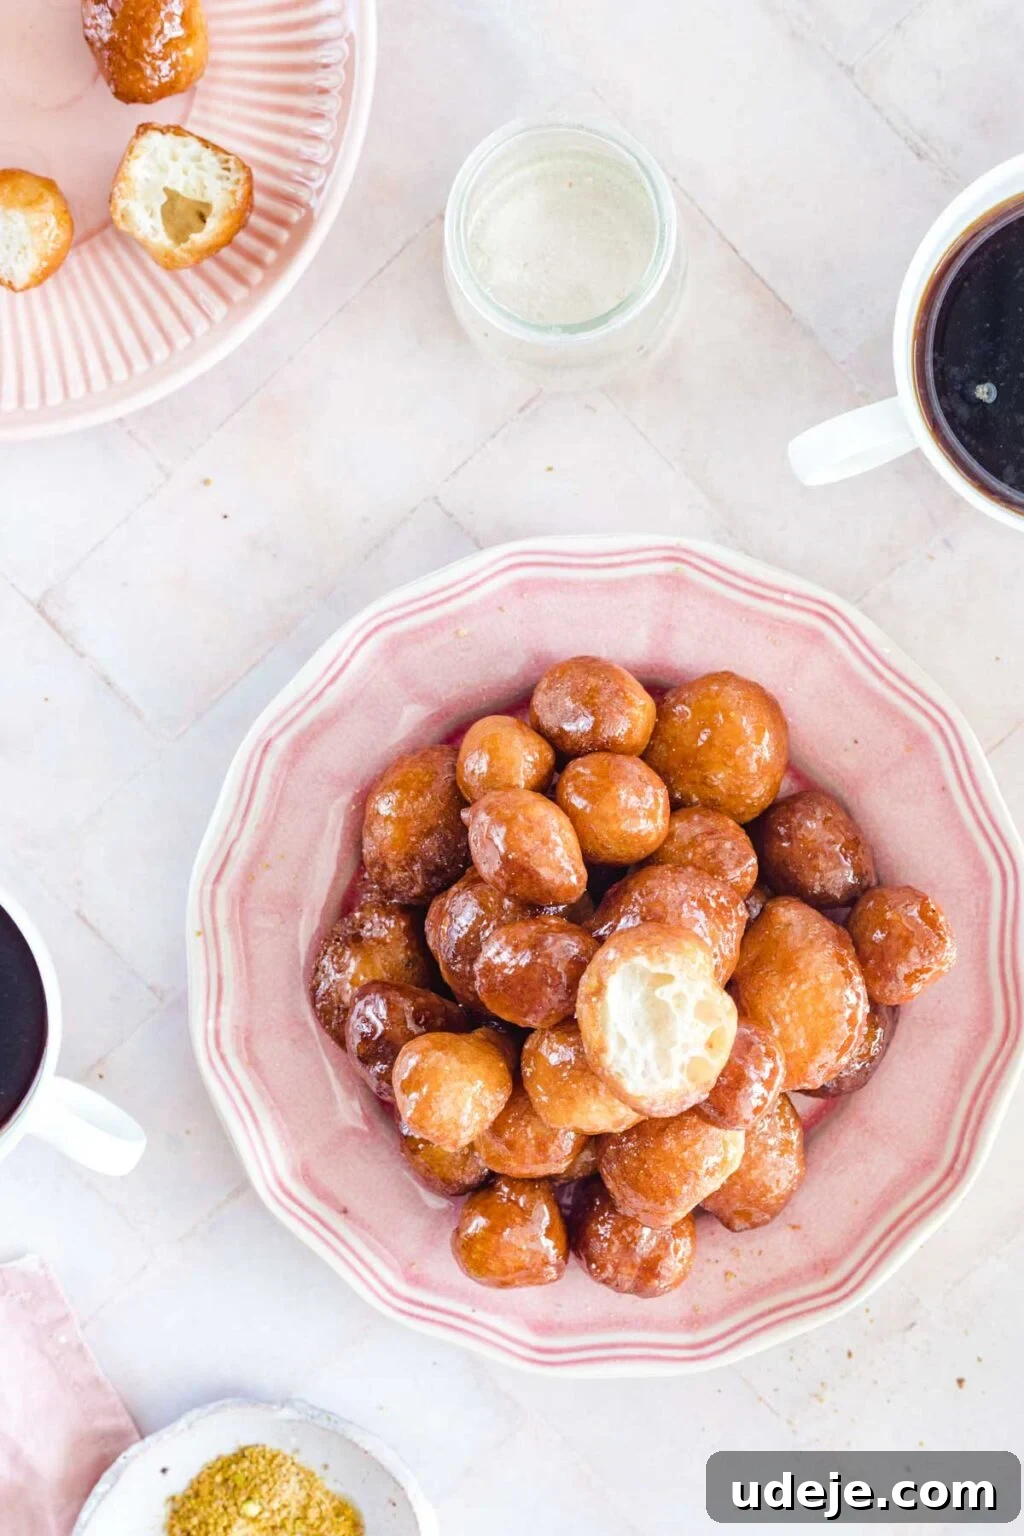
Step into the delightful world of Middle Eastern desserts with Luqaimat, also known as Awamat or Lokmat El Qadi. These irresistible fried dough fritters are a true culinary gem, cherished across the region and beyond. Imagine a perfectly golden sphere, incredibly crunchy on the outside, yielding to a light, airy, and wonderfully soft interior, all generously drenched in a sweet, aromatic simple syrup. It’s a symphony of textures and flavors that is utterly addictive and surprisingly simple to master in your own kitchen. This comprehensive guide will walk you through every step, from crafting the ideal dough to achieving that signature double-fried crispness, ensuring your homemade Luqaimat are nothing short of perfection.
5-STAR REVIEW
“I was super intimidated to make these but once I got to it, the instructions and the video tutorial were so well explained that it made me breeze through it! Everyone loved it and I’m getting ready to make it again for a family gathering”
—Safa
Unveiling Luqaimat: A Taste of Middle Eastern Tradition
There’s something uniquely charming about translating Arabic recipe names, and “Luqaimat” is no exception! It elegantly translates to “bites,” perfectly describing these small, pop-able parcels of joy. You might also hear them referred to as “Lokmat el Qadi,” meaning “Judge’s Bite,” hinting at their ancient origins and esteemed place in culinary history. Another common name is “Awamat,” which translates to “floaters,” a vivid depiction of how they gracefully bob and sizzle in hot oil during frying. Regardless of what you call them, these sweet dough balls are a universally loved deep-fried delicacy, best enjoyed fresh, warm, and coated in fragrant syrup.
My personal journey with these treats began with calling them Awamat, and the nostalgia they evoke is immense. Luqaimat aren’t just a dessert; they’re a celebration. They embody the warmth of Middle Eastern hospitality and are a staple during significant holidays like Ramadan and Eid, though their deliciousness is savored throughout the year. They stand proudly among the “big leagues” of Middle Eastern sweets, alongside iconic delights such as Kunafa, Baklava, Qatayef, Turkish Delight, and Warbat, each offering a unique taste of the region’s rich culinary heritage.
Be warned: these Luqaimat are incredibly addictive. Seriously. There’s a reason I don’t make them too often – resisting them is nearly impossible! During recipe testing, I found myself almost devouring an entire batch single-handedly. Despite being deep-fried, a well-made Luqaimat is surprisingly light, and the secret lies in achieving a truly airy and soft dough. This is a stark contrast to many store-bought versions, which often turn out dense, overly saturated with syrup, and lack that quintessential satisfying crunch. The explosion of syrup without the crisp exterior can be quite disappointing.
This is precisely why I embarked on the journey to perfect this recipe. My goal was to develop a Luqaimat that boasts an unparalleled crisp exterior while maintaining a wonderfully light and fluffy interior. The absolute game-changer, the secret weapon for achieving this dream texture, is a technique called double-frying. Trust me, it makes all the difference, transforming these simple dough balls into an extraordinary indulgence. You’ll never go back to single-fried!
Essential Ingredients for Perfect Luqaimat
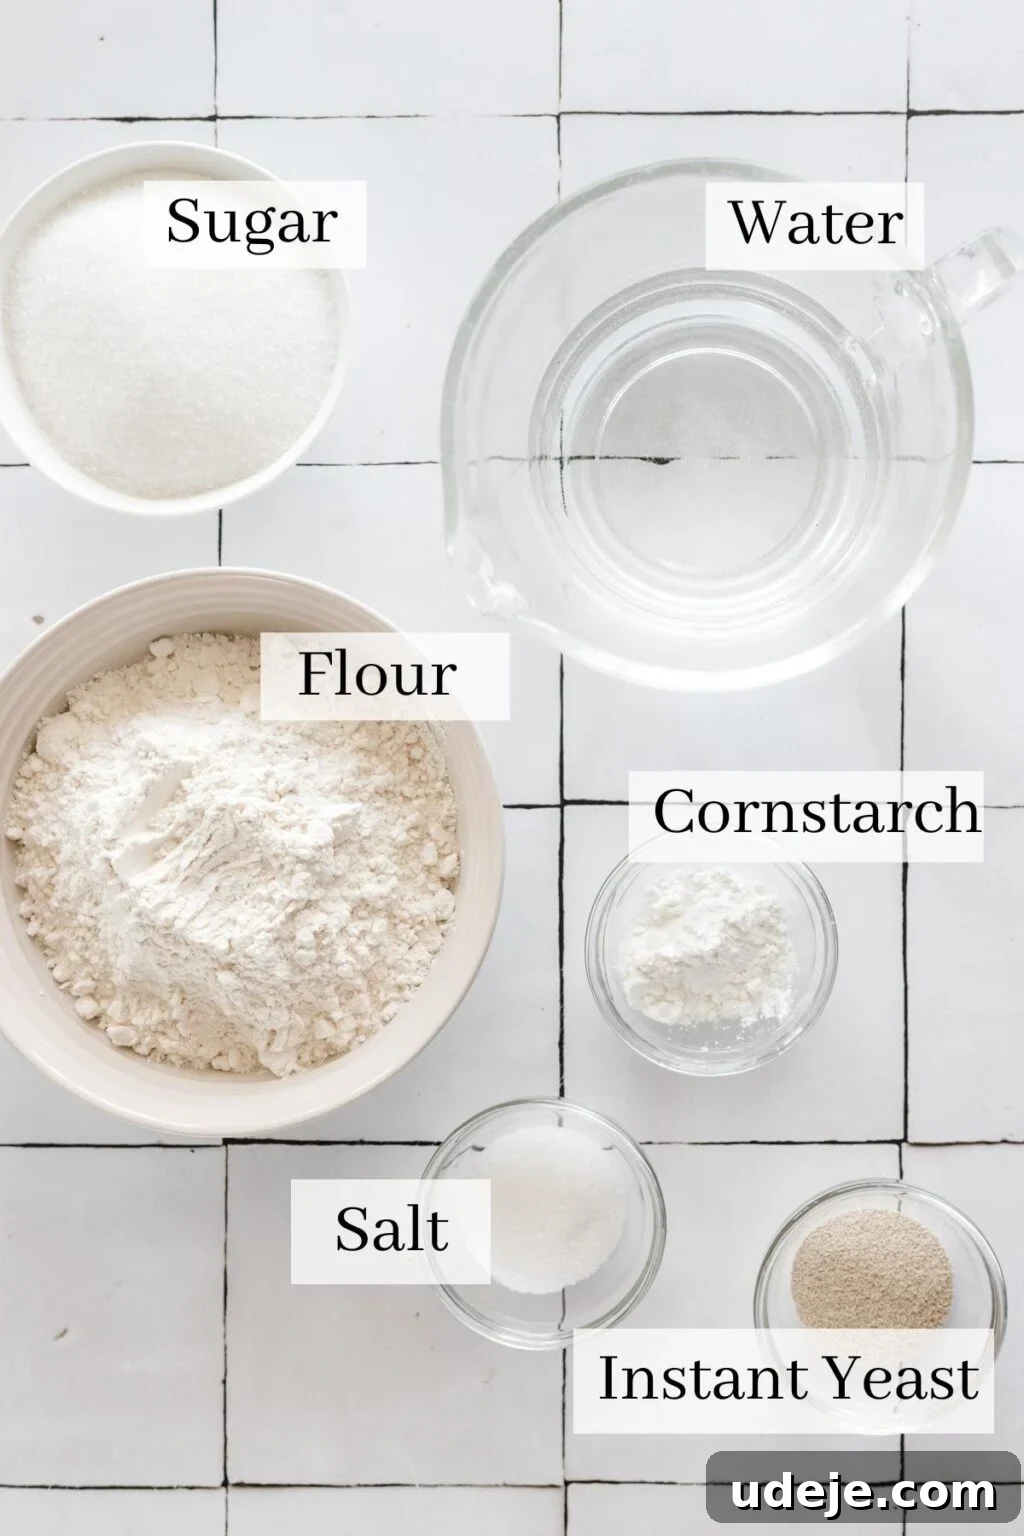
One of the beauties of Luqaimat is its simplicity. You don’t need a long list of exotic ingredients to create this beloved dessert. The magic happens with a few pantry staples, proving that extraordinary flavors can come from humble beginnings. Here’s what you’ll need for the dough:
- All-Purpose Flour: The foundation of our dough. Using all-purpose flour ensures a tender yet structured fritter.
- Instant Yeast: This is crucial for giving the dough its light and airy texture. Always check the expiry date of your yeast to ensure it’s active and will properly leaven the dough.
- Granulated Sugar: A small amount in the dough helps activate the yeast and adds a subtle sweetness.
- Cornstarch: This is a secret weapon for achieving that coveted crisp exterior. It contributes to the golden color and prevents the fritters from becoming chewy.
- A Pinch of Salt: Essential for balancing the flavors and enhancing the overall taste of the dough.
- Warm Water: Activated the yeast and brings the dough together to the right consistency.
And for the luscious simple syrup, which is just as important as the dough itself, you’ll need:
- Granulated Sugar: The primary component of the syrup.
- Water: To dissolve the sugar and create the syrup base.
- Lemon Juice and Slices: The lemon serves multiple purposes. It adds a bright, tangy note that cuts through the sweetness, preventing the syrup from being cloyingly sweet. More importantly, the acidity helps prevent the sugar from crystallizing, ensuring a smooth, clear syrup that coats the Luqaimat beautifully.
Crafting Perfect Luqaimat: A Detailed Step-by-Step Guide
Making Luqaimat is a rewarding experience, transforming simple ingredients into a truly spectacular dessert. Follow these steps carefully to achieve crispy, airy fritters every time.
Step 1: Prepare the Simple Syrup
The first crucial step is to prepare your simple syrup, as it needs ample time to cool completely before the Luqaimat are ready. A cold syrup ensures the hot fritters absorb just the right amount, giving them their glossy finish without becoming soggy.
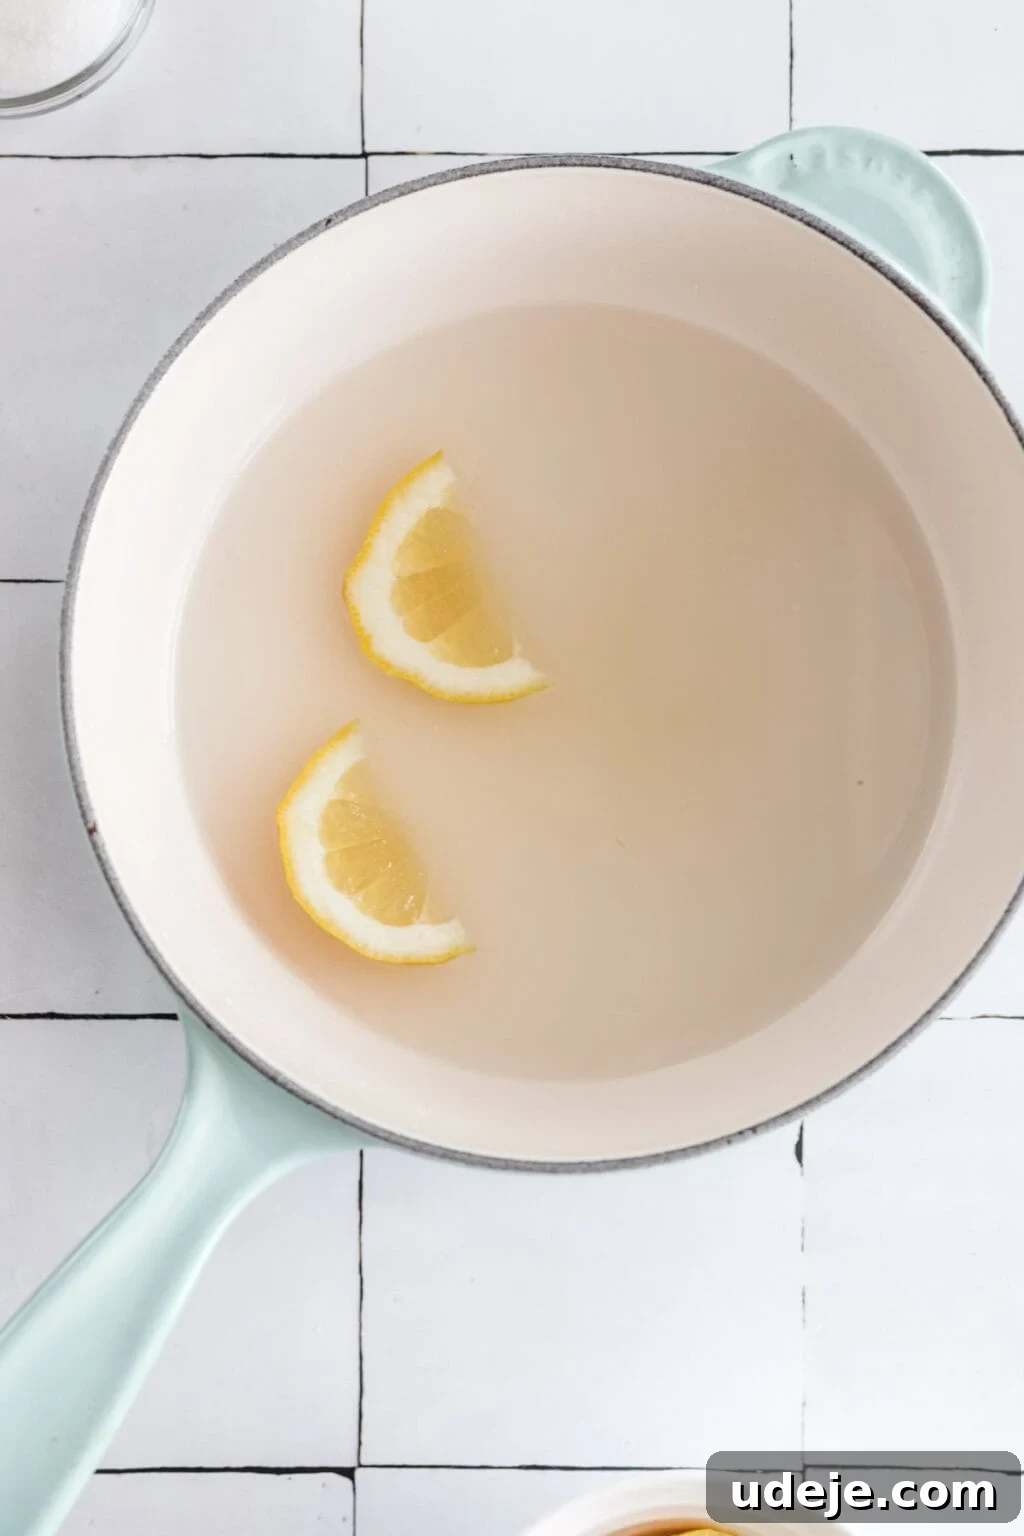
In a medium saucepan, combine the granulated sugar, water, a generous squeeze of fresh lemon juice, and the lemon slices. Place the saucepan over medium heat. There’s no need to stir at this point; let the ingredients heat gradually. Once the mixture begins to simmer gently, reduce the heat to low and allow it to continue simmering for approximately 10-12 minutes. This simmering time is essential for the syrup to thicken slightly. After 10-12 minutes, remove the pan from the heat and set it aside to cool down completely to room temperature. It will thicken further as it cools, reaching the perfect consistency to cling beautifully to your Luqaimat.
Step 2: Preparing the Dough
Now, let’s turn our attention to the heart of the Luqaimat: the dough. This light and airy dough is what sets homemade Luqaimat apart.
In a large mixing bowl, combine the warm water with the instant yeast. Ensure the water is warm to the touch, like a comfortable bath, not boiling hot, as excessively hot water can kill the yeast. Let this mixture stand for 1-2 minutes until the yeast begins to foam slightly, indicating it’s active. This step is often called “proofing” the yeast.
Next, add the granulated sugar, all-purpose flour, cornstarch, and a pinch of salt to the yeast mixture. Using a sturdy wooden spoon, begin to mix these ingredients together. At first, the dough will appear shaggy and somewhat stiff. As you continue to mix, you’ll notice it needs more hydration. Gradually add the extra warm water, about 1-2 tablespoons at a time, mixing thoroughly after each addition. Continue this process until the dough noticeably loosens up and becomes very soft, sticky, and stretchy. The total amount of extra water needed should be around 1/4 cup, but adjust as necessary based on your flour and humidity.
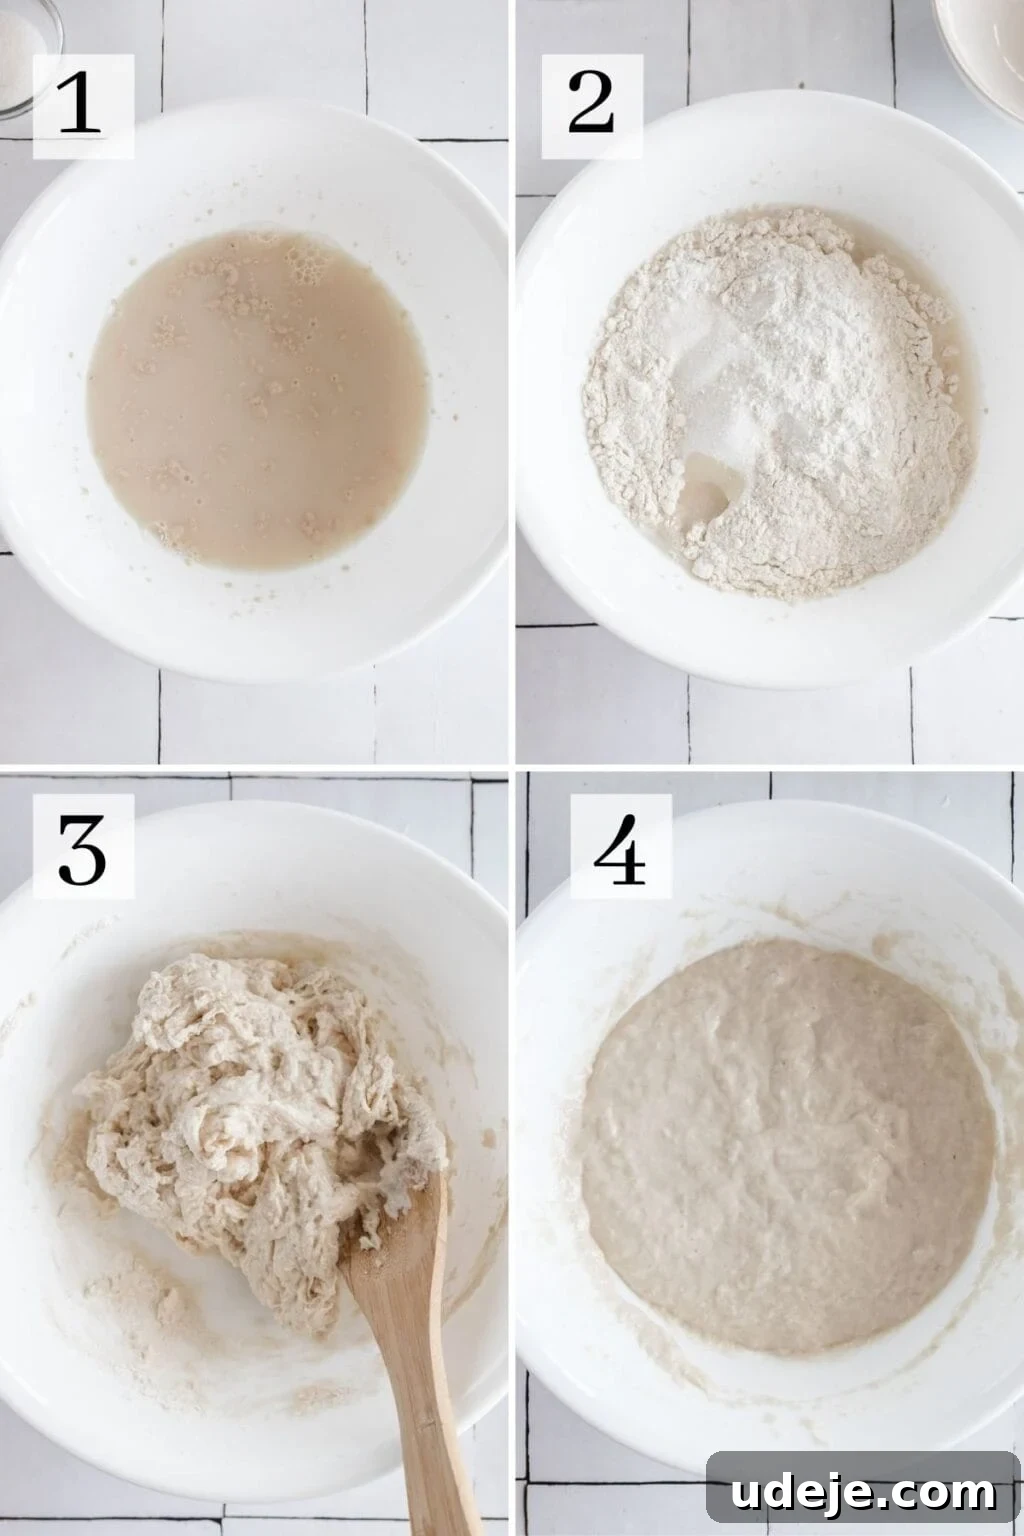
Once the dough has reached this soft, loose consistency, it’s time for a unique “kneading” technique. Pick up the dough with your wooden spoon and then vigorously smack it back down into the bowl. Repeat this motion 8-10 times. This action, despite being unconventional for kneading, helps develop the gluten and incorporates air into the dough, leading to a lighter fritter. It’s surprisingly fun and effective!
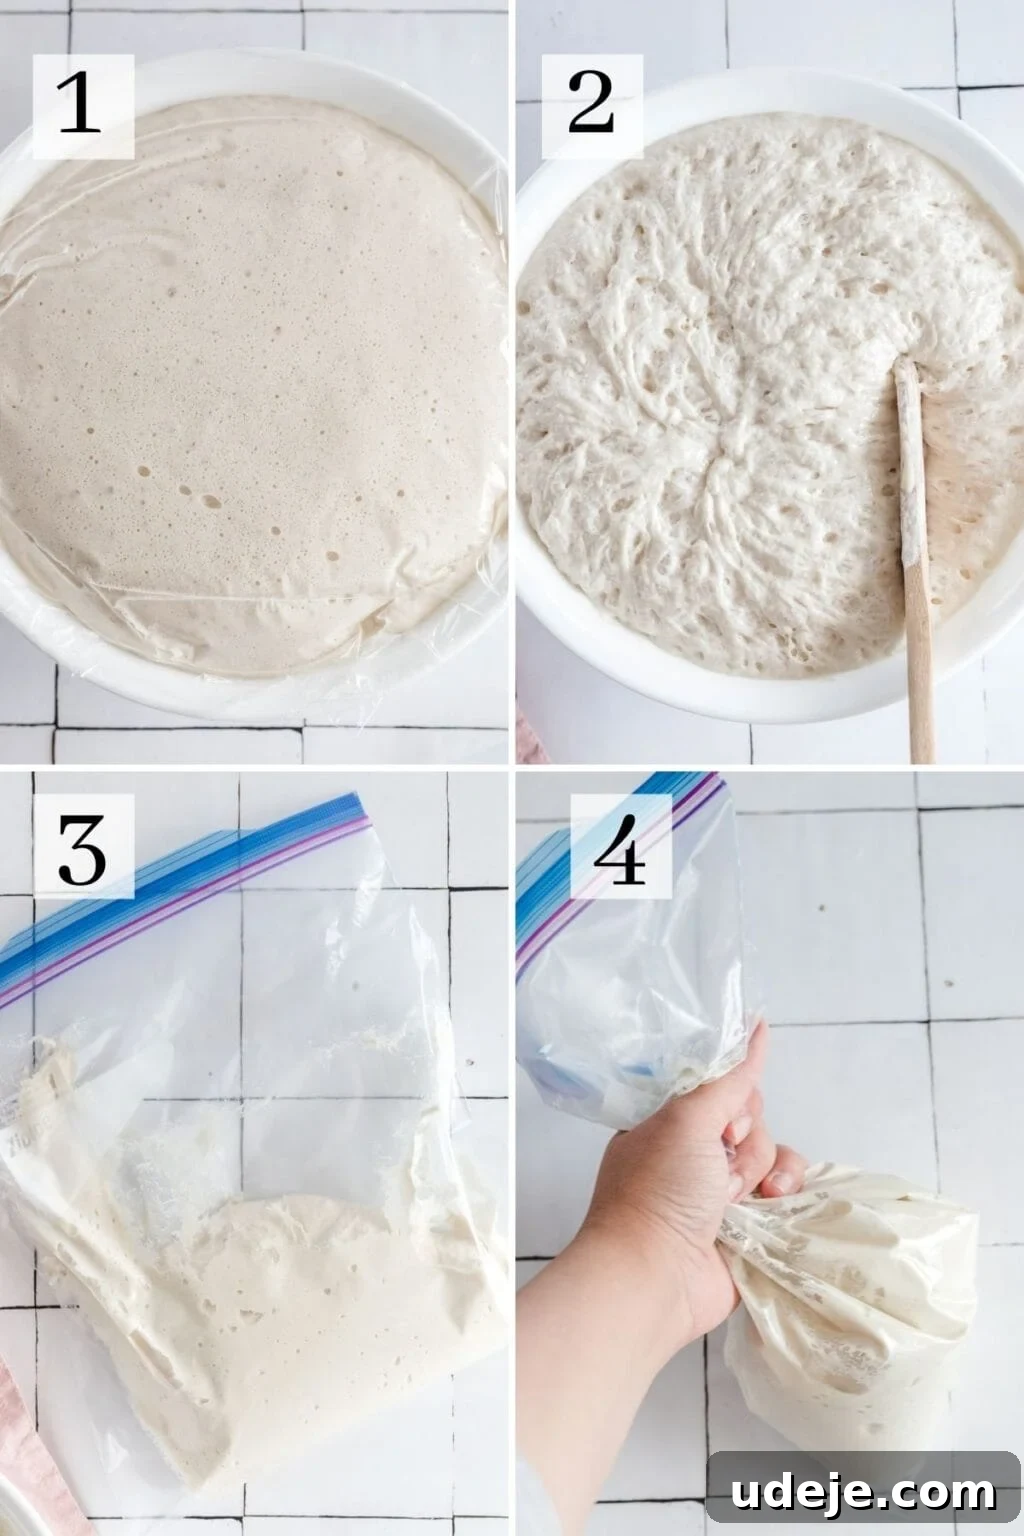
Cover the bowl tightly with plastic wrap, then drape a clean kitchen towel over it. Allow the dough to rise in a warm, draft-free place for approximately 1 hour. During this time, the dough should significantly increase in volume, ideally doubling or even tripling in size.
Step 3: Preparing the Dough for Frying
After the hour of rising, gently deflate the dough using your wooden spoon. The goal is to release the excess air while maintaining its soft texture. Carefully transfer the stretchy, soft dough into a large plastic freezer bag. Gather all the dough into one corner of the bag, twisting the top tightly to form a makeshift piping bag. This method provides excellent control when portioning the dough into the hot oil. Crucially, do not snip the corner of the bag until you are fully ready to begin frying.
Step 4: The Double Frying Technique
This is where the magic happens and where we achieve that irresistible crunch!
Pour about 2 cups of vegetable oil into a deep pot or a large, heavy-bottomed skillet – enough oil to fully submerge the dough balls. Heat the oil over medium-high heat until it’s hot but not smoking. You can test the oil temperature by dropping a tiny piece of dough into it; if it sizzles and floats to the top immediately, the oil is ready. A good oil temperature is around 350-375°F (175-190°C).
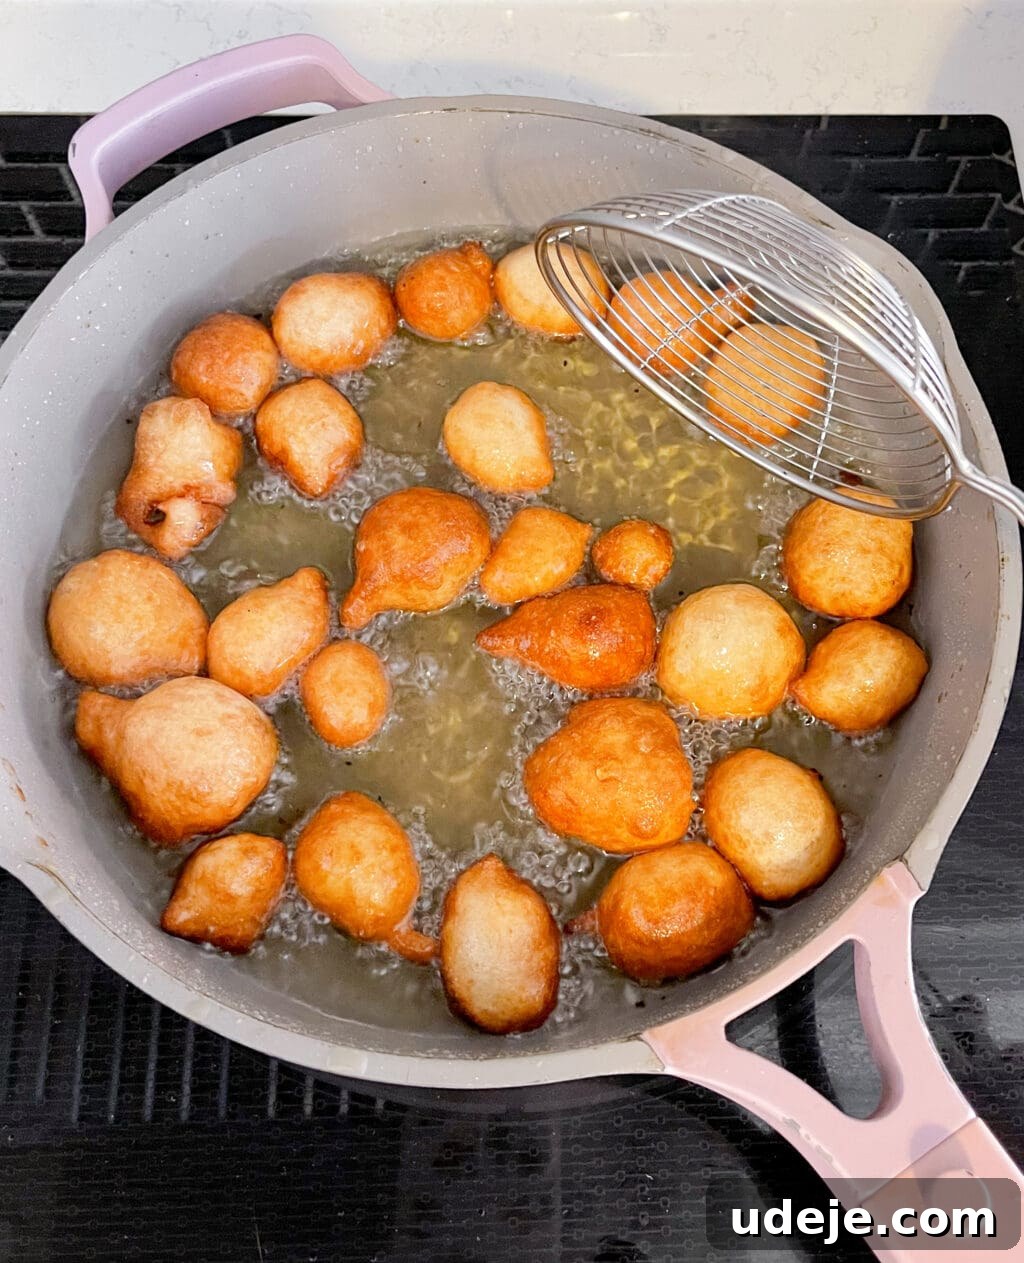
Snip a small corner off the plastic bag, being careful not to make the opening too large – a small opening ensures smaller, more uniform Luqaimat. Keep a pair of kitchen scissors handy and dip them in the hot oil between cuts to prevent sticking. Position your arm over the pot, gently squeeze the bag to push out some dough, and use the oiled scissors to snip off small pieces, allowing them to drop directly into the hot oil. Work quickly but carefully. Don’t overcrowd the pot; fry in batches to maintain the oil temperature and ensure even cooking.
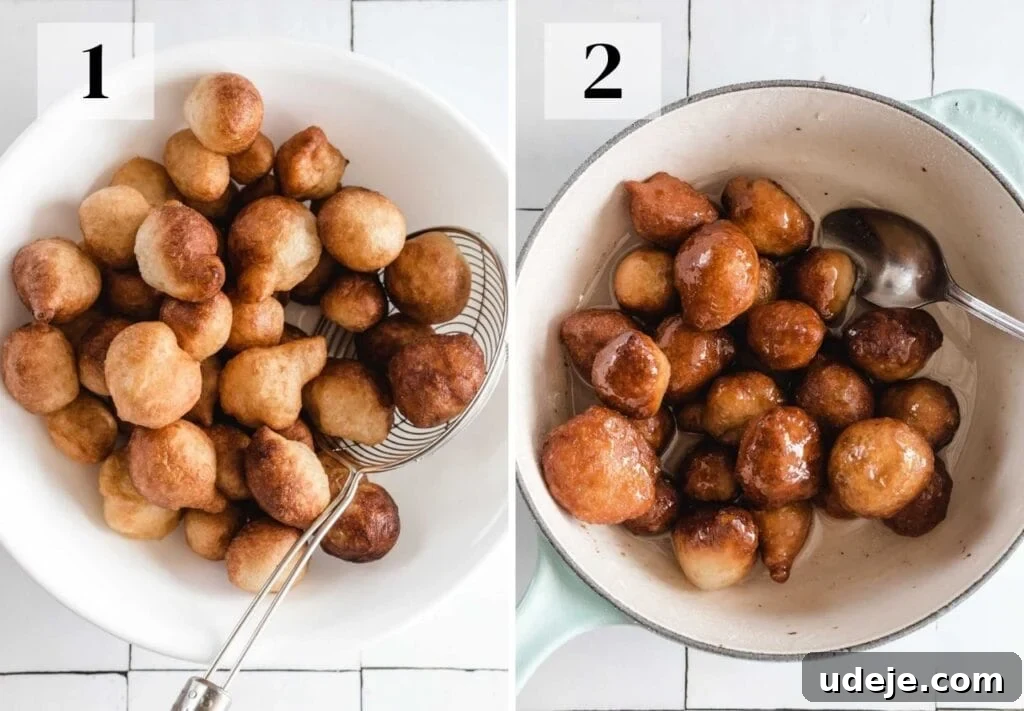
First Fry: Fry the Luqaimat for about 1-2 minutes per batch, or until they turn a very light golden color. They won’t be fully cooked or crispy yet. Remove them from the oil using a spider strainer or slotted spoon and transfer them to a bowl or a tray lined with paper towels to cool slightly. Continue with the remaining dough, frying all batches once.
Second Fry: Once all the Luqaimat have had their first fry and have cooled down for a few minutes (they should still be warm but not piping hot), it’s time for the crucial second fry. Re-introduce the lightly golden Luqaimat back into the hot oil. This time, fry them until they achieve a deep, rich golden brown color, which indicates their exterior is wonderfully crispy. This second frying session, lasting another 1-3 minutes depending on your oil temperature, is the secret to that ultimate crunch and hollow, airy interior.
Step 5: Syrupping and Serving
Immediately after their second fry, while they are still piping hot and at their crispiest, transfer the deep golden Luqaimat directly into the cooled simple syrup. Stir them gently to ensure each fritter is thoroughly coated with the sweet, sticky syrup. The hot Luqaimat will readily absorb the syrup. Remove them from the syrup using a slotted spoon, allowing any excess to drip off, and arrange them on your serving platter. Serve your homemade Luqaimat straight away to enjoy them at their absolute best – hot, crispy, and deliciously sweet!
FAQs and Expert Tips for Luqaimat Success
To ensure your Luqaimat turn out perfectly crunchy and delightful every single time, here are some essential tips and answers to common questions:
- The Power of Double Frying: I cannot stress this enough – frying them twice is the absolute key to achieving that signature crunchy exterior and airy interior. It’s not a step to skip! The first fry partially cooks the dough and allows it to puff up, while the second fry, done after a brief cooling period, renders them incredibly crispy without over-browning. Don’t be tempted to be lazy; it adds only a few extra minutes but makes all the difference.
- Dough Consistency is Crucial: The dough for Luqaimat should be exceptionally loose, soft, and stretchy – almost like a thick batter. This unique consistency is what contributes to the fritters being light and airy on the inside. If your dough feels too stiff, gradually add a tablespoon of warm water at a time until you achieve the desired looseness. A dough that is too tight will result in dense Luqaimat.
- Syrup Flavor Variations: While a classic simple syrup is delicious, feel free to get creative! You can infuse your syrup with a variety of aromatic additions for an extra layer of flavor. Try adding a splash of rose water or orange blossom water, a few crushed cardamom pods, or a pinch of saffron threads while it simmers. These additions will elevate the fragrance and taste of your Luqaimat, making them even more special.
- Perfectly Round Shapes: For consistently round Luqaimat, practice makes perfect! Dipping your scissors in oil between each cut helps the dough release cleanly. Working quickly with the squeeze-and-snip motion also aids in creating a rounder shape. Don’t worry if your first few aren’t perfectly spherical; they’ll still taste amazing! Another alternative is using a small, oiled ice cream scoop or fruit baller for shaping, though the piping bag method often offers more speed and efficiency.
- Oil Temperature Management: Maintaining the correct oil temperature is vital. If the oil is too cold, the Luqaimat will absorb too much oil and become greasy. If it’s too hot, they’ll brown too quickly on the outside, remaining raw or dense in the center. Use a kitchen thermometer if possible, or test with a small piece of dough. Adjust heat between batches as needed.
- Serving Suggestions: Luqaimat are best served warm, immediately after being drenched in syrup. They pair wonderfully with a hot cup of Arabic coffee or black tea, or even a glass of fresh mint tea. For an added touch of elegance, sprinkle them with crushed pistachios, a dusting of powdered sugar, or even a drizzle of date syrup before serving.
- Storage and Reheating: While best fresh, leftover Luqaimat can be stored in an airtight container at room temperature for a day or two, or in the refrigerator for up to 3-4 days. To regain some crispness, briefly reheat them in a toaster oven or air fryer until warmed through and slightly crisped. Avoid microwaving, as this will make them soft.
More Desserts You Will Love!
If you tried these recipes, please consider leaving a star ★★★★★ rating in the recipe card below and/or a review in the comments section further down the page – I’d love to hear from you! You can also hop on over to Instagram and say hello!
Luqaimat (Middle Eastern Crunchy Doughnuts)
45
pieces
10
mins
15
mins
1
hr
1
hr
25
mins
Amina Al-Saigh
Leave a Review
Pin Recipe
Ingredients
For the Sugar Syrup
-
1
cup
water -
1/2
cup
granulated sugar -
1
squeeze
lemon juice -
2
lemon slices
For the Dough
-
1
cup
warm water, + 1/4 cup when kneading -
1
tablespoon
instant yeast -
1
tablespoon
granulated sugar -
1.5
cup
all-purpose flour, spooned in to measure -
1
pinch
salt -
1
tablespoon
cornstarch
Other Ingredients
-
2
cups
vegetable oil , approx. for frying
Instructions
For the Sugar Syrup
-
In a sauce pan, add the sugar, water, squeeze of lemon juice and the lemon slices.
-
No need to mix it – place it on the stove top on medium heat.
-
Once simmering, lower the heat to low and simmer for 10 minutes. Remove and set aside to cool. It will be a thick syrup!
For the Dough
-
Mix together the warm water with the instant yeast in a large bowl. The water should be tap water warm, not boiling hot. Let stand for 1-2 minutes.
-
Add the sugar, flour, cornstarch and salt. Combine together using a wooden spoon until a shaggy dough forms.
-
Continue using your spoon to mix together the dough as you add a bit more water, 1-2 tablespoons at a time. As you add the water, the dough should loosen up slightly. The total water to add during kneading should be around 1/4 cup.
-
Once the dough is softer and looser, use your wooden spoon to scoop up the dough and then slap it back down into the bowl. Continue doing this motion 6-7 times. This is a form of kneading and helps the dough to rise well.
-
Cover the dough with plastic wrap and a towel and set aside to rise for 1 hour.
-
After an hour, using a wooden spoon, scoop up the stretchy and really soft dough into a large plastic freezer bag.
-
Using your hands, squish the dough into one corner of the bag and twist the top to form a piping bag shape. This is what will be used to fry the dough. Don’t cut the corner of the bag until you are ready to fry.
For Frying the Luqaimat
-
Add vegetable oil to a large skillet, enough to submerge the dough balls. Allow the oil to come to temperature for a few minutes.
-
Using kitchen scissors, make a small cut at the corner of the bag. Ensure it’s not too big or the balls will come out really large.
-
Dip the scissors in the oil. Position your arm above the oil, and squeeze out some of the dough, then cut it off using the scissors so it falls into the oil. You need to be quick with this movement if you want a round shape (otherwise the shape will be irregular which is okay too!).
-
Use the first one to test the oil temperature. If it starts to bubble, that means the oil is ready. If not, wait a few more minutes.
-
Continue to squeeze out the dough and cut until you fill the surface without overcrowding. Using a large spider (or skimmer), take out the luqaimat once they are a light golden brown and place into an empty bowl.
-
Fry the dough in 2-3 batches as necessary, depending on the size of your frying pan. As you finish one batch, place it separate from the second batch so you can keep track of which batch is coolest.
-
Once the luqaimat have cooled slightly, add them back into the hot oil for a second round of frying. Frying them twice will ensure a crispy outside. This time, fry until they turn a deep brown color.
-
Remove and dunk them into the sugar syrup, then remove and add them to a plate. Serve immediately.
Notes
- When measuring the flour, be sure to use a spoon and spoon it into the measuring cup. This ensures an accurate measurement (vs. dunking the cup straight into the flour bin and risking over measuring).
- Be sure to fry the Luqaimat twice! That’s the key to a really crunchy outside. You want them to also develop a deep brown color.
- Another method of frying is using a small, oiled ice cream scoop or fruit scooper to shape the balls. It works, but I find the piping bag much easier.
Serving:
1
piece
,
Calories:
112
kcal
,
Carbohydrates:
6
g
,
Protein:
1
g
,
Fat:
10
g
,
Saturated Fat:
1
g
,
Polyunsaturated Fat:
6
g
,
Monounsaturated Fat:
2
g
,
Trans Fat:
1
g
,
Sodium:
2
mg
,
Potassium:
6
mg
,
Fiber:
1
g
,
Sugar:
3
g
,
Vitamin A:
1
IU
,
Vitamin C:
1
mg
,
Calcium:
1
mg
,
Iron:
1
mg
Did you make this recipe?
Please leave a star rating and review below!