
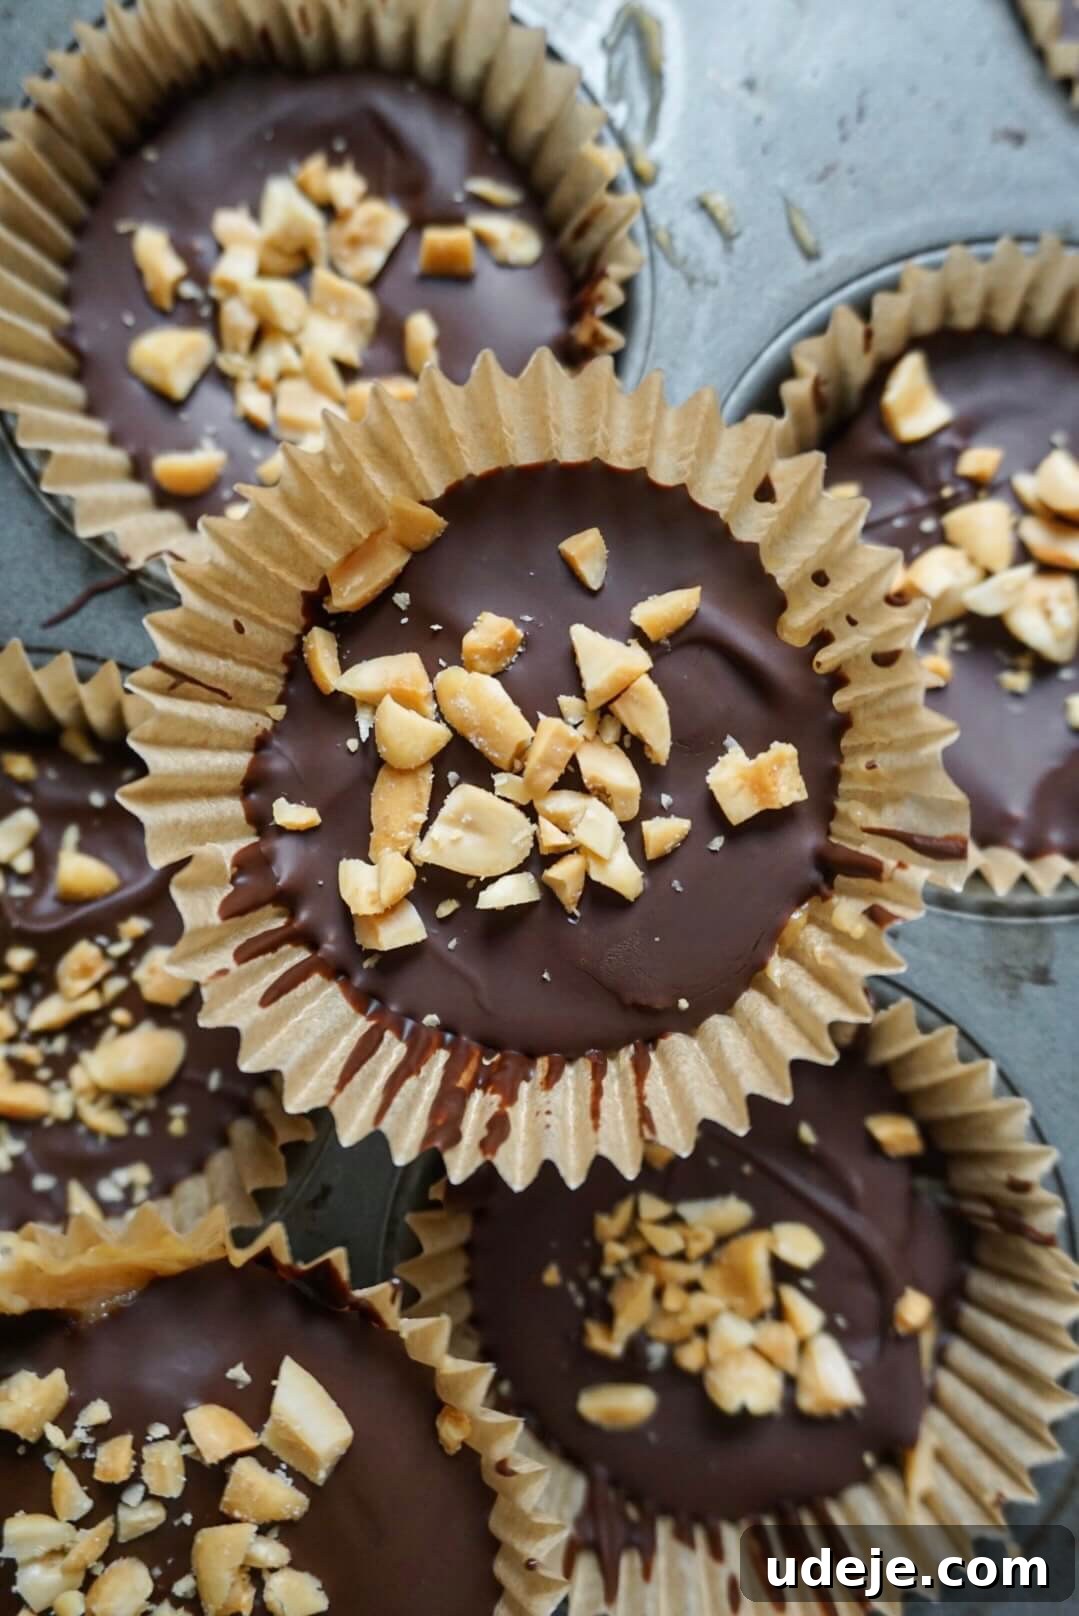
Indulge Guilt-Free: The Ultimate No-Bake Vegan Chocolate Peanut Butter Yogurt Cups
Seeking the perfect healthy summer dessert? Look no further! These No-Bake Vegan Chocolate Peanut Butter Yogurt Cups are a dream come true – wonderfully creamy, intensely chocolatey, naturally sweetened, and crafted with just 6 simple ingredients. Imagine a treat that captures the beloved flavor combination of chocolate and peanut butter, elevated with a cool, creamy yogurt twist, all without turning on your oven. This recipe delivers exactly that: a delightful, fuss-free dessert that’s ideal for warm weather or any time you crave a wholesome yet decadent bite.
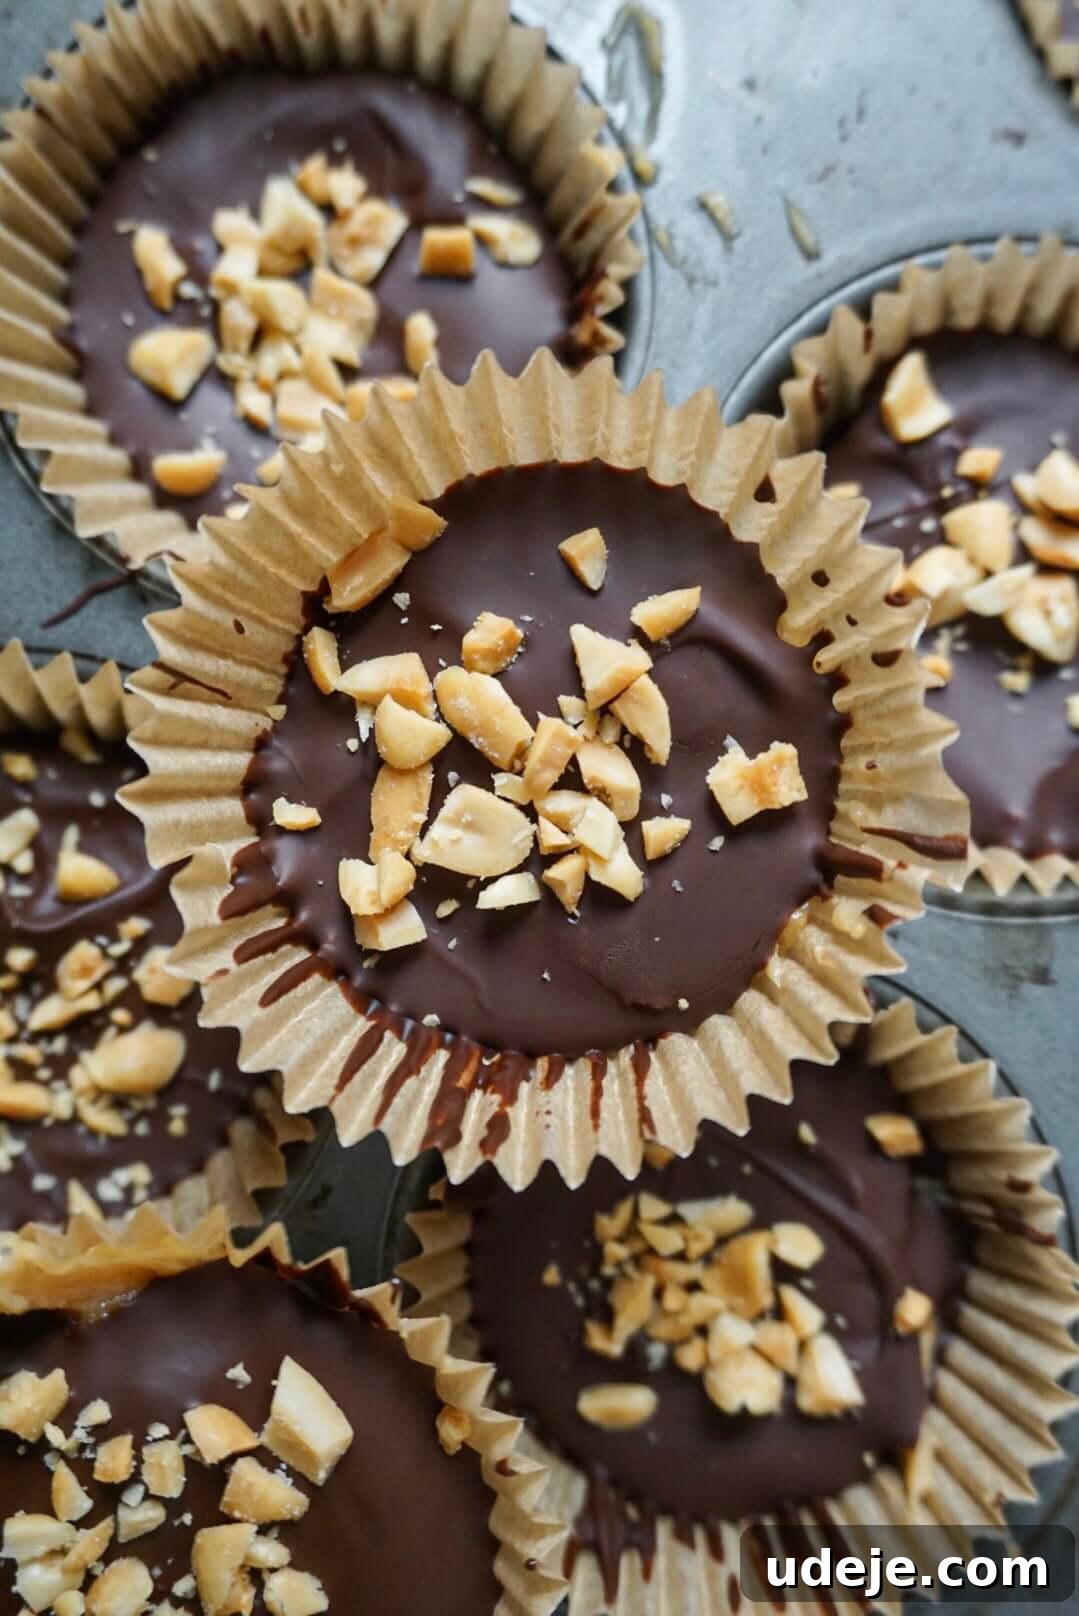
The irresistible duo of chocolate and peanut butter has always held a special place in my heart. Lately, I’ve been on a major peanut butter kick, finding myself constantly experimenting with new ways to incorporate its rich, nutty flavor into my favorite healthy treats. My Snickers Stuffed Dates, for instance, have become a staple after-dinner indulgence. But as the summer sun blazes on and the temperatures soar, my cravings shifted towards something distinctly cold, impossibly creamy, and exquisitely chocolatey. That’s when inspiration struck, leading to the creation of this very recipe – a refreshingly cool take on a classic favorite.
These enchanting little cups are a symphony of textures and flavors. Each one begins with a luscious, rich chocolate base, forming a satisfying foundation. This is then generously topped with a velvety smooth peanut butter yogurt filling so delightful, it tastes remarkably like a frozen cheesecake. The grand finale? A delicate drizzle of more melted chocolate, adorned with a sprinkle of crunchy roasted peanuts or a touch of flaky sea salt for that perfect balance of sweet and savory. In essence, consider these your new go-to for a healthier, frozen interpretation of the iconic Reese’s peanut butter cup – but with a completely vegan, dairy-free, and utterly guilt-free twist.
Beyond their incredible taste, the practicality of these Vegan Chocolate Peanut Butter Yogurt Cups makes them an absolute winner. They come together in under 25 minutes of active preparation time, demanding absolutely zero baking. Because let’s be honest, who wants to fire up the oven when the summer heat is already intense? Once prepared, they’re perfectly portioned and ready to be stashed in your freezer, offering an instant, satisfying snack or a post-dinner dessert whenever a sweet craving calls. They’re designed for convenience without compromising on flavor or nutritional value. Total win indeed!
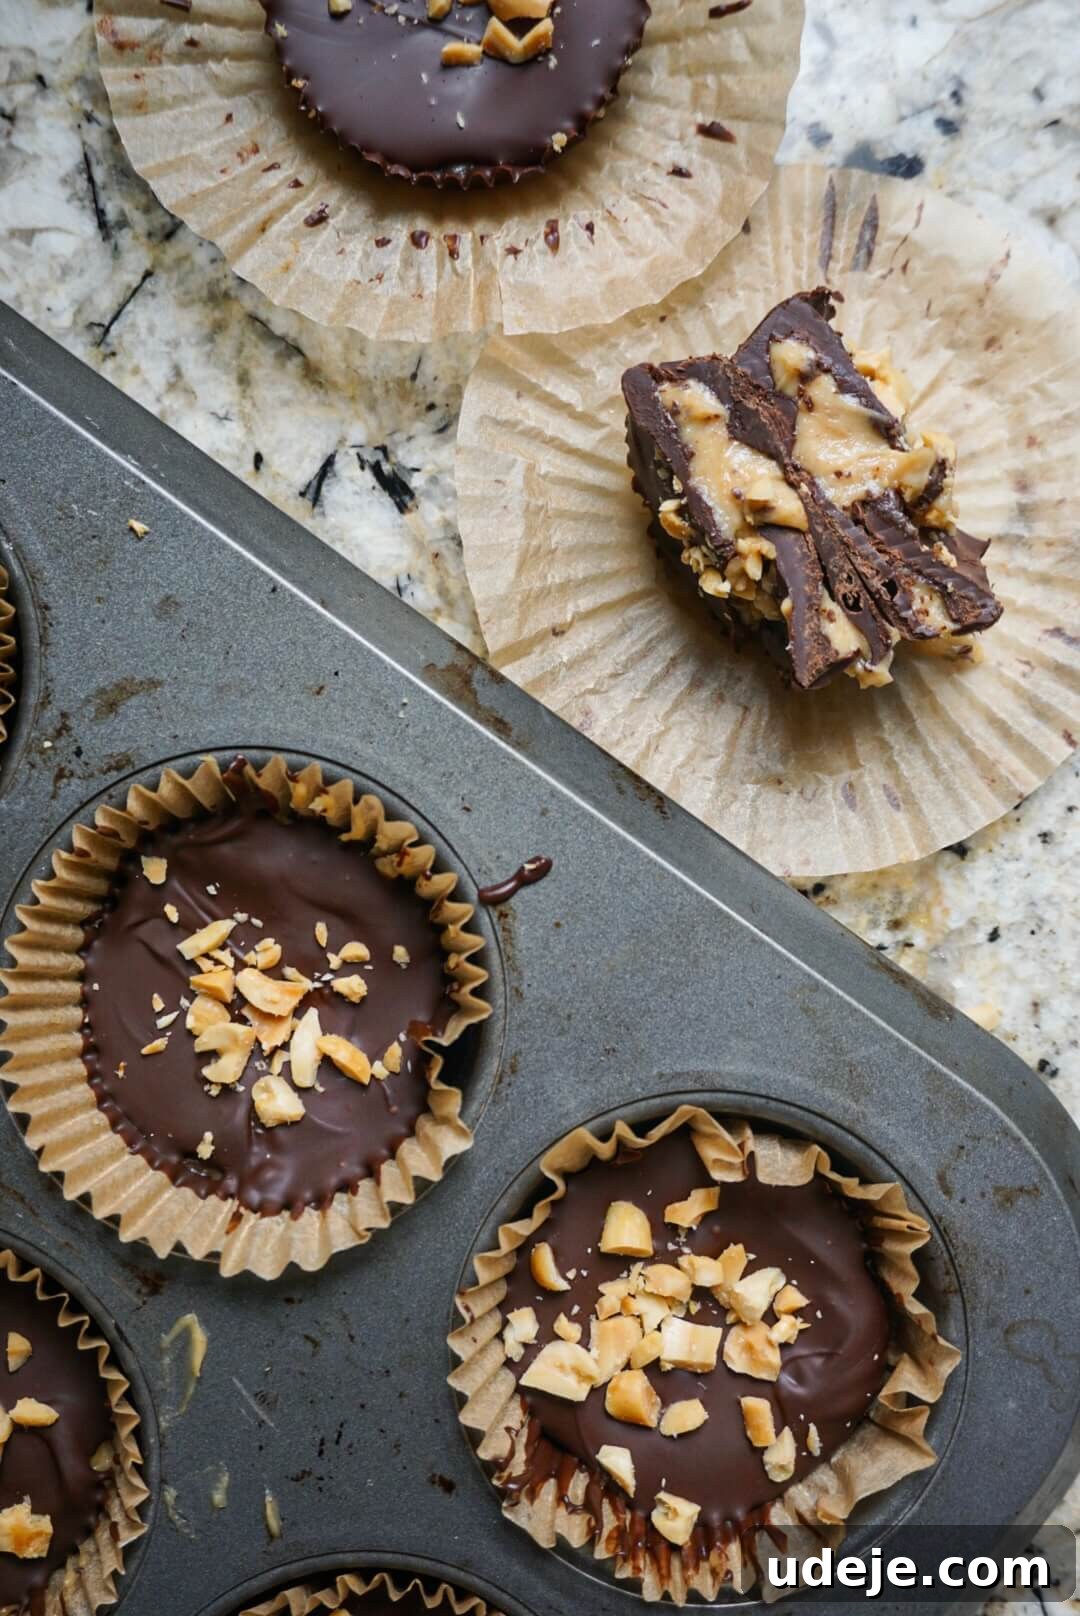
Why These Vegan Chocolate Peanut Butter Yogurt Cups Will Be Your New Favorite Treat
There are countless reasons to fall in love with this recipe. It combines ease, flavor, and wholesome ingredients into one spectacular dessert:
- Effortless & Freezer-Friendly: Say goodbye to baking! These cups require no oven time, making them a perfect no-fuss dessert for any skill level. Simply assemble, freeze, and enjoy. Their freezer-friendly nature means you can always have a healthy treat on hand.
- A Healthier Reese’s Experience: Get all the nostalgic taste of your favorite chocolate peanut butter candy, but with a creamy, frozen twist and without any dairy or refined sugars. They truly taste like a gourmet, frozen version of Reese’s, but much better for you!
- Minimal Ingredients, Maximum Flavor: With just 6 simple, wholesome ingredients, you can whip up these decadent cups. Each component plays a crucial role in creating the rich, balanced flavor profile.
- Dietary-Friendly Indulgence: This recipe is naturally vegan, gluten-free, and refined sugar-free, making it suitable for a wide range of dietary needs and preferences. Everyone can enjoy this delicious dessert without compromise.
- Perfect for Summer: Their cool, refreshing nature makes them an ideal dessert for hot summer days, offering a delightful way to cool down and satisfy your sweet tooth simultaneously.
- Versatile & Customizable: Easily adapt this recipe to your preferences, whether it’s adjusting the sweetness, trying different nut butters, or experimenting with various toppings.
Essential Ingredients for Your Vegan Chocolate Peanut Butter Yogurt Cups
Crafting these delectable cups requires only a handful of readily available ingredients. Each one is chosen for its specific role in achieving the perfect texture and flavor:
- Non-Dairy Yogurt: The cornerstone of our creamy filling. It’s crucial to use a thick, unsweetened variety. Brands like Siggi’s non-dairy yogurt or an extra-thick coconut, almond, or soy yogurt work beautifully. The thicker the yogurt, the creamier and more cheesecake-like your filling will be. Opting for unsweetened ensures you control the overall sweetness of the dessert.
- Peanut Butter: Choose a natural, drippy peanut butter where the only ingredients are peanuts and salt (and sometimes oil). This type blends smoothly and contributes to the rich, creamy texture. If you have a peanut allergy or simply want to experiment, feel free to use almond butter, cashew butter, or even hazelnut butter for a delightful Nutella-inspired vibe. For a nut-free option, sunflower seed butter is an excellent substitute, just be aware it can sometimes react with baking soda (though not relevant here) and can turn green!
- Maple Syrup: Our natural sweetener of choice. Maple syrup not only adds sweetness but also a subtle depth of flavor that complements the peanut butter and chocolate beautifully. Agave nectar can be used as an alternative if preferred. Adjust the quantity to your personal sweetness preference.
- Vanilla Extract: A touch of pure vanilla extract is essential for enhancing the overall flavor profile. It adds a warm, aromatic note that deepens the taste of both the chocolate and peanut butter layers, elevating the dessert beyond its simple components.
- Vegan Dark Chocolate: To keep this recipe entirely plant-based, select high-quality dairy-free chocolate chips or a vegan dark chocolate bar. Look for brands that specify “vegan” or “dairy-free.” The quality of your chocolate will significantly impact the final taste, so choose one you genuinely enjoy.
- Refined Coconut Oil: This ingredient is key for achieving a smooth, tempered chocolate shell that sets beautifully and has a satisfying snap. Refined coconut oil is preferred over unrefined as it has a neutral flavor, ensuring your chocolate layer tastes purely of chocolate without any coconut undertones. It helps thin the chocolate to the perfect pouring consistency.
(Scroll down to the detailed recipe card below for exact measurements and further notes.)
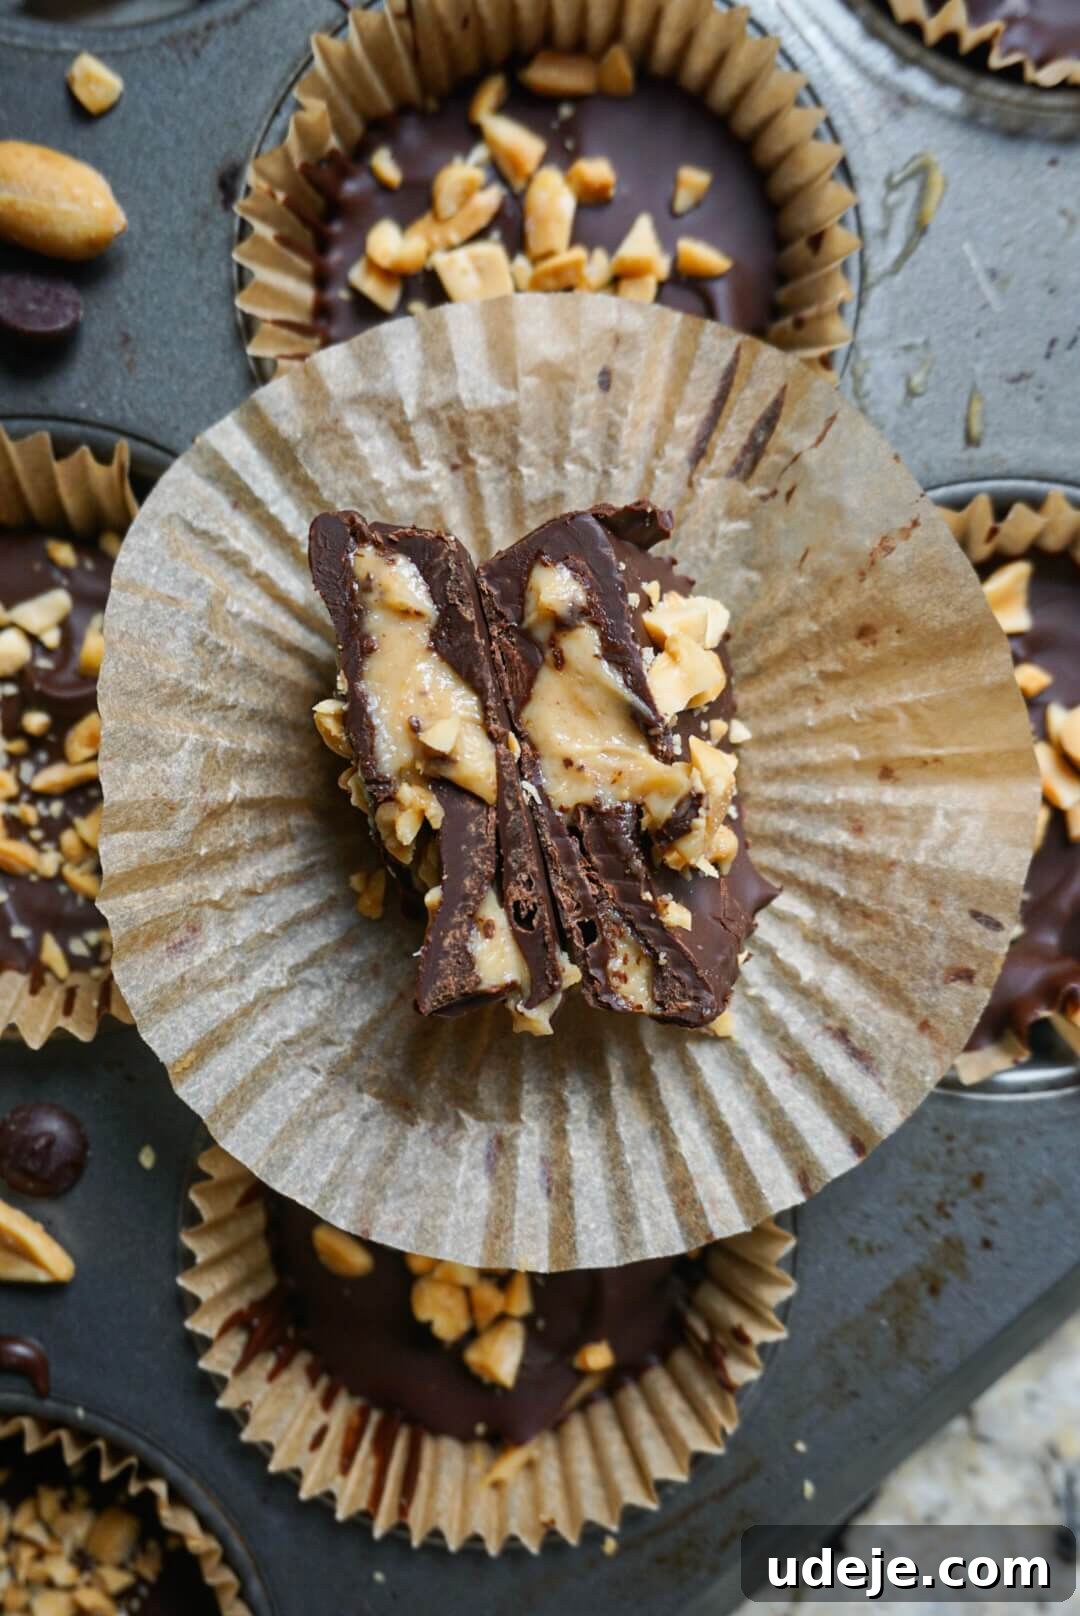
How To Master These No-Bake Vegan Chocolate Peanut Butter Yogurt Cups
Creating these delightful cups is surprisingly simple, requiring minimal effort for maximum reward. Follow these straightforward steps for a perfect batch every time:
- Prepare Your Chocolate Coating: In a small, microwave-safe bowl, combine your chosen vegan chocolate chips with the refined coconut oil. Microwave in short bursts of 30 seconds, stirring thoroughly after each interval, until the mixture is completely smooth and glossy. The coconut oil helps create a perfectly fluid chocolate that will set with a satisfying firmness.
- Form the Chocolate Base: Line a muffin tin with paper or silicone liners. Spoon a small amount of the melted chocolate mixture into the bottom of each liner – just enough to create a thin, even layer. Using the back of a spoon, gently spread the chocolate up along the sides of the liner to create a cup shape. Transfer the muffin tin to the freezer for 5–10 minutes to allow the chocolate base to firm up. This step prevents the filling from mixing with the chocolate.
- Craft the Creamy Peanut Butter Yogurt Filling: While your chocolate bases are chilling, prepare the rich filling. In a medium bowl, combine the non-dairy yogurt, peanut butter, maple syrup, and vanilla extract. Whisk or stir vigorously until the mixture is completely smooth, creamy, and free of lumps. The texture should be thick and luxurious, similar to a soft-set pudding or a dense frosting.
- Add the Velvety Filling: Once the chocolate bases are firm to the touch, retrieve the muffin tin from the freezer. Evenly spoon the peanut butter yogurt filling into each chocolate cup. Use the back of a spoon or a small offset spatula to smooth out the tops, ensuring an attractive and uniform appearance.
- Top with More Chocolate & Finish: Carefully pour the remaining melted chocolate over the peanut butter yogurt filling in each cup, creating the top layer. Before it sets, immediately sprinkle with your desired toppings – crushed salted peanuts or a pinch of flaky sea salt are highly recommended for an extra pop of flavor and texture. Return the muffin tin to the freezer for approximately 20 minutes, or until the cups are completely firm and set.
- Serve & Savor: When ready to enjoy, remove the cups from the freezer. For the absolute best creamy texture, allow them to sit at room temperature for just a few minutes before eating. This slight thaw will soften the yogurt filling to an ideal consistency, enhancing its “frozen cheesecake” appeal.
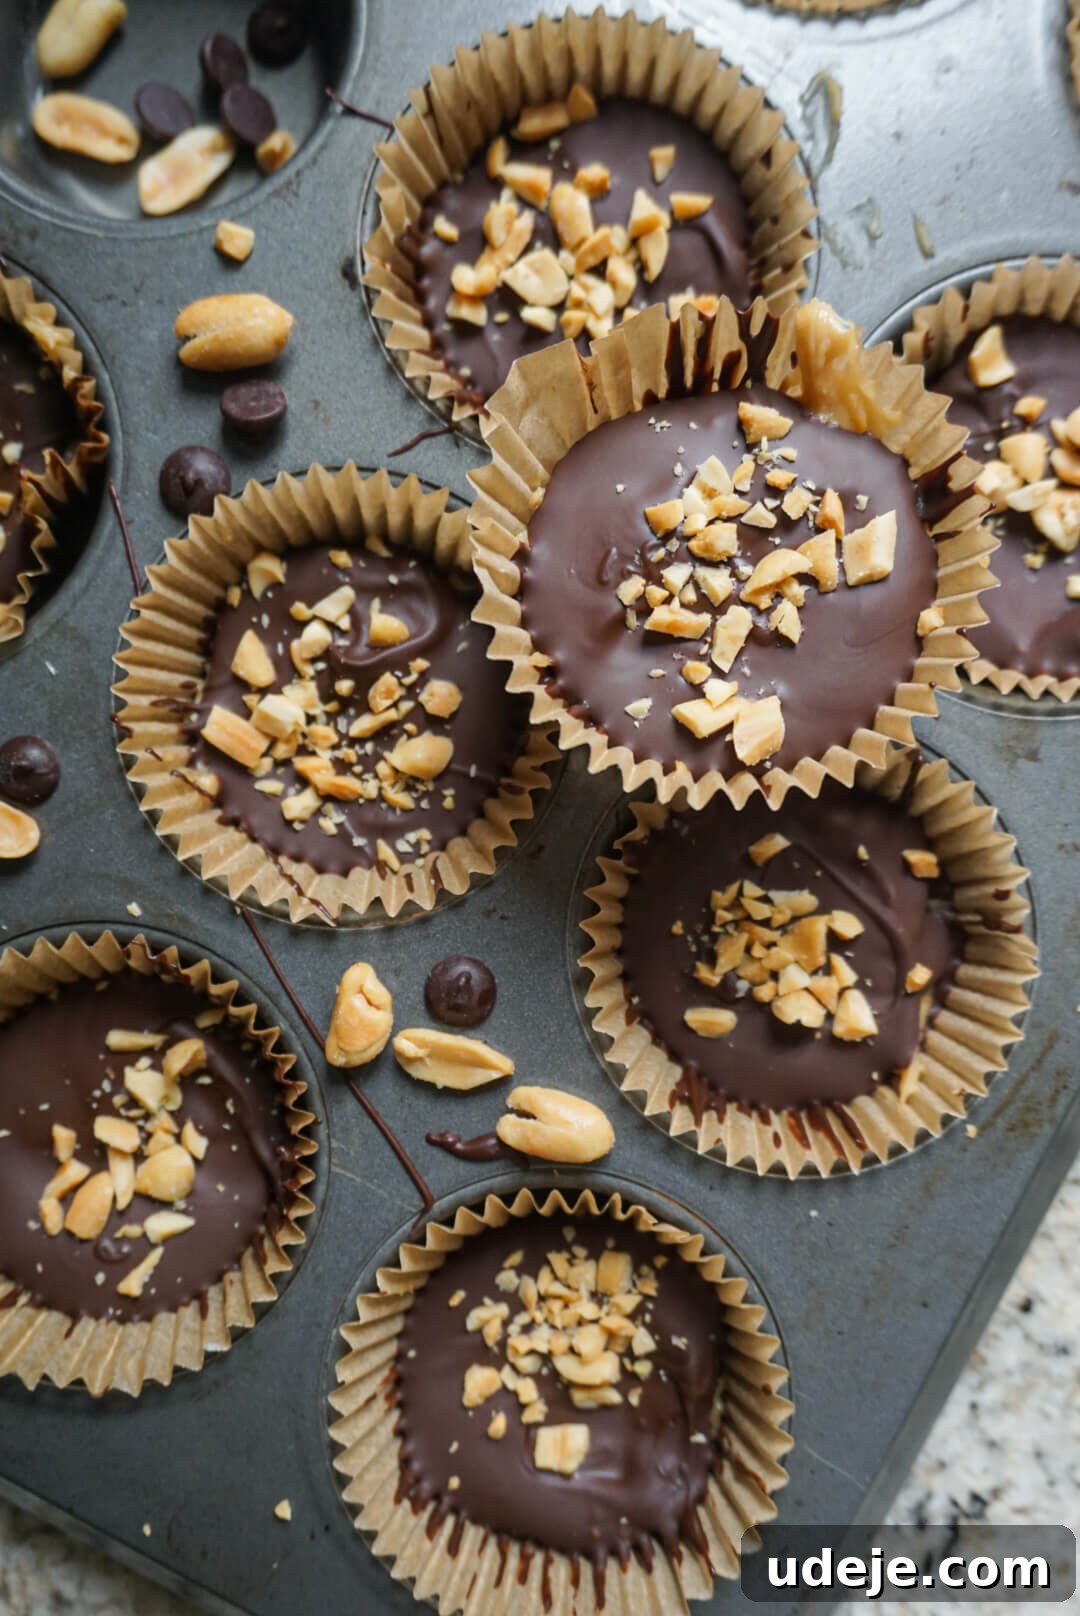
If you, like me, once held a deep obsession with Reese’s Peanut Butter Cups (🙋♀️), then prepare to absolutely fall in love with these vegan counterparts. They deliver all the beloved chocolatey and peanut buttery goodness in every bite, but without any of the refined sugars, dairy, or highly processed ingredients found in traditional candies. What truly elevates these cups is the creamy yogurt filling, which introduces an irresistible ice cream-like element. This makes them incredibly refreshing and perfectly suited for cooling down on a sweltering day.
I find immense joy in always having a batch of these delightful cups stashed in my freezer. They serve as an effortless, healthy dessert after dinner, or a perfect mid-afternoon snack when my sweet tooth calls for something satisfying yet nourishing. Beyond personal enjoyment, their adorable individual portions make them a fantastic choice for parties, potlucks, or any gathering where you want to offer a unique and wholesome treat. Just pop them out of the freezer shortly before serving, and watch how quickly they disappear!
Tips for Success and Creative Variations
Making these Vegan Chocolate Peanut Butter Yogurt Cups is straightforward, but a few pointers can ensure perfection every time. Plus, don’t shy away from customizing them to your taste!
- Choose Your Muffin Liners Wisely: While paper liners work fine, silicone muffin liners or a silicone muffin pan are excellent for easy removal, ensuring your chocolate cups come out perfectly intact without sticking.
- The Secret to Smooth Chocolate: When melting chocolate, always use a double boiler or microwave in short intervals, stirring frequently. Overheating chocolate can cause it to seize and become grainy. The coconut oil helps prevent this and creates a beautiful, shiny finish.
- Adjust Sweetness to Taste: The amount of maple syrup can be adjusted based on your preference and the sweetness of your non-dairy yogurt. Start with the recommended amount and add more if you like a sweeter dessert.
- Topping Ideas Galore: Beyond crushed peanuts or flaky sea salt, consider adding cacao nibs for an extra chocolatey crunch, shredded coconut, mini vegan chocolate chips, or even a drizzle of homemade caramel sauce before freezing for an extra layer of decadence.
- Flavor Enhancements: A pinch of cinnamon or a tiny dash of espresso powder in the chocolate layer can add a sophisticated depth of flavor. For a mint chocolate twist, add a drop of food-grade peppermint extract to the chocolate or yogurt filling.
- Nut Butter Alternatives: As mentioned, feel free to experiment with other nut or seed butters. Each will lend a unique flavor profile – almond butter offers a milder taste, while hazelnut butter brings a Nutella-like richness.
Storage and Serving Suggestions
These delightful treats are best enjoyed frozen, but a slight thaw can enhance their texture.
- Storing: Keep these Vegan Chocolate Peanut Butter Yogurt Cups in an airtight container in the freezer for up to 2-3 weeks. This ensures they stay fresh and ready for whenever a craving strikes.
- Serving: For the ideal creamy texture, remove the cups from the freezer about 5-10 minutes before serving. This allows the yogurt filling to soften slightly, giving it that delightful frozen cheesecake consistency. If serving at a party, arrange them on a chilled platter to prevent them from melting too quickly.
- Portion Control: These individual cups are naturally portion-controlled, making them a fantastic option for mindful snacking or dessert.
Frequently Asked Questions (FAQs)
- Can I make these nut-free?
- Absolutely! Simply substitute the peanut butter with a seed butter like sunflower seed butter. Ensure all other ingredients (yogurt, chocolate) are also certified nut-free if severe allergies are a concern.
- What if my non-dairy yogurt is too thin?
- If your yogurt isn’t thick enough, you can try straining it through a cheesecloth-lined sieve overnight in the refrigerator to remove excess liquid. This will result in a much thicker, Greek-style yogurt consistency, perfect for this recipe.
- Can I use a different sweetener?
- Yes, you can use other liquid sweeteners like agave nectar or brown rice syrup. Granulated sweeteners won’t work as well here as they can make the filling grainy. Always adjust the amount to your taste.
- How long do these last in the freezer?
- Stored in an airtight container, these yogurt cups will keep well in the freezer for up to 2-3 weeks, maintaining their delicious flavor and texture.
- Why is my chocolate seizing when I melt it?
- Chocolate seizing (becoming thick and grainy) usually happens if it gets too hot or if even a tiny bit of water or steam gets into it. Ensure your bowl and utensils are completely dry, and melt in short bursts at lower power in the microwave, stirring often. The added coconut oil helps prevent this.
More No-Bake Vegan Desserts to Explore Next
If you’re as much a fan of easy, no-bake treats as I am, you’ll love these other simple and delicious vegan recipes:
- Decadent Snickers Stuffed Dates
- Healthy 4-Ingredient Snickers Bites
- Creamy Vegan Chocolate Crunch Ice Cream Bars
- Summery No-Churn Vegan Chocolate Peanut Butter Ice Cream
If you whip up a batch of these irresistible Vegan Chocolate Peanut Butter Yogurt Cups, please make sure to share your experience! Leave a comment below and give it a ★★★★★ star rating to let me know how much you loved it. Your feedback helps other dessert enthusiasts discover and enjoy my recipes. I truly appreciate your support, as always. xo, Megan
Vegan Chocolate Peanut Butter Yogurt Cups

Megan
12 cups
25 mins
25 mins
Leave a Review
Pin Recipe
Ingredients
- ¾ cup plain non-dairy yogurt, thick
- ¾ cup peanut butter
- 3 tablespoons maple syrup, or agave
- 1 teaspoon vanilla extract
- 2 cups vegan chocolate chips
- 2 tablespoons refined coconut oil
- salted peanuts, chopped (optional, for topping)
Instructions
-
In a small bowl, combine the vegan chocolate chips and refined coconut oil. Melt in the microwave in 30-second intervals, stirring between each, until smooth.
-
Spoon a small amount of melted chocolate into the bottom of each muffin liner (just enough to coat the bottom). Spread along the bottom and up along the sides a little. Place in the freezer for 5–10 minutes to set.
-
While the base is chilling, stir together the non-dairy yogurt, peanut butter, maple syrup, and vanilla extract until smooth and creamy. The texture should be thick, almost like pudding.
-
Once the chocolate base has hardened, spoon the peanut butter yogurt mixture evenly into each cup. Use the back of a spoon to smooth out the tops.
-
Pour the remaining melted chocolate over the filling and sprinkle with crushed peanuts or flaky salt (optional but so good!). Place back in the freezer for about 20 minutes, or until fully set.
-
Serve & enjoy! Let them sit at room temp for a few minutes before eating for the perfect creamy texture.
Equipment
Notes
- I always use the brand Hu Chocolate – it’s made with clean ingredients and my all-time favorite chocolate! Be sure to use my code BOOBOO for a discount.
- See blog post above for detailed substitution ideas and tips.
Did you make this recipe?
Tag @booboosbakeryy with hashtag #booboosbakery on Instagram. We love to see what you make!