
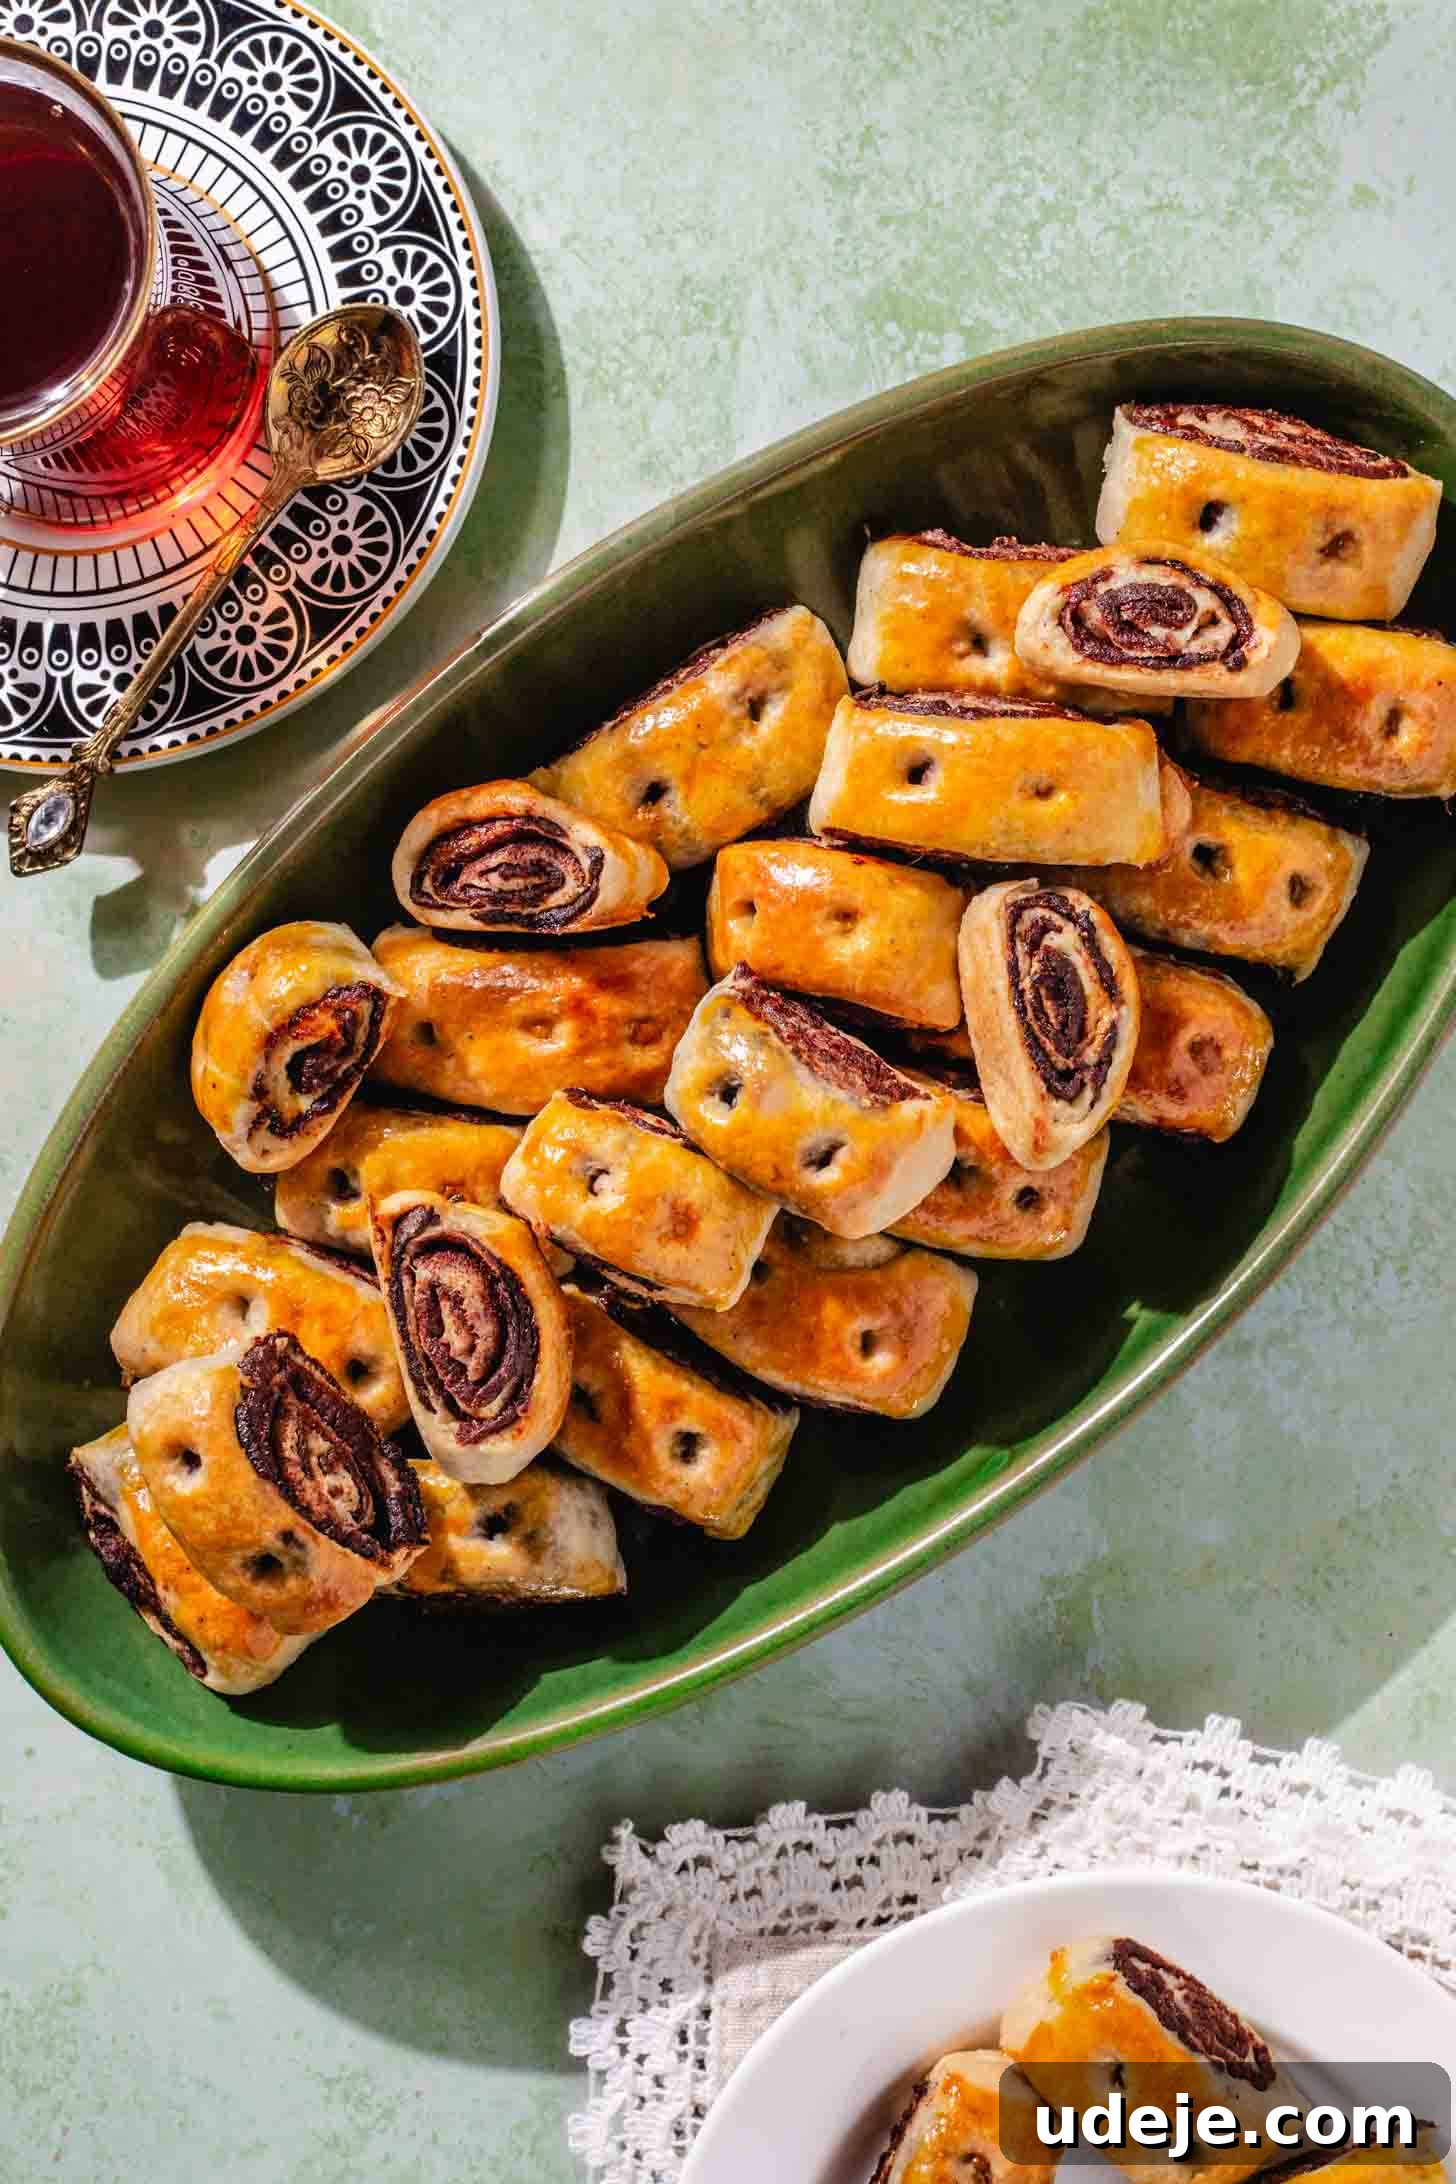
Embark on a culinary journey to Iraq with this authentic Kleicha recipe, the cherished national cookie that graces tables during joyous celebrations like Eid. Renowned for its buttery, soft yet slightly crisp dough, Kleicha offers a delightful textural contrast that perfectly complements its aromatic fillings. While the cinnamon-infused date Kleicha remains a classic and perhaps the most iconic variation, a lesser-known but equally captivating version features a fragrant cardamom-spiced walnut filling. This detailed guide reveals time-honored techniques and invaluable tips, including a secret family recipe for the dough, ensuring your homemade Kleicha achieves that irresistible balance of sweet and savory notes. Though the process may seem intricate at first glance, this step-by-step tutorial is designed to empower every home baker to master this exquisite Iraqi pastry from scratch.
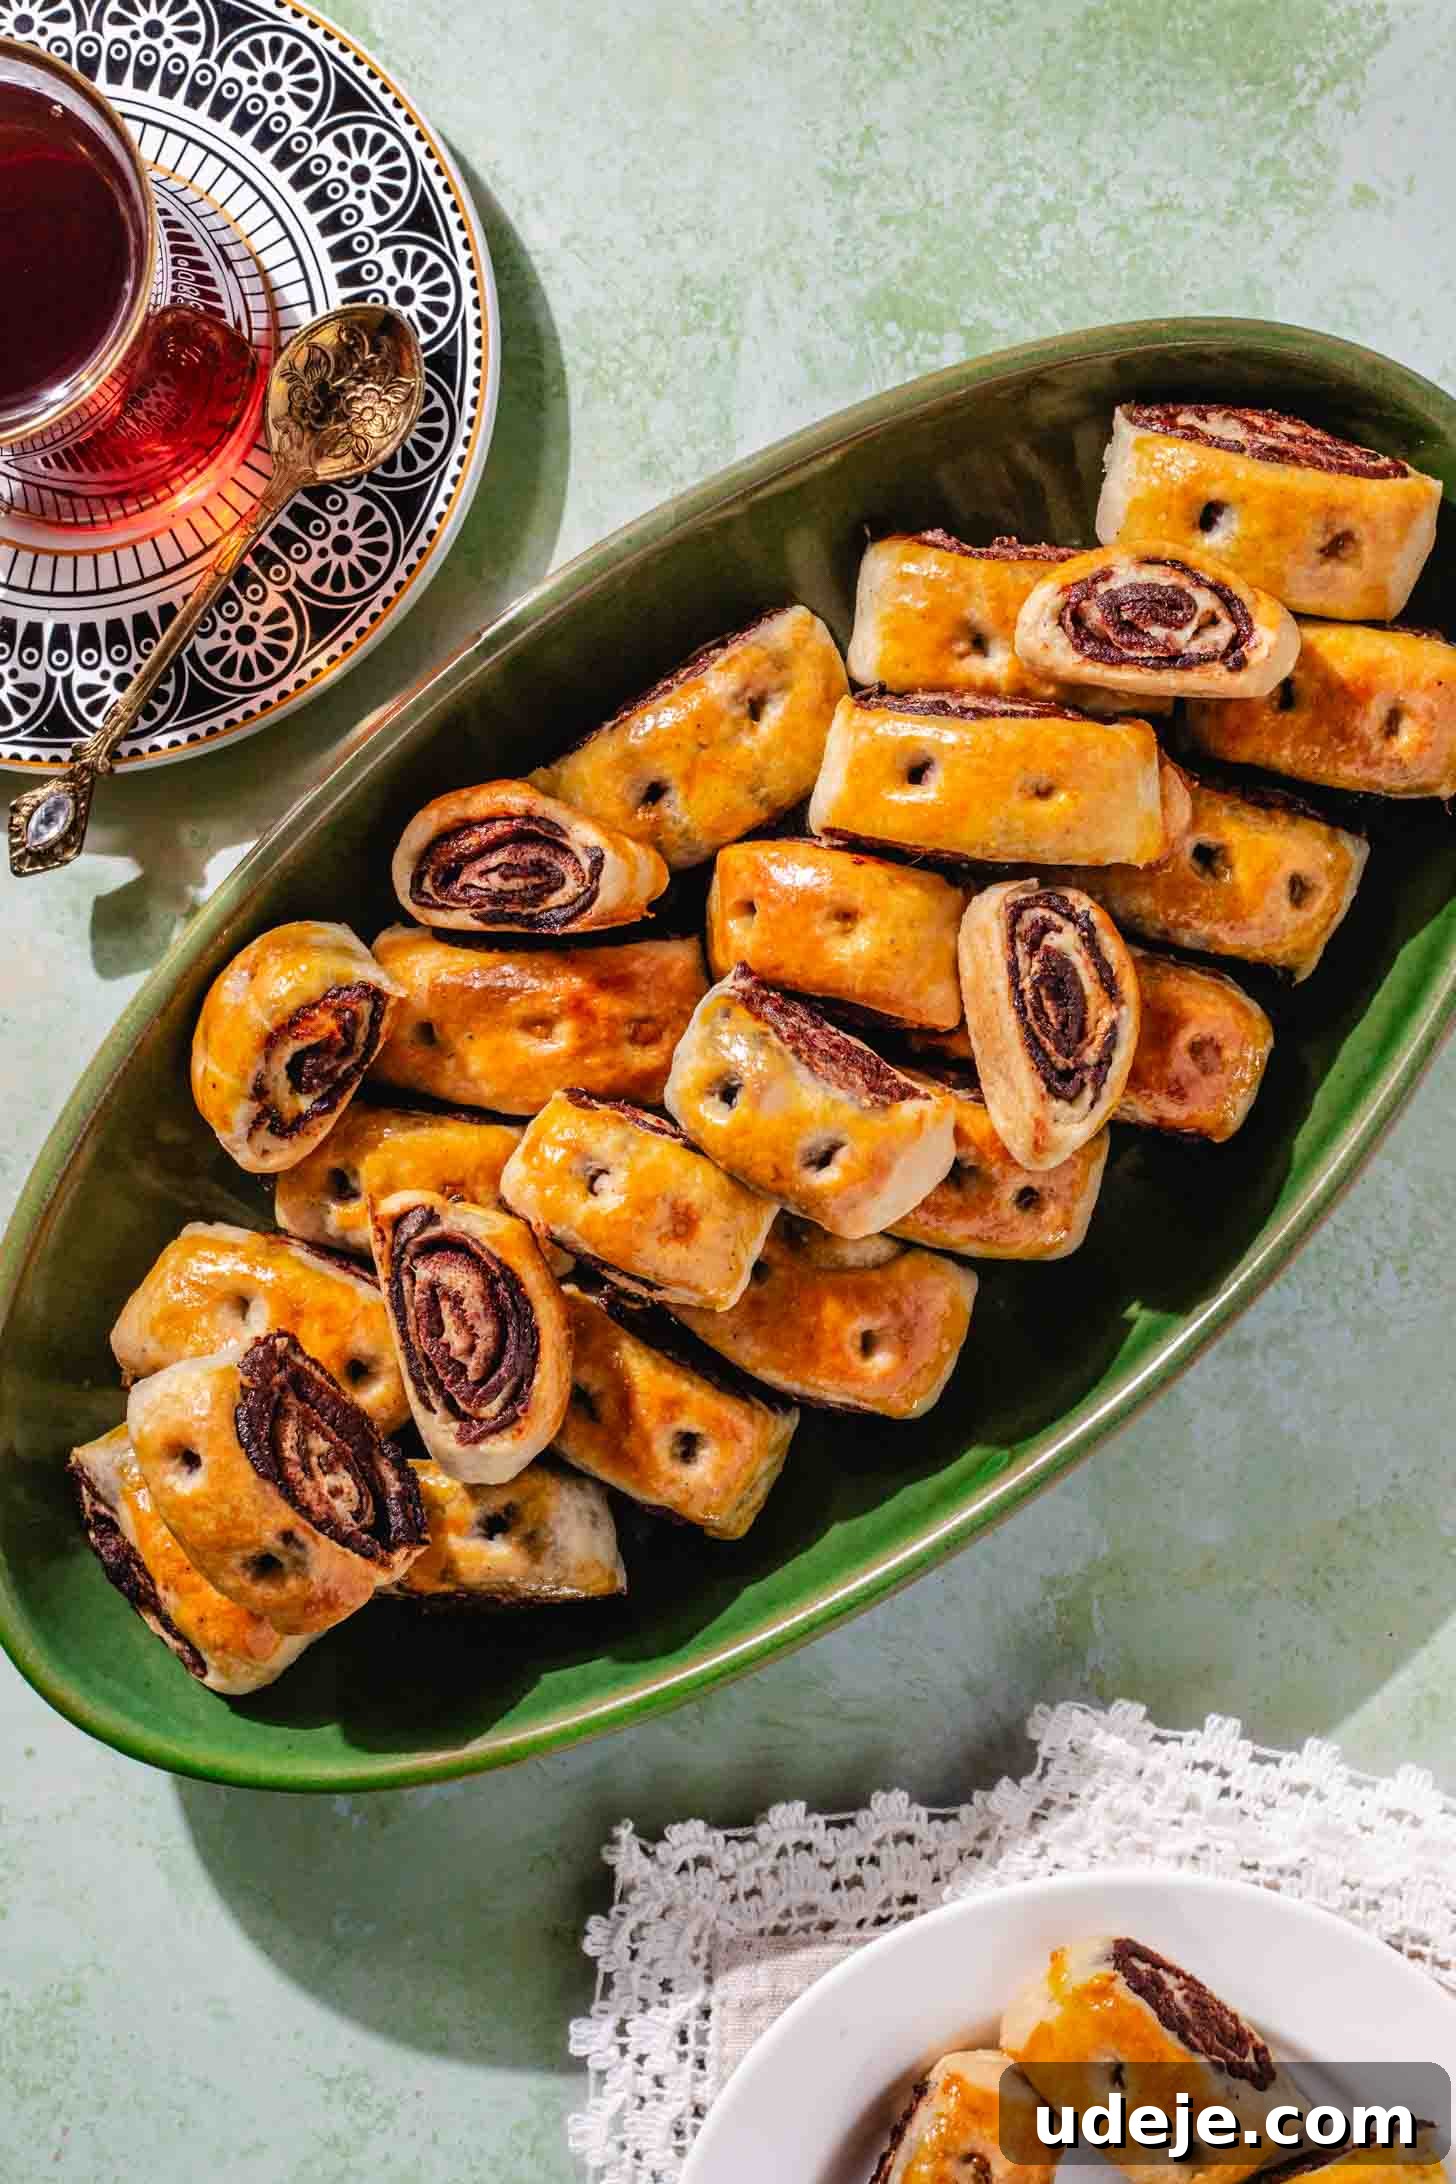
Iraq’s Most Beloved Eid Cookie: Kleicha
For Iraqis around the globe, Kleicha isn’t just a cookie; it’s a symbol of heritage, hospitality, and communal joy. Growing up in an Iraqi-Canadian household, the arrival of Eid was synonymous with the comforting aroma of freshly baked Kleicha emanating from my mother’s kitchen. She would meticulously prepare colossal trays, not solely for our family’s enjoyment, but also for sharing with friends and neighbors, extending the warmth and blessings of Eid to everyone. My sisters and I would eagerly gather, observing her skilled hands, occasionally lending a hand ourselves. My particular task was often the intricate braiding of the walnut Kleicha edges, a small but significant contribution to the family tradition.
Even after moving to London, UK, in my first year of marriage, the essence of Eid remained incomplete without this traditional treat. To my delight, my mother orchestrated a heartfelt surprise, shipping a large box of Kleicha directly to my doorstep. It arrived at the most opportune moment, just as I had finished brewing a steaming cup of authentic Arabic tea – an pairing that transcends mere refreshment, offering a truly perfect culinary embrace.
Kleicha boasts several captivating variations, each distinct in its filling and shaping. The most widely recognized and popular form features a sweet date paste generously flavored with cinnamon, typically rolled and shaped to resemble small cinnamon rolls. However, my personal favorite is the one filled with a rich, aromatic blend of walnuts and cardamom, often crafted into delicate half-moon pastries. This comprehensive recipe guides you through preparing both these beloved fillings. For those new to Kleicha making, I recommend starting with the date version, as its shaping process is generally considered simpler and quicker.
Essential Ingredients for Kleicha Dough & Fillings
The foundation of an exceptional Kleicha lies in its yeast-based dough, crafted primarily from all-purpose flour. My mother’s recipe, perfected over generations, incorporates two key elements that elevate it from good to truly irresistible, creating a unique texture and flavor profile:
- A harmonious blend of butter and vegetable oil: Utilizing equal proportions of both fats is crucial. The vegetable oil contributes to a delicately crisp exterior, while the butter infuses the dough with unparalleled richness and ensures a tender, soft crumb. This combination results in the perfect balance of flakiness and chewiness.
- A generous hand with salt and freshly ground cardamom: The addition of a substantial amount of salt to the dough is a secret weapon, providing a subtle savory undertone that beautifully contrasts and enhances the sweetness of the fillings. Furthermore, using freshly ground cardamom is paramount. Its aroma and flavor are significantly more potent and vibrant than pre-ground varieties, permeating the dough with an exotic, warm spice that is the hallmark of authentic Kleicha.
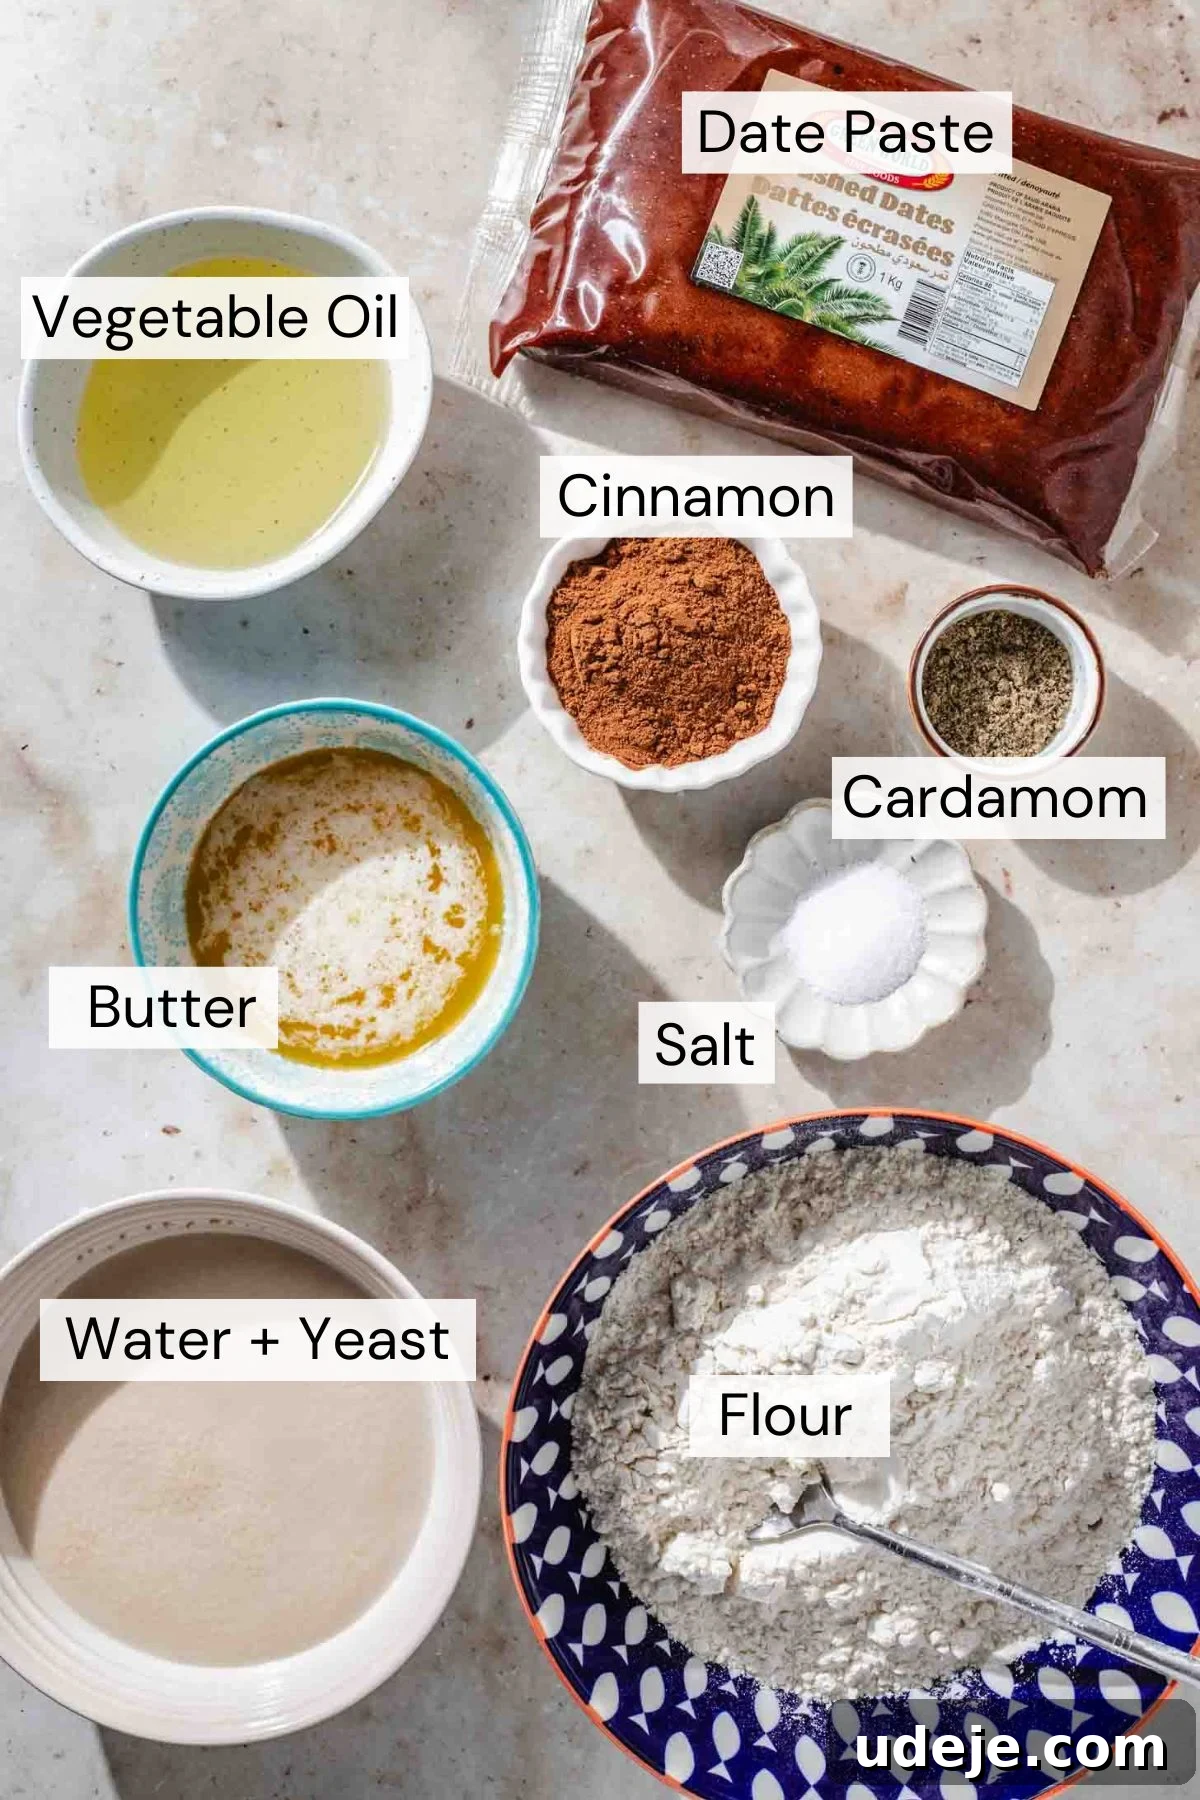
For the classic date filling, you will need high-quality date paste and ground cinnamon. Opting for pre-made date paste saves considerable time and effort compared to preparing it from whole dates. For the nutty walnut filling, gather fresh walnuts, an egg (which acts as a binder), granulated sugar, and, once again, a healthy dose of freshly ground cardamom to ensure maximum flavor intensity.
Important Note: This recipe provides quantities for one batch of dough. This single batch is sufficient for either the full date filling recipe OR the full walnut filling recipe. If your heart desires a mix of both delectable fillings, remember to either double the dough recipe or halve the quantities for each individual filling to ensure you have enough dough to accommodate both.
Detailed Step-by-Step Kleicha Instructions
Please note: Precise measurements for all ingredients are provided in the recipe card at the end of this article. This section focuses on the detailed process.
Preparing the Kleicha Dough
Begin by preparing the dough. In a small bowl, combine warm water (ensure it’s warm to the touch, not hot, to avoid killing the yeast) with the instant yeast. Stir gently and allow the mixture to rest for approximately 5 minutes until the yeast activates and becomes frothy, indicating it’s alive and ready to work.
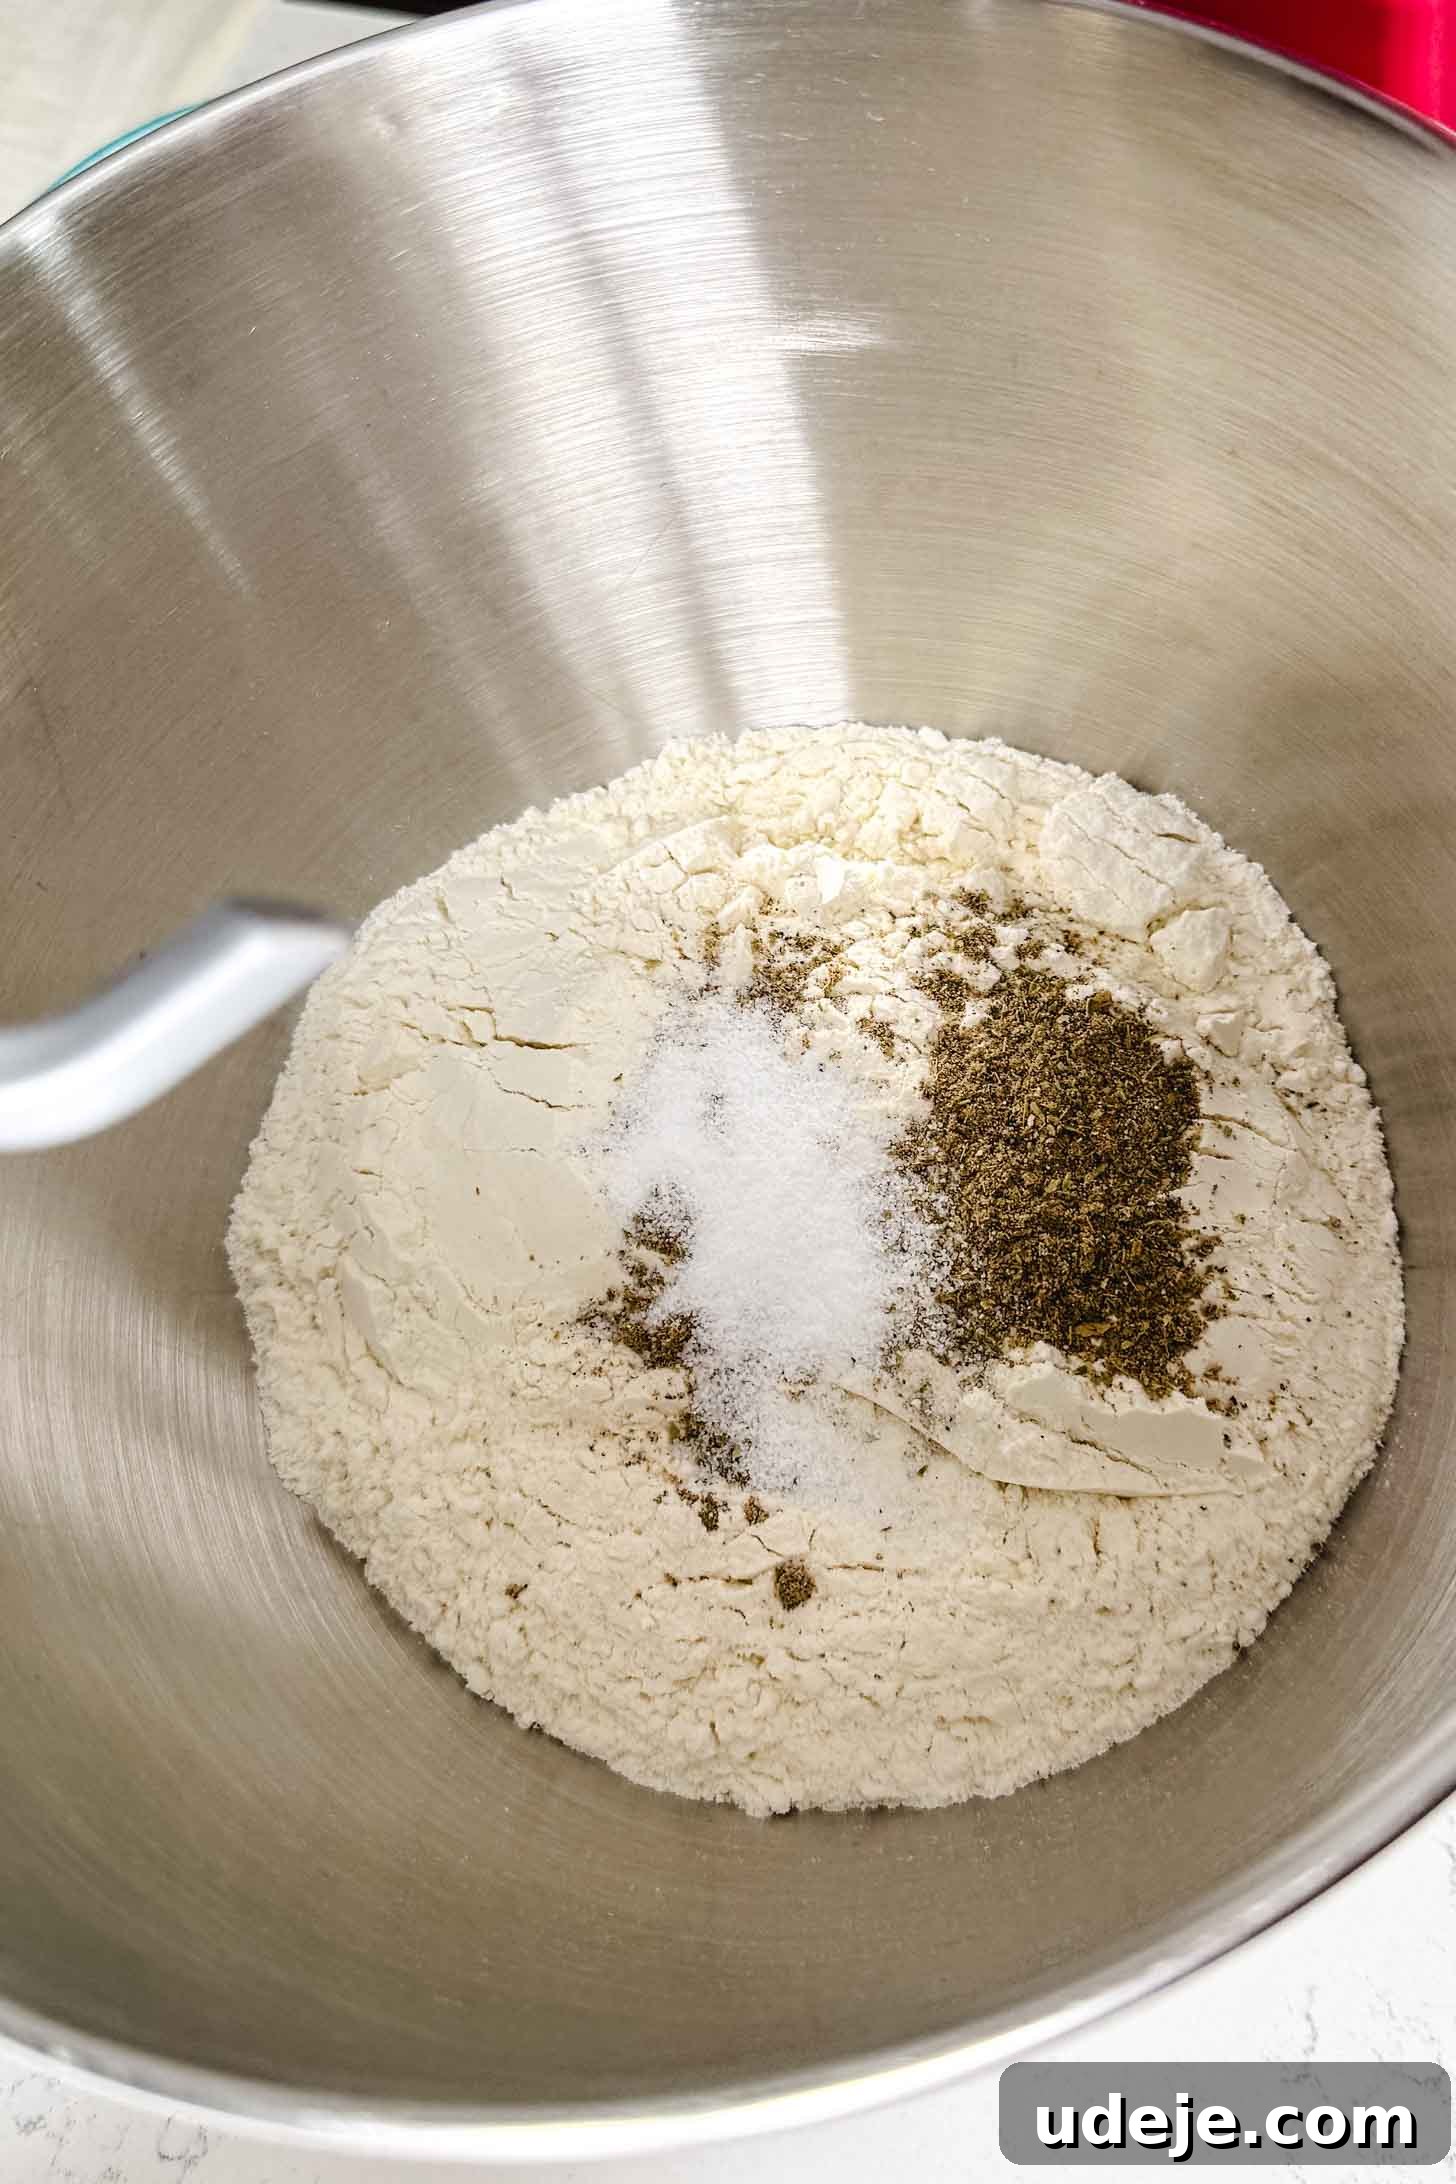
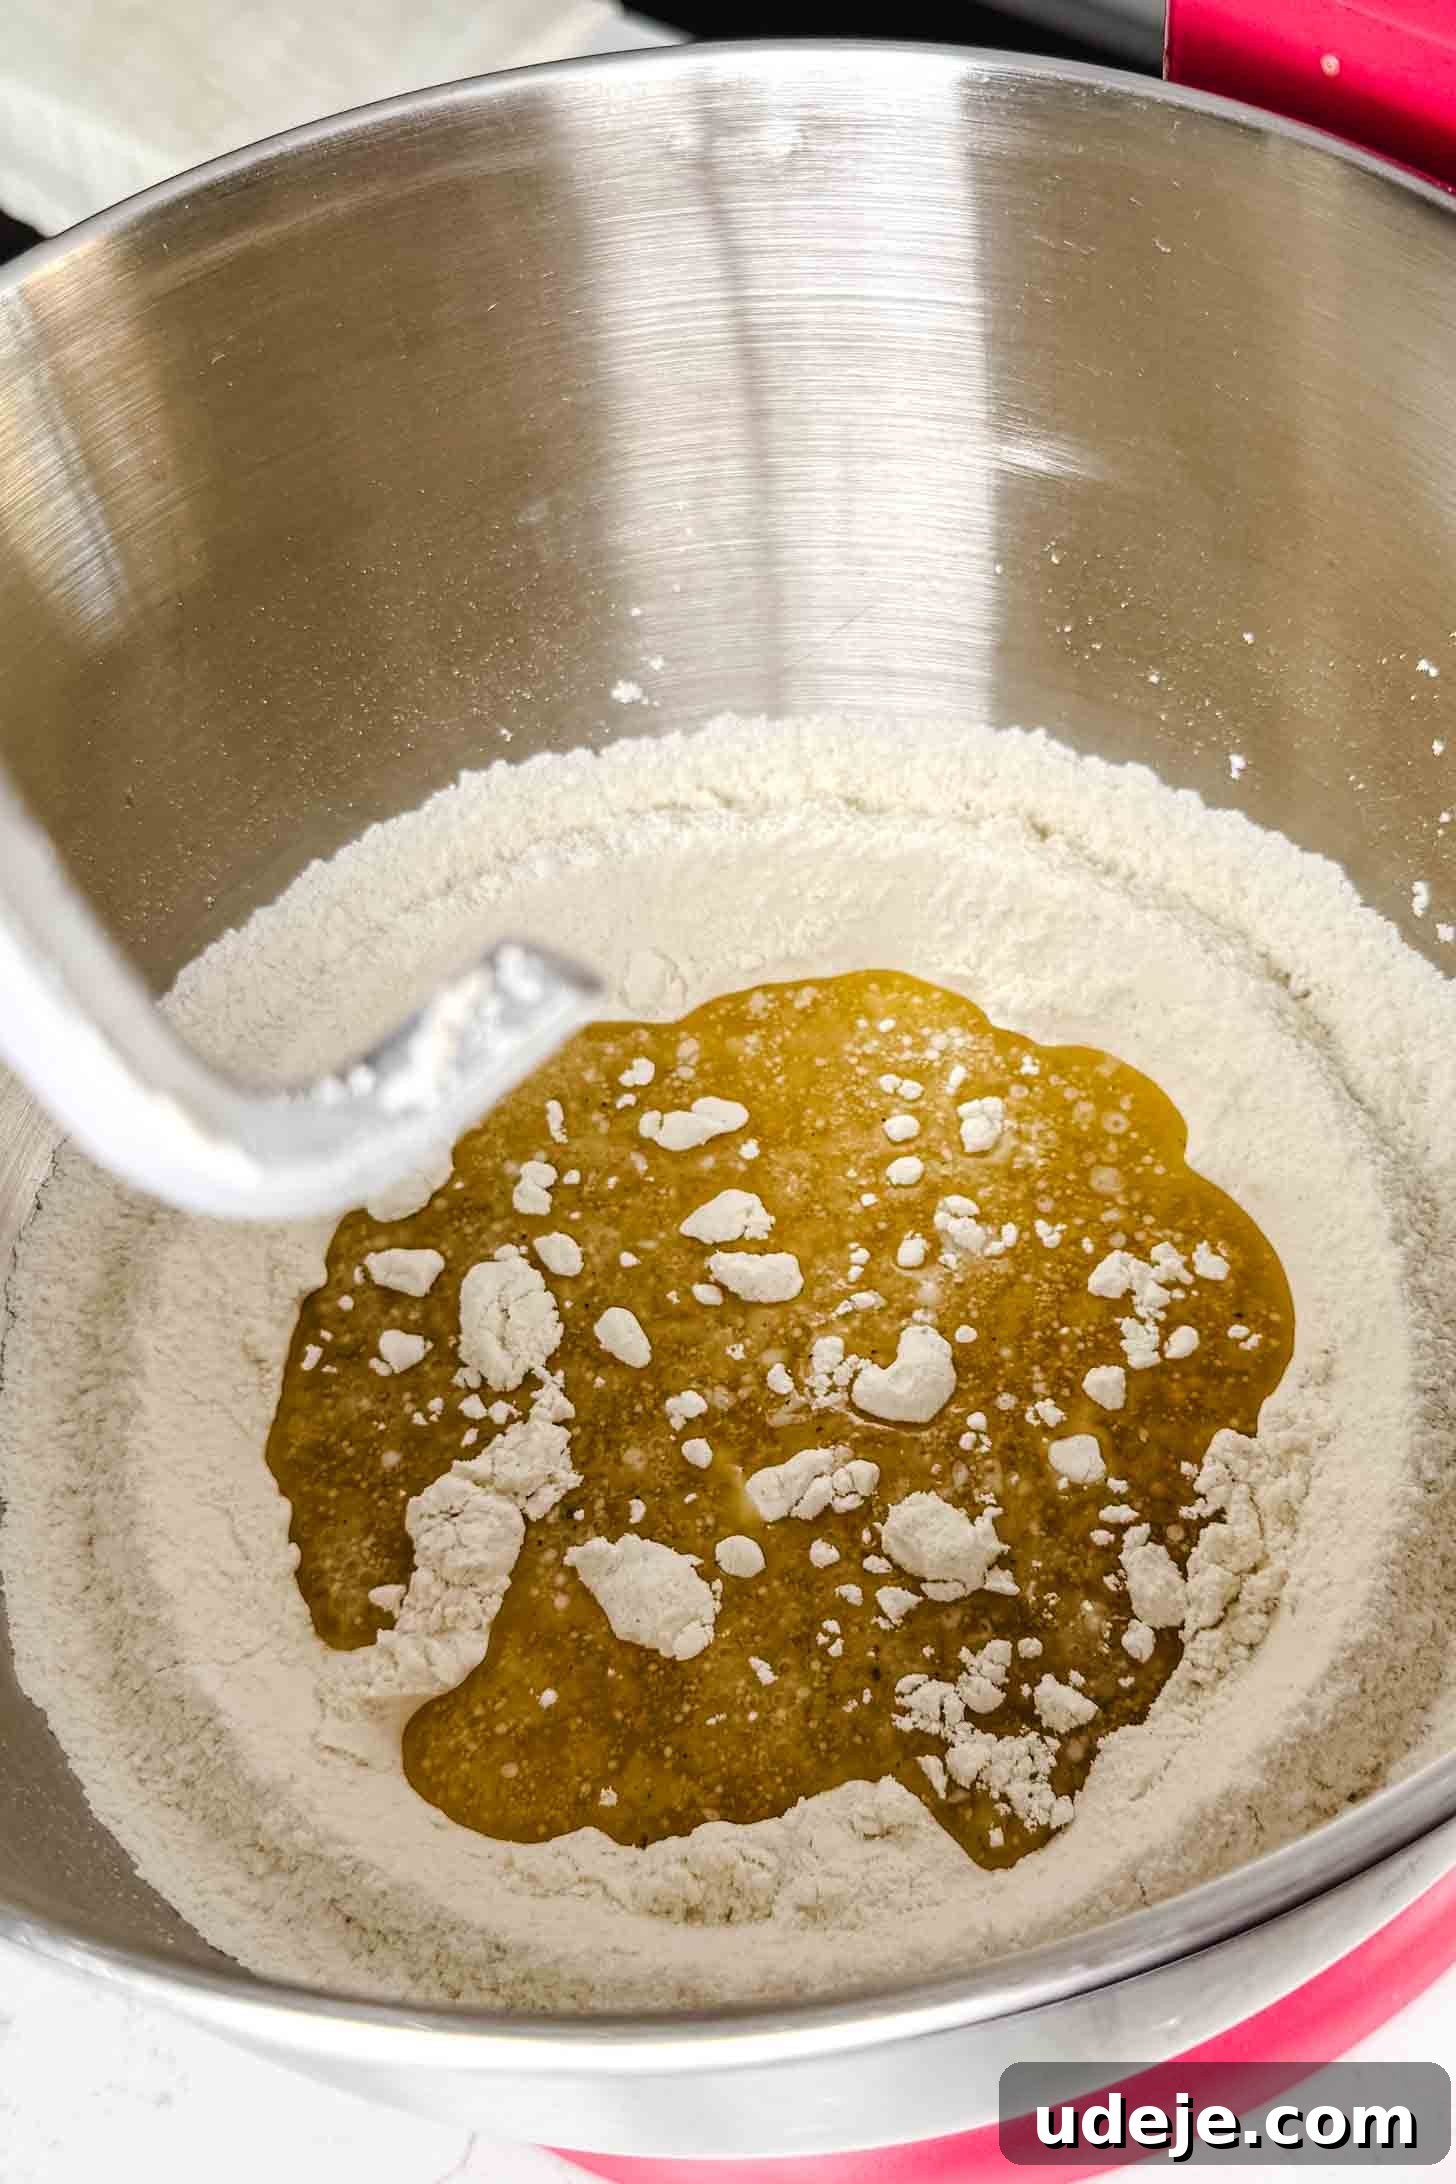
In the large bowl of a stand mixer, measure and add the all-purpose flour, salt, and freshly ground cardamom. Using a dough hook attachment, mix these dry ingredients briefly to combine them thoroughly. Next, pour in the melted butter and vegetable oil. Continue mixing with the dough hook on low speed until the fats are completely incorporated into the flour. The mixture will transform, taking on a texture reminiscent of wet sand, finely crumbled and evenly moist. This step typically takes about 5 minutes, ensuring the fats are well distributed for a tender dough.
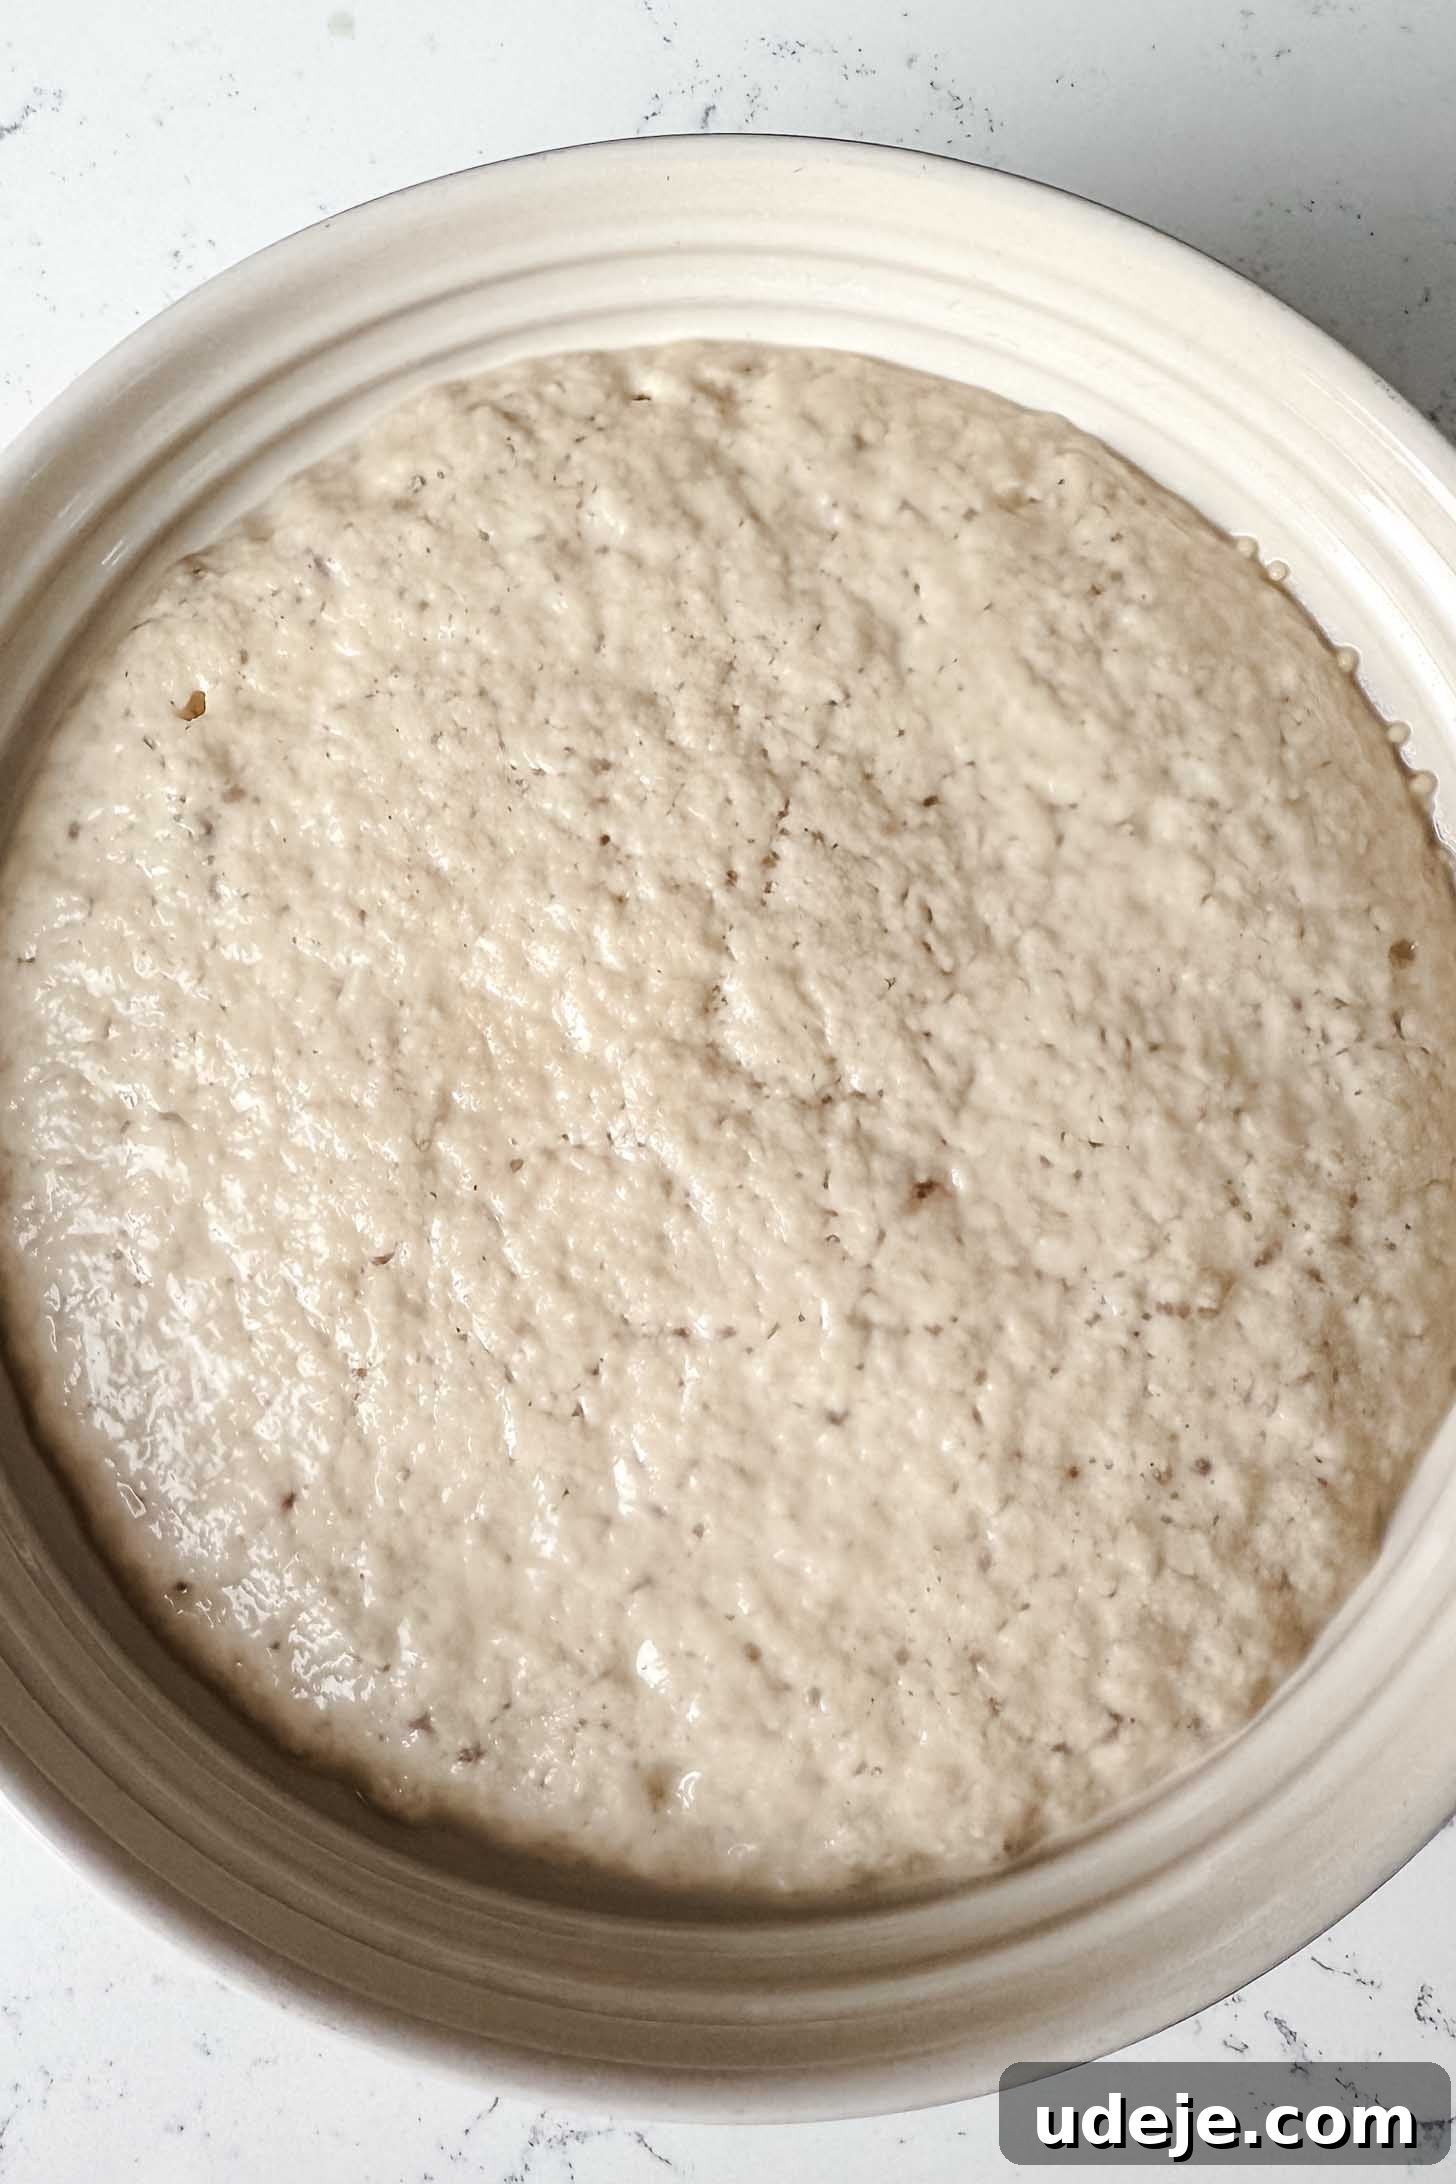
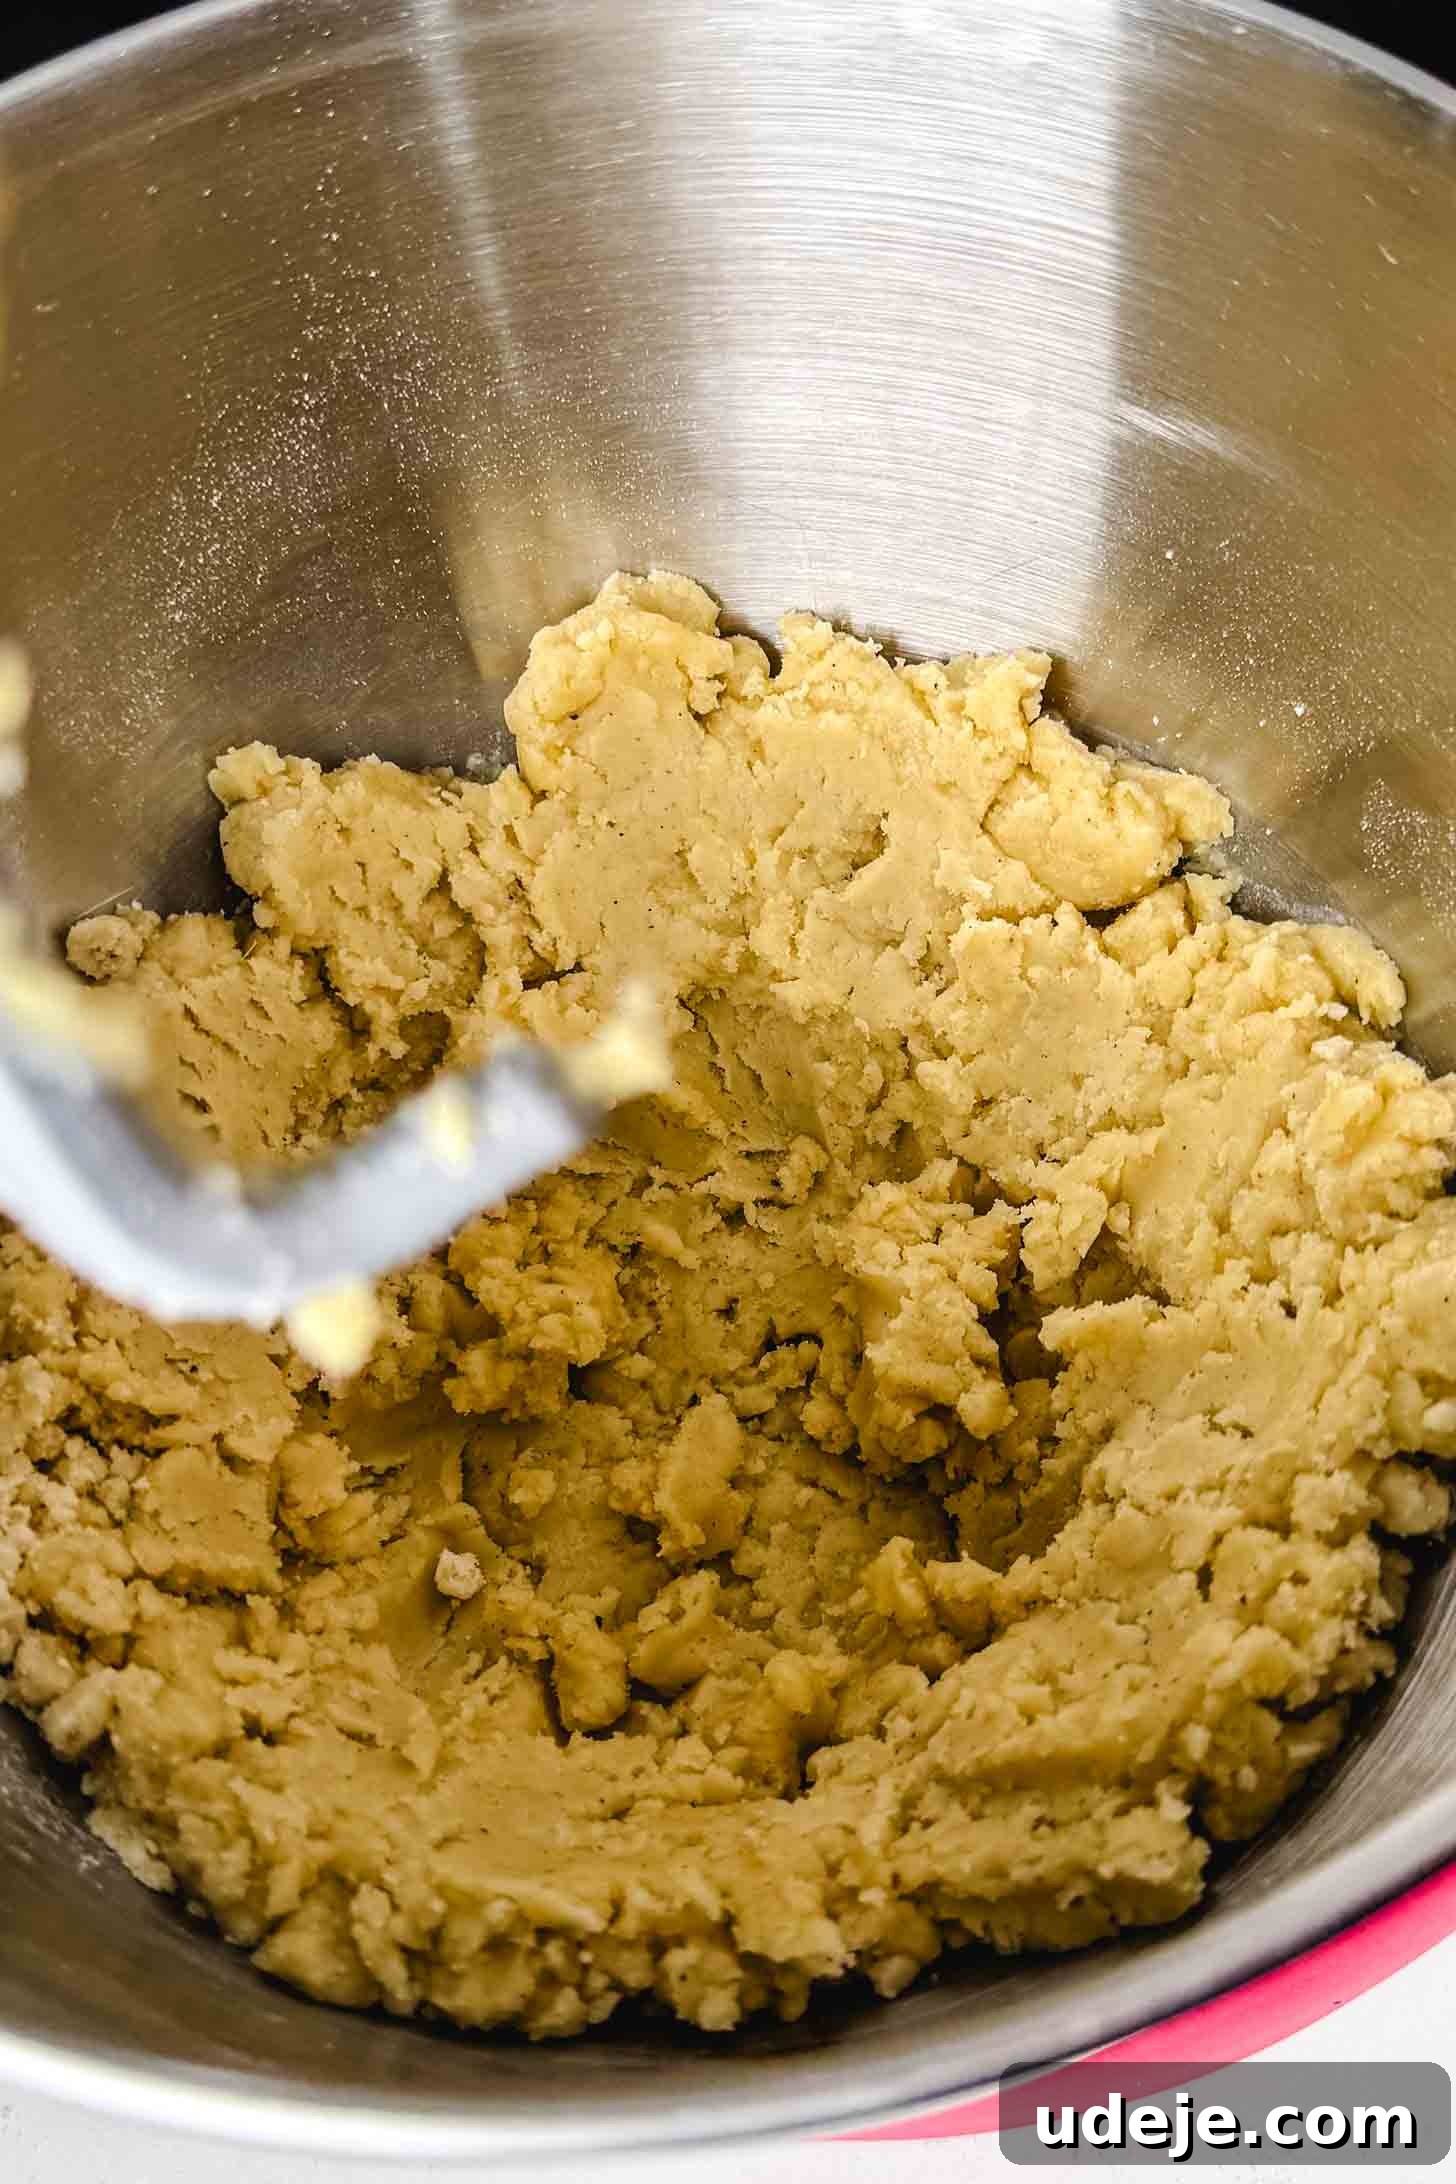
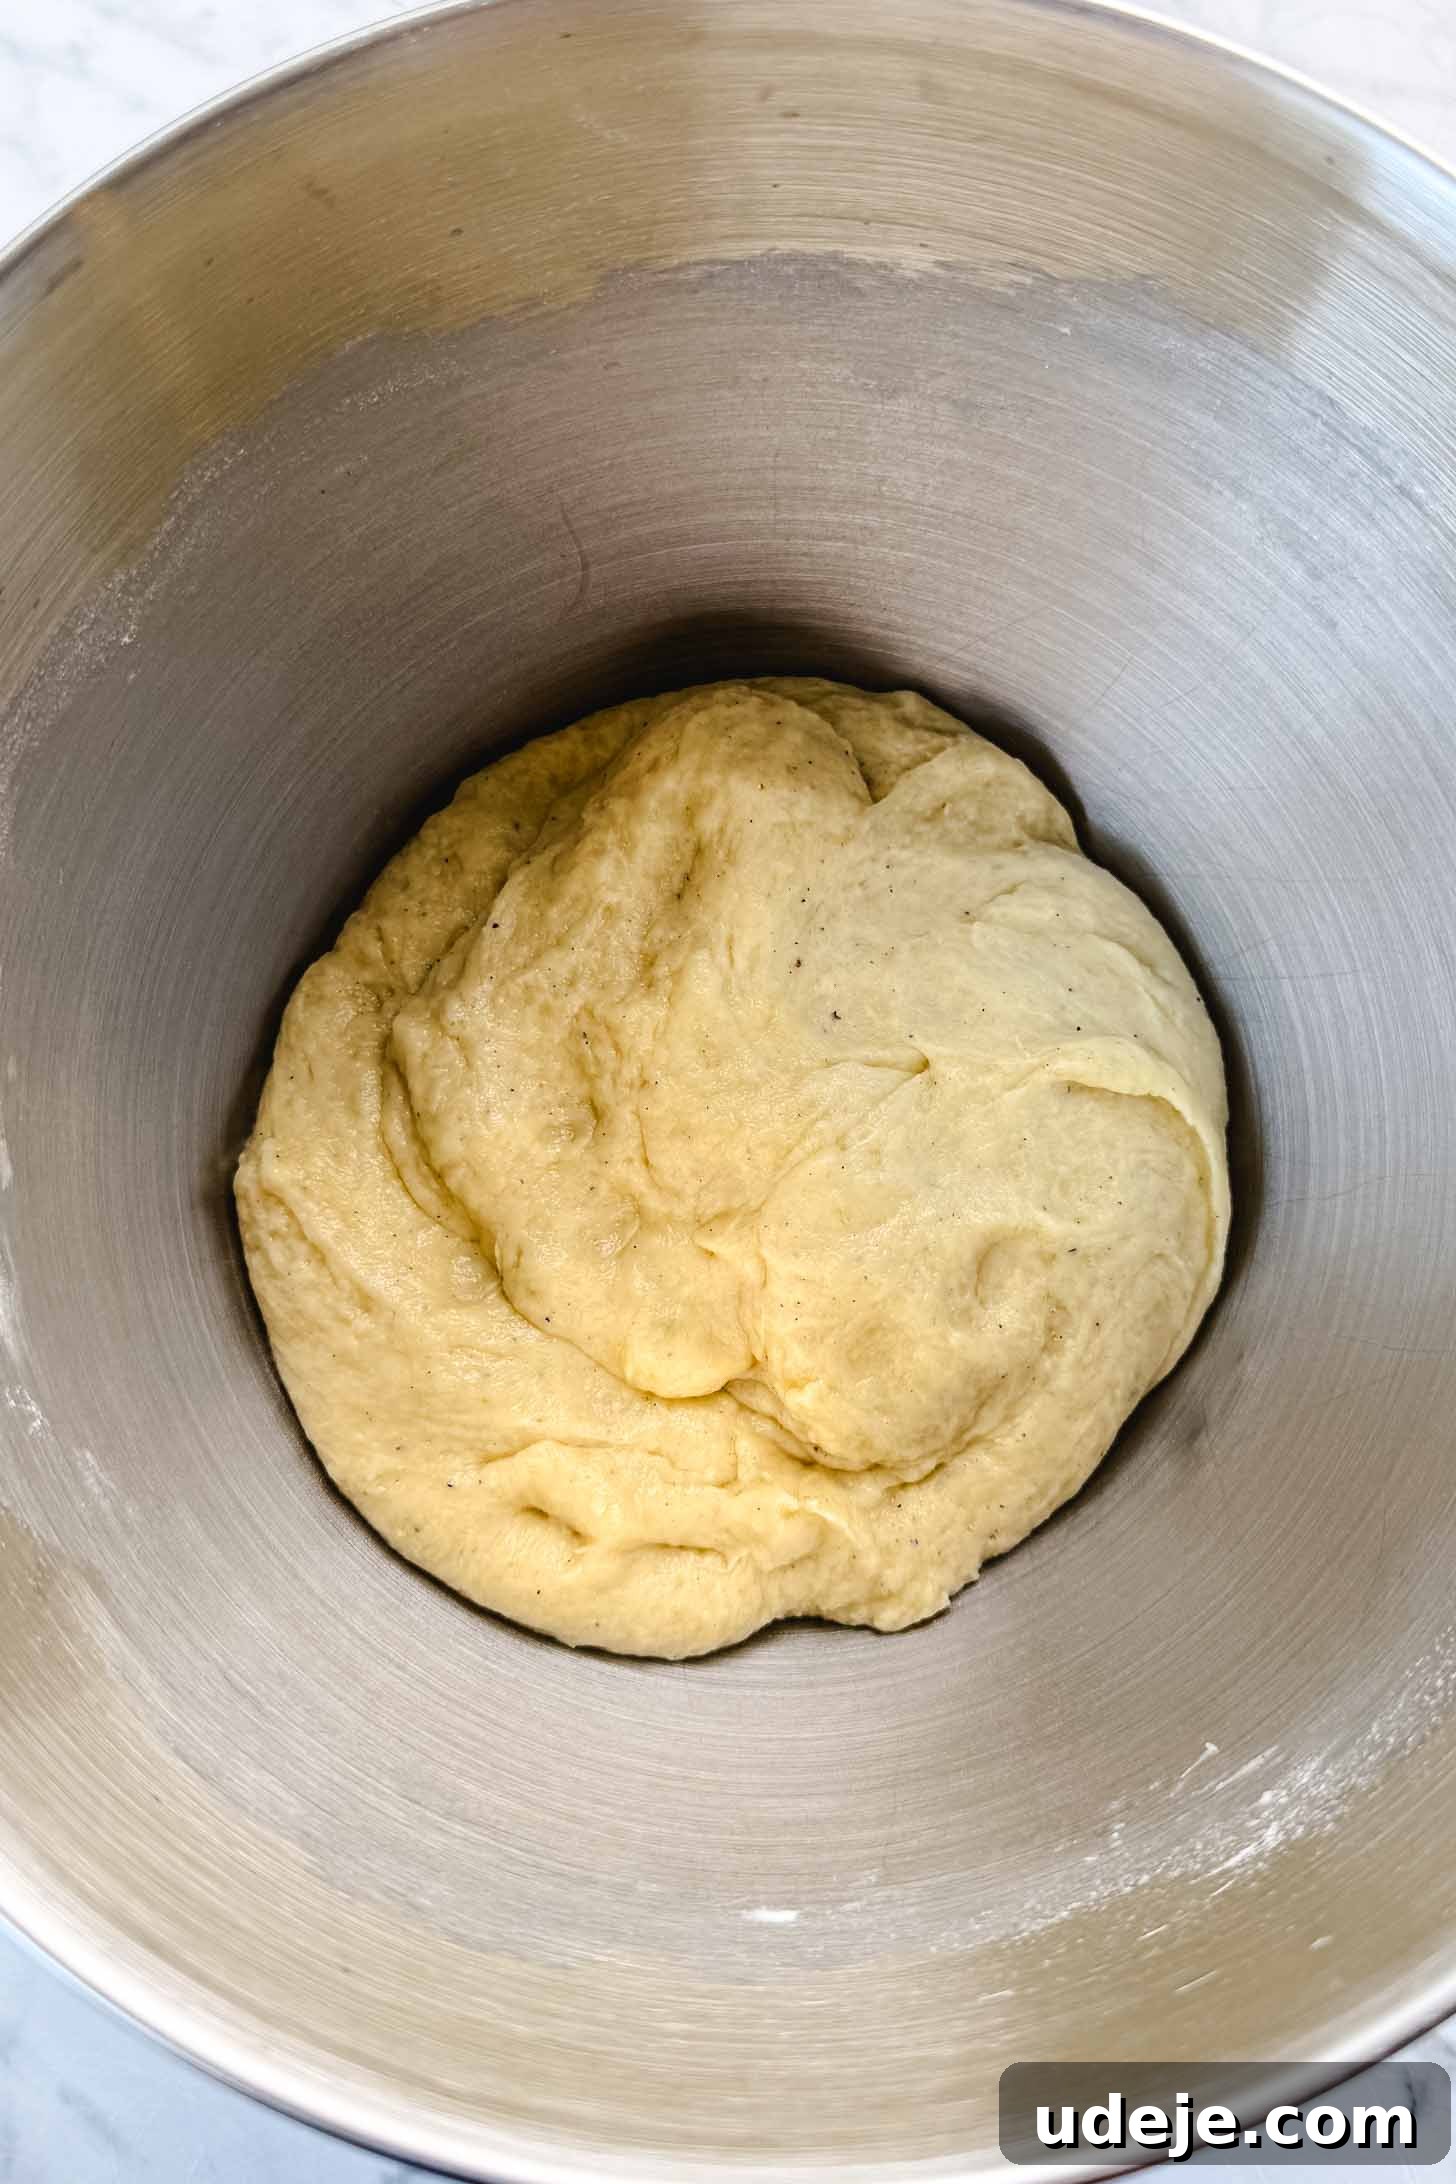
Now, pour the activated yeast and water mixture into the stand mixer bowl. Increase the mixer speed to medium and knead the dough for a minimum of 5 to 7 minutes. Observe the dough carefully; it’s ready when it gathers into a single large ball, and the sides of the mixing bowl are clean, indicating no sticky residue. The resulting dough will feel remarkably soft and slightly greasy to the touch, and you’ll notice small specks of cardamom distributed throughout. Once kneaded, cover the bowl with a clean kitchen towel and set it aside in a warm place to rise for approximately 1 hour. This resting period allows the flavors to meld and the dough to develop its characteristic texture while you prepare your chosen filling.
Crafting and Shaping Date Kleicha (The Classic Roll)
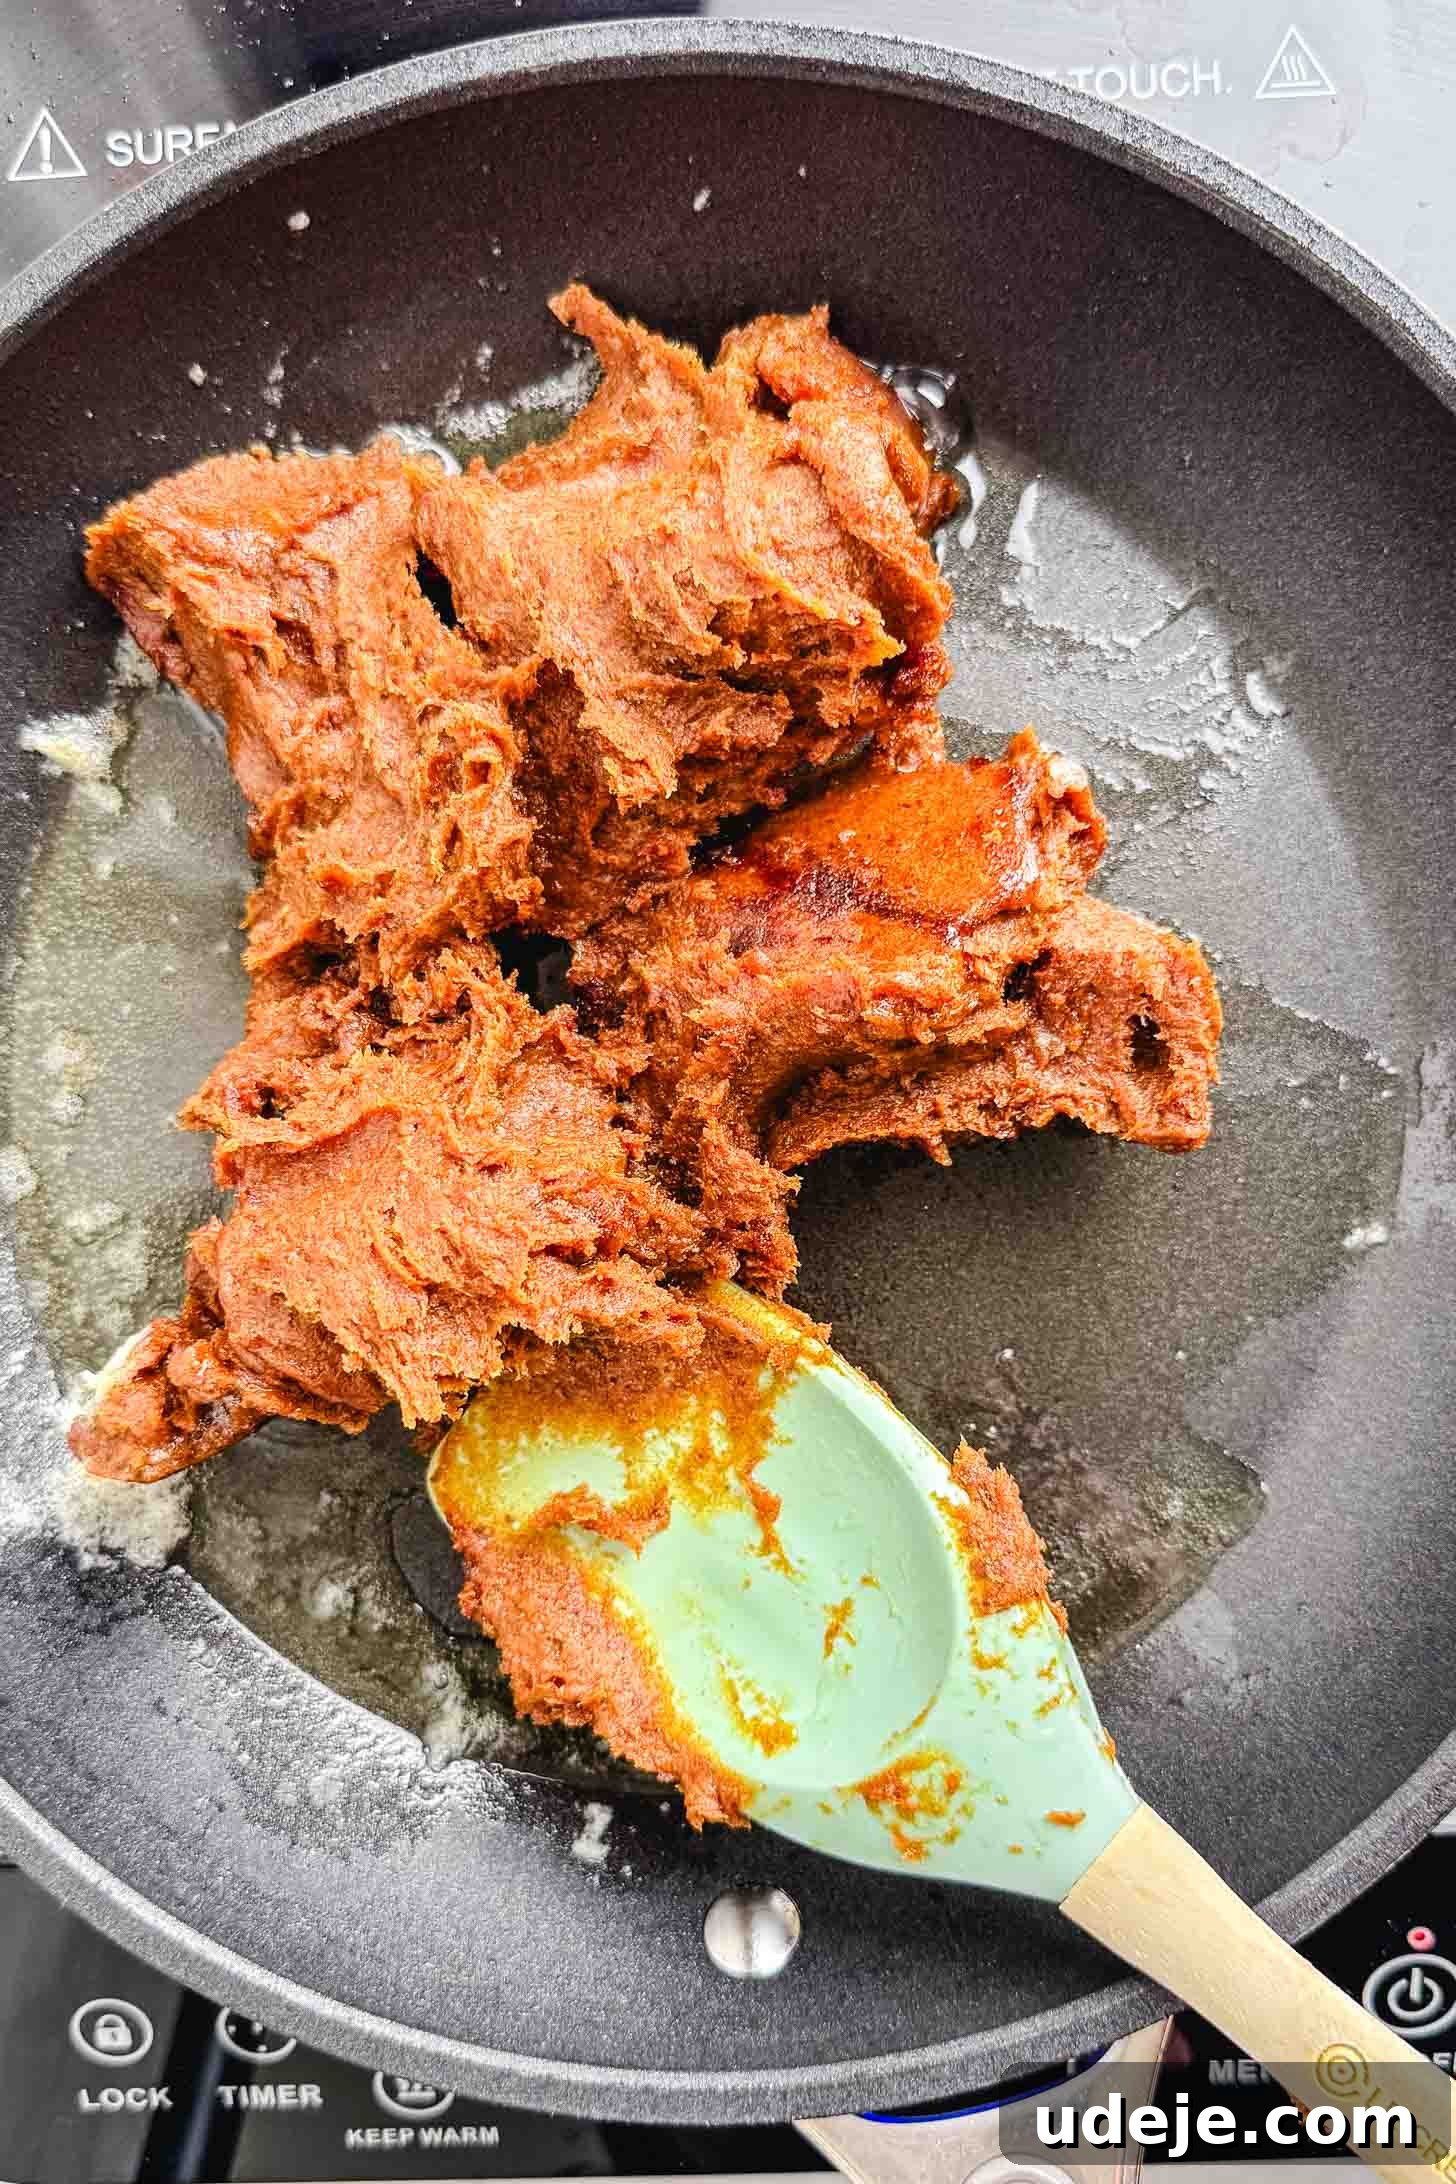
Begin by preheating your oven to 425°F (220°C) and positioning an oven rack on the bottom. In a non-stick skillet over medium-low heat, melt the specified amount of butter. Once melted, add the date paste to the pan. Using a non-stick spatula, stir and mix the date paste into the butter continuously for a few minutes. This crucial step not only softens the date paste but also caramelizes it slightly, intensifying its flavor and adding a delightful depth. The paste will be sticky, which is perfectly normal. Remove it from the heat and allow it to cool for several minutes, making it easier to handle.
Due to the inherent stickiness of date paste, proper surface preparation is key. You’ll need either a large non-stick silicone baking mat or a substantial piece of parchment paper or wax paper, measuring at least 15 by 20 inches, placed on a clean, flat work surface. My mother often uses a large, thick plastic bag, cut open to lie flat (avoid thin cling wrap, as it’s too delicate for this purpose).
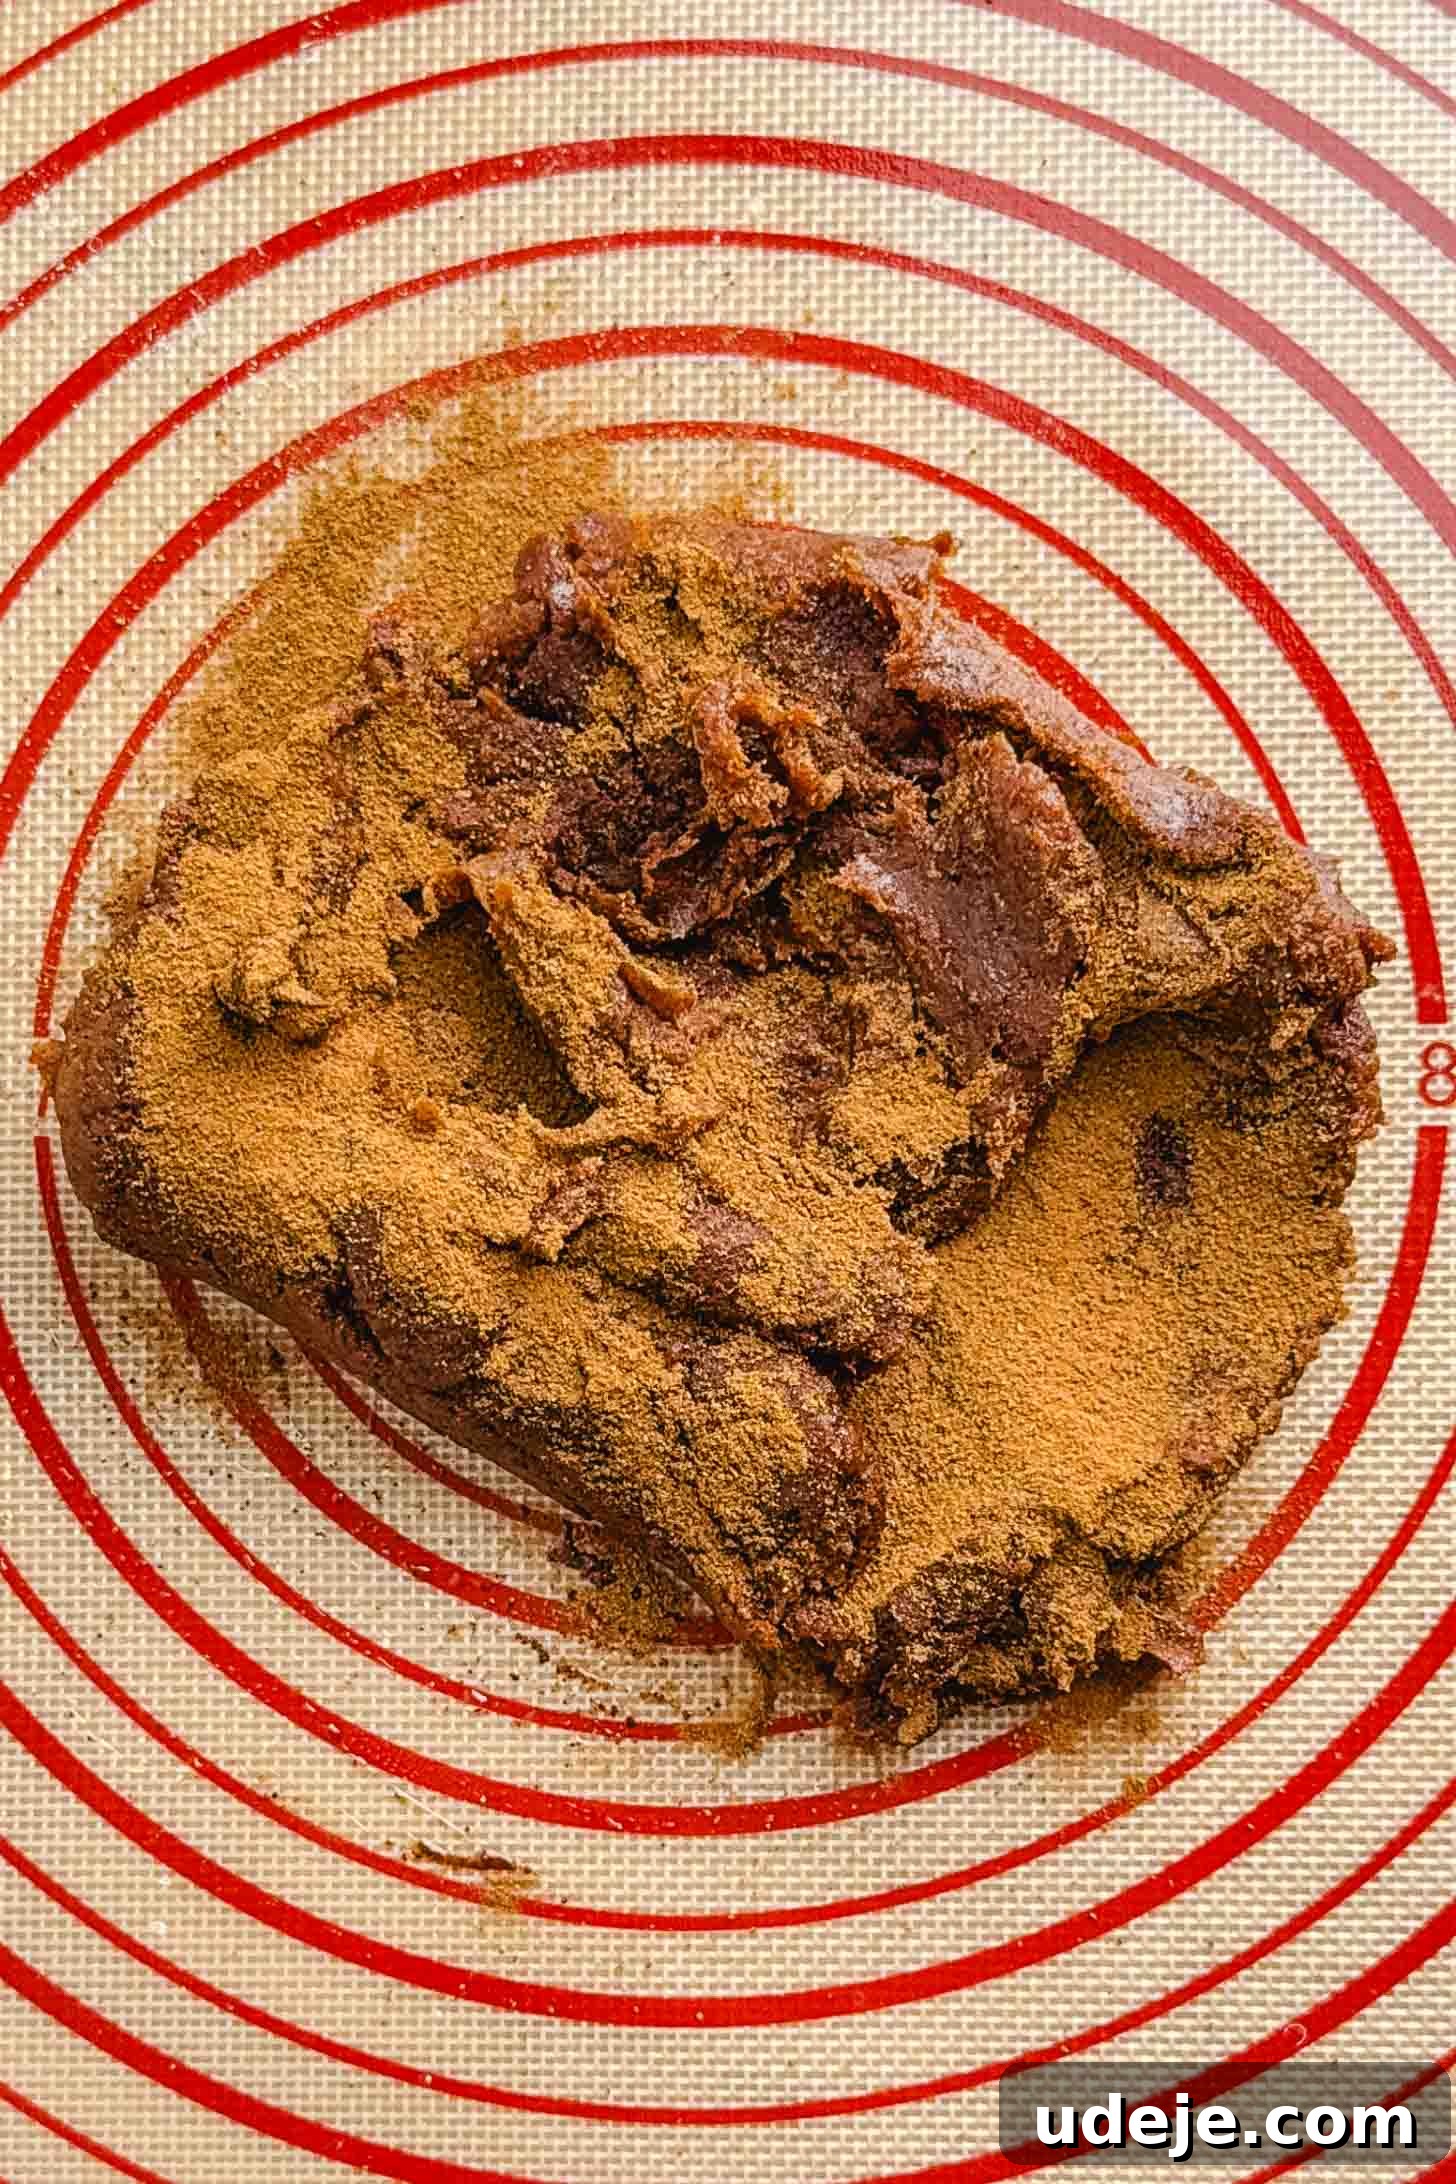
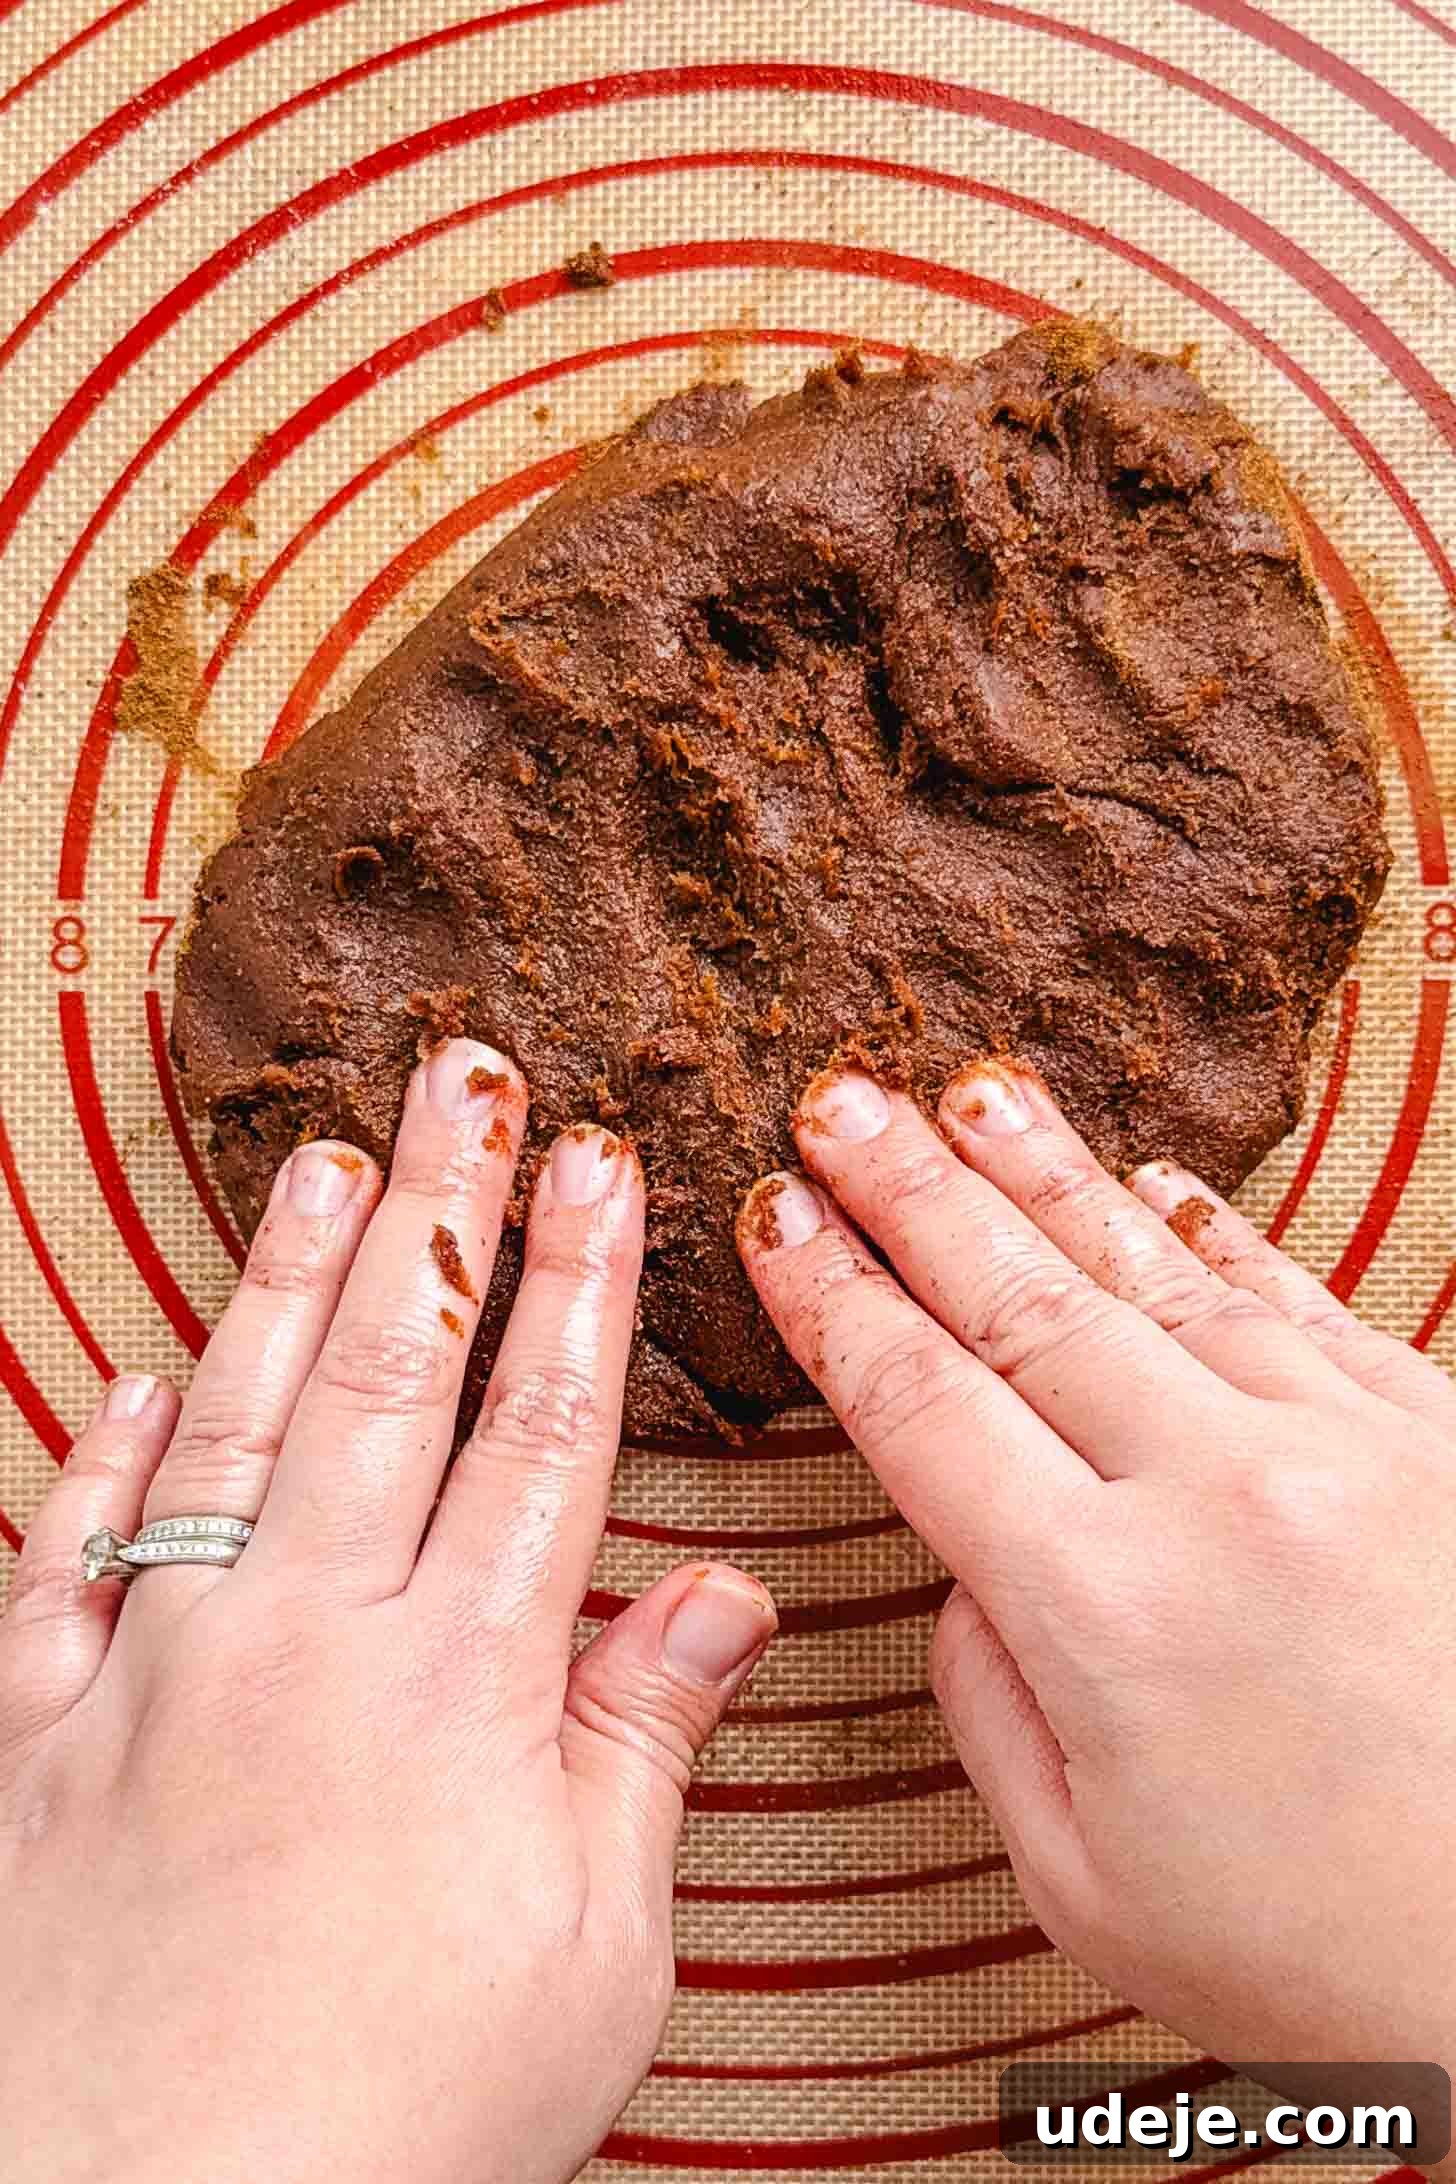
Place the cooled date paste onto your prepared non-stick surface. Sprinkle it generously with about three-quarters of the ground cinnamon. Use your hands to knead the cinnamon into the date paste. This action not only infuses the dates with aromatic spice but also helps to reduce its stickiness, making it more manageable for rolling. Continue kneading until the cinnamon is well incorporated.
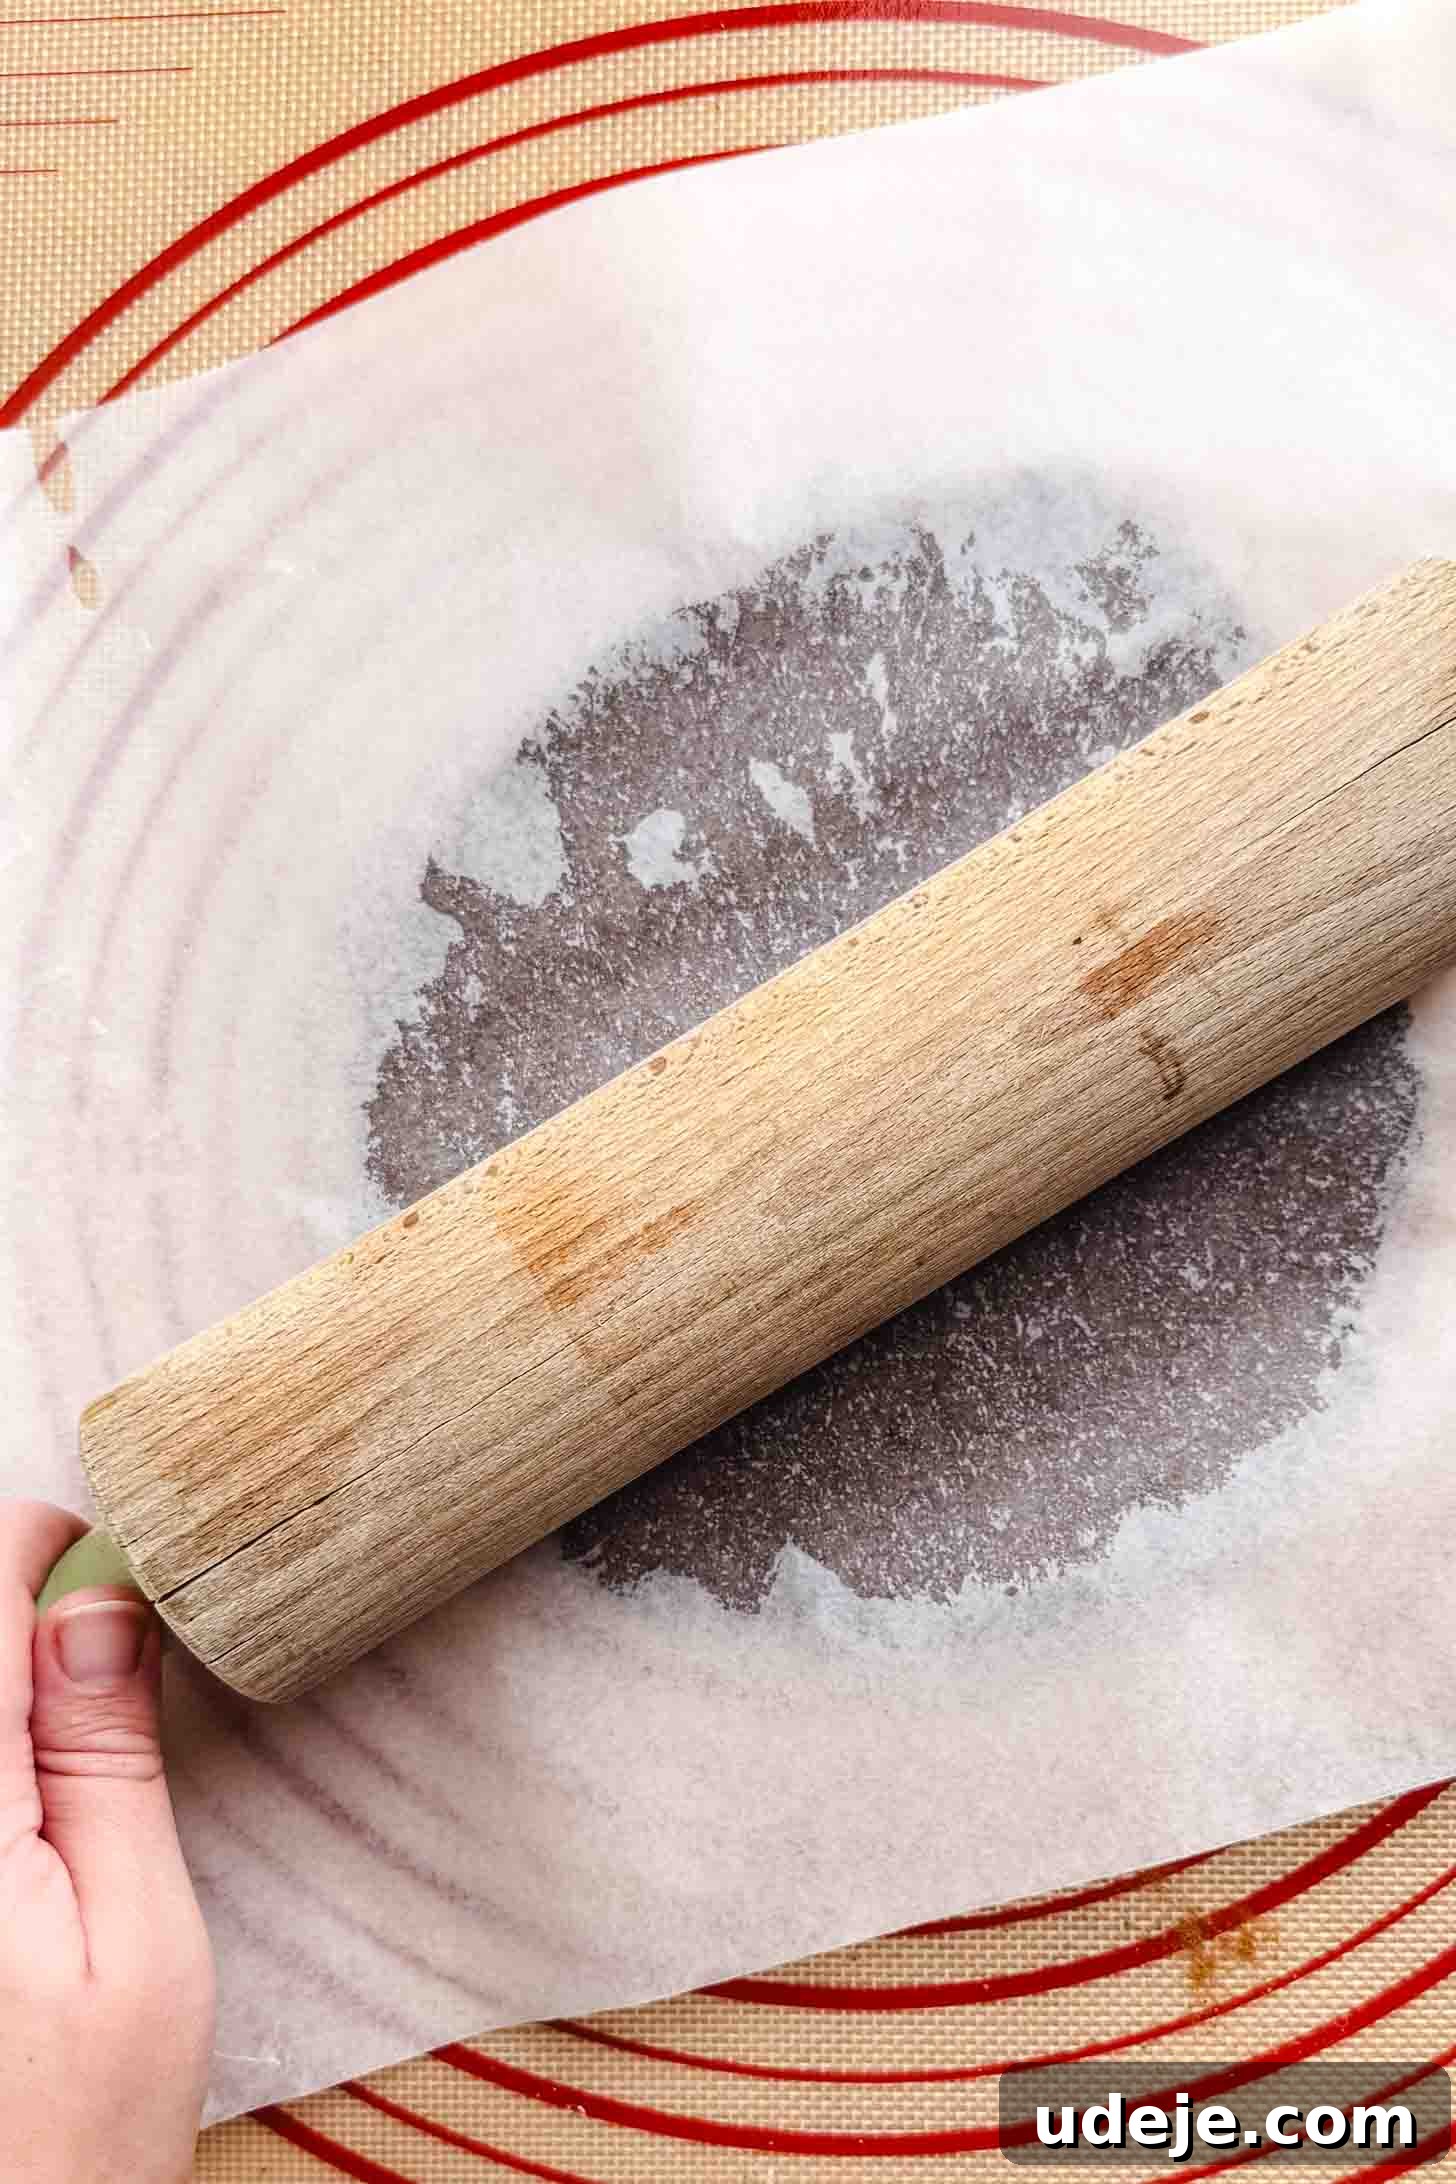
Gather the cinnamon-infused date paste into a disc shape on your mat. Lay another large piece of parchment paper or wax paper directly on top of the date disc. Using a rolling pin, roll out the date paste between the two sheets of paper into a very thin, even layer, approximately 1/8 inch (about 3mm) thick. This method prevents sticking and ensures uniformity. Simultaneously, on a separate clean surface, roll out your prepared Kleicha dough into an equally large and thin layer, also about 1/8 inch thick. The dough should be pliable and easy to work with.
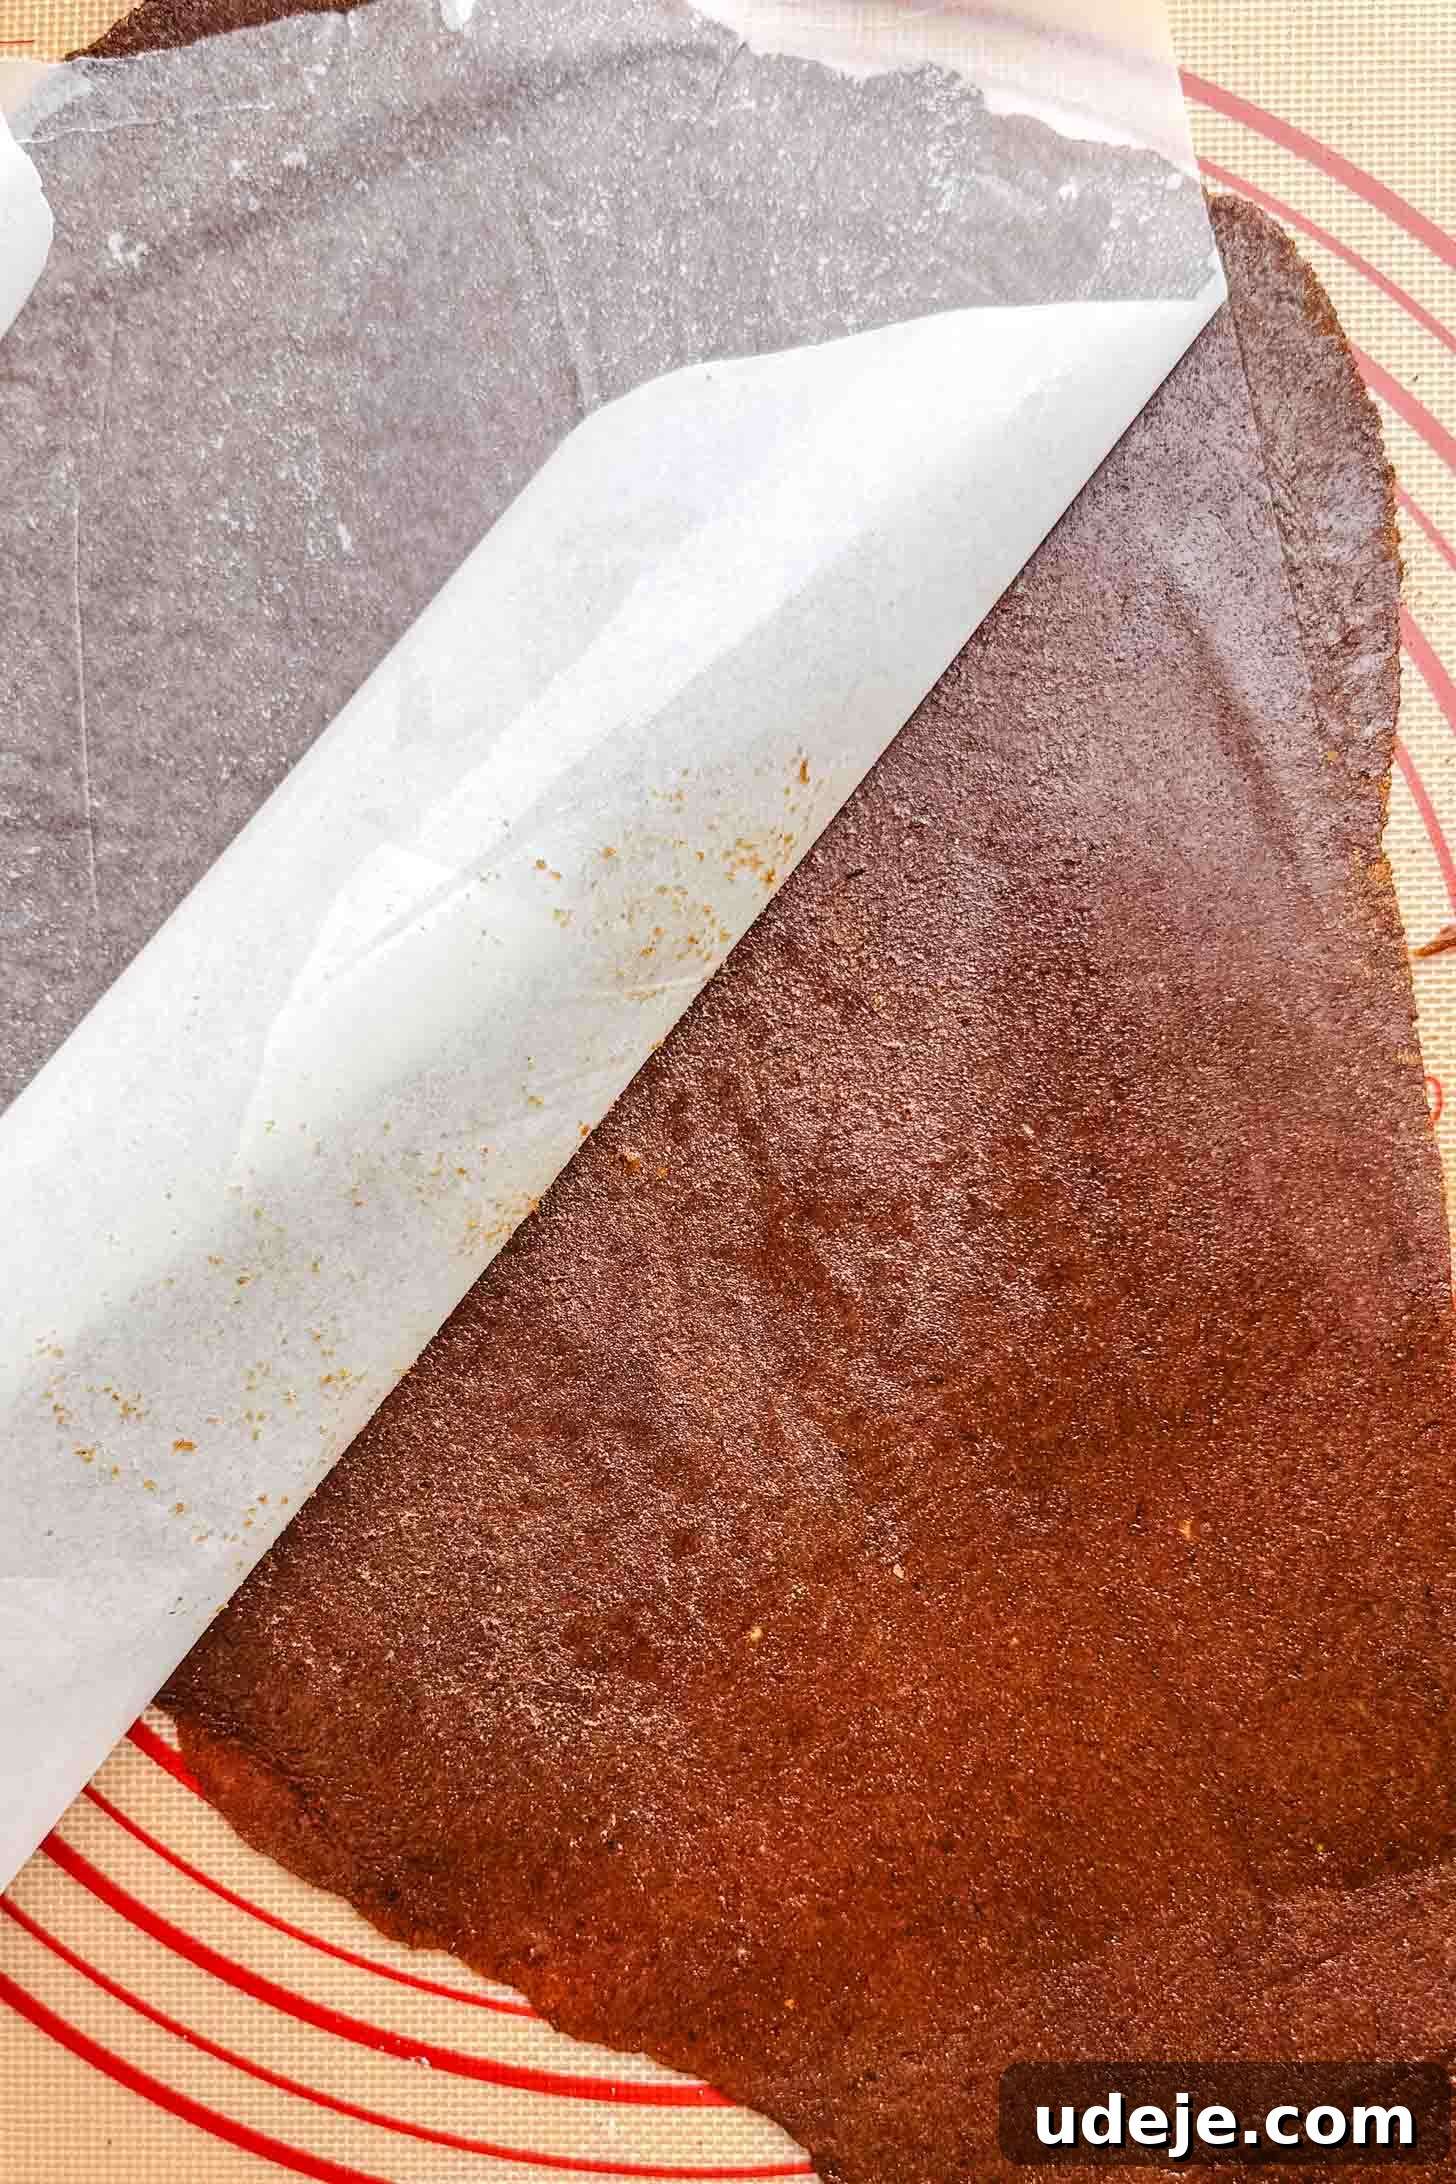
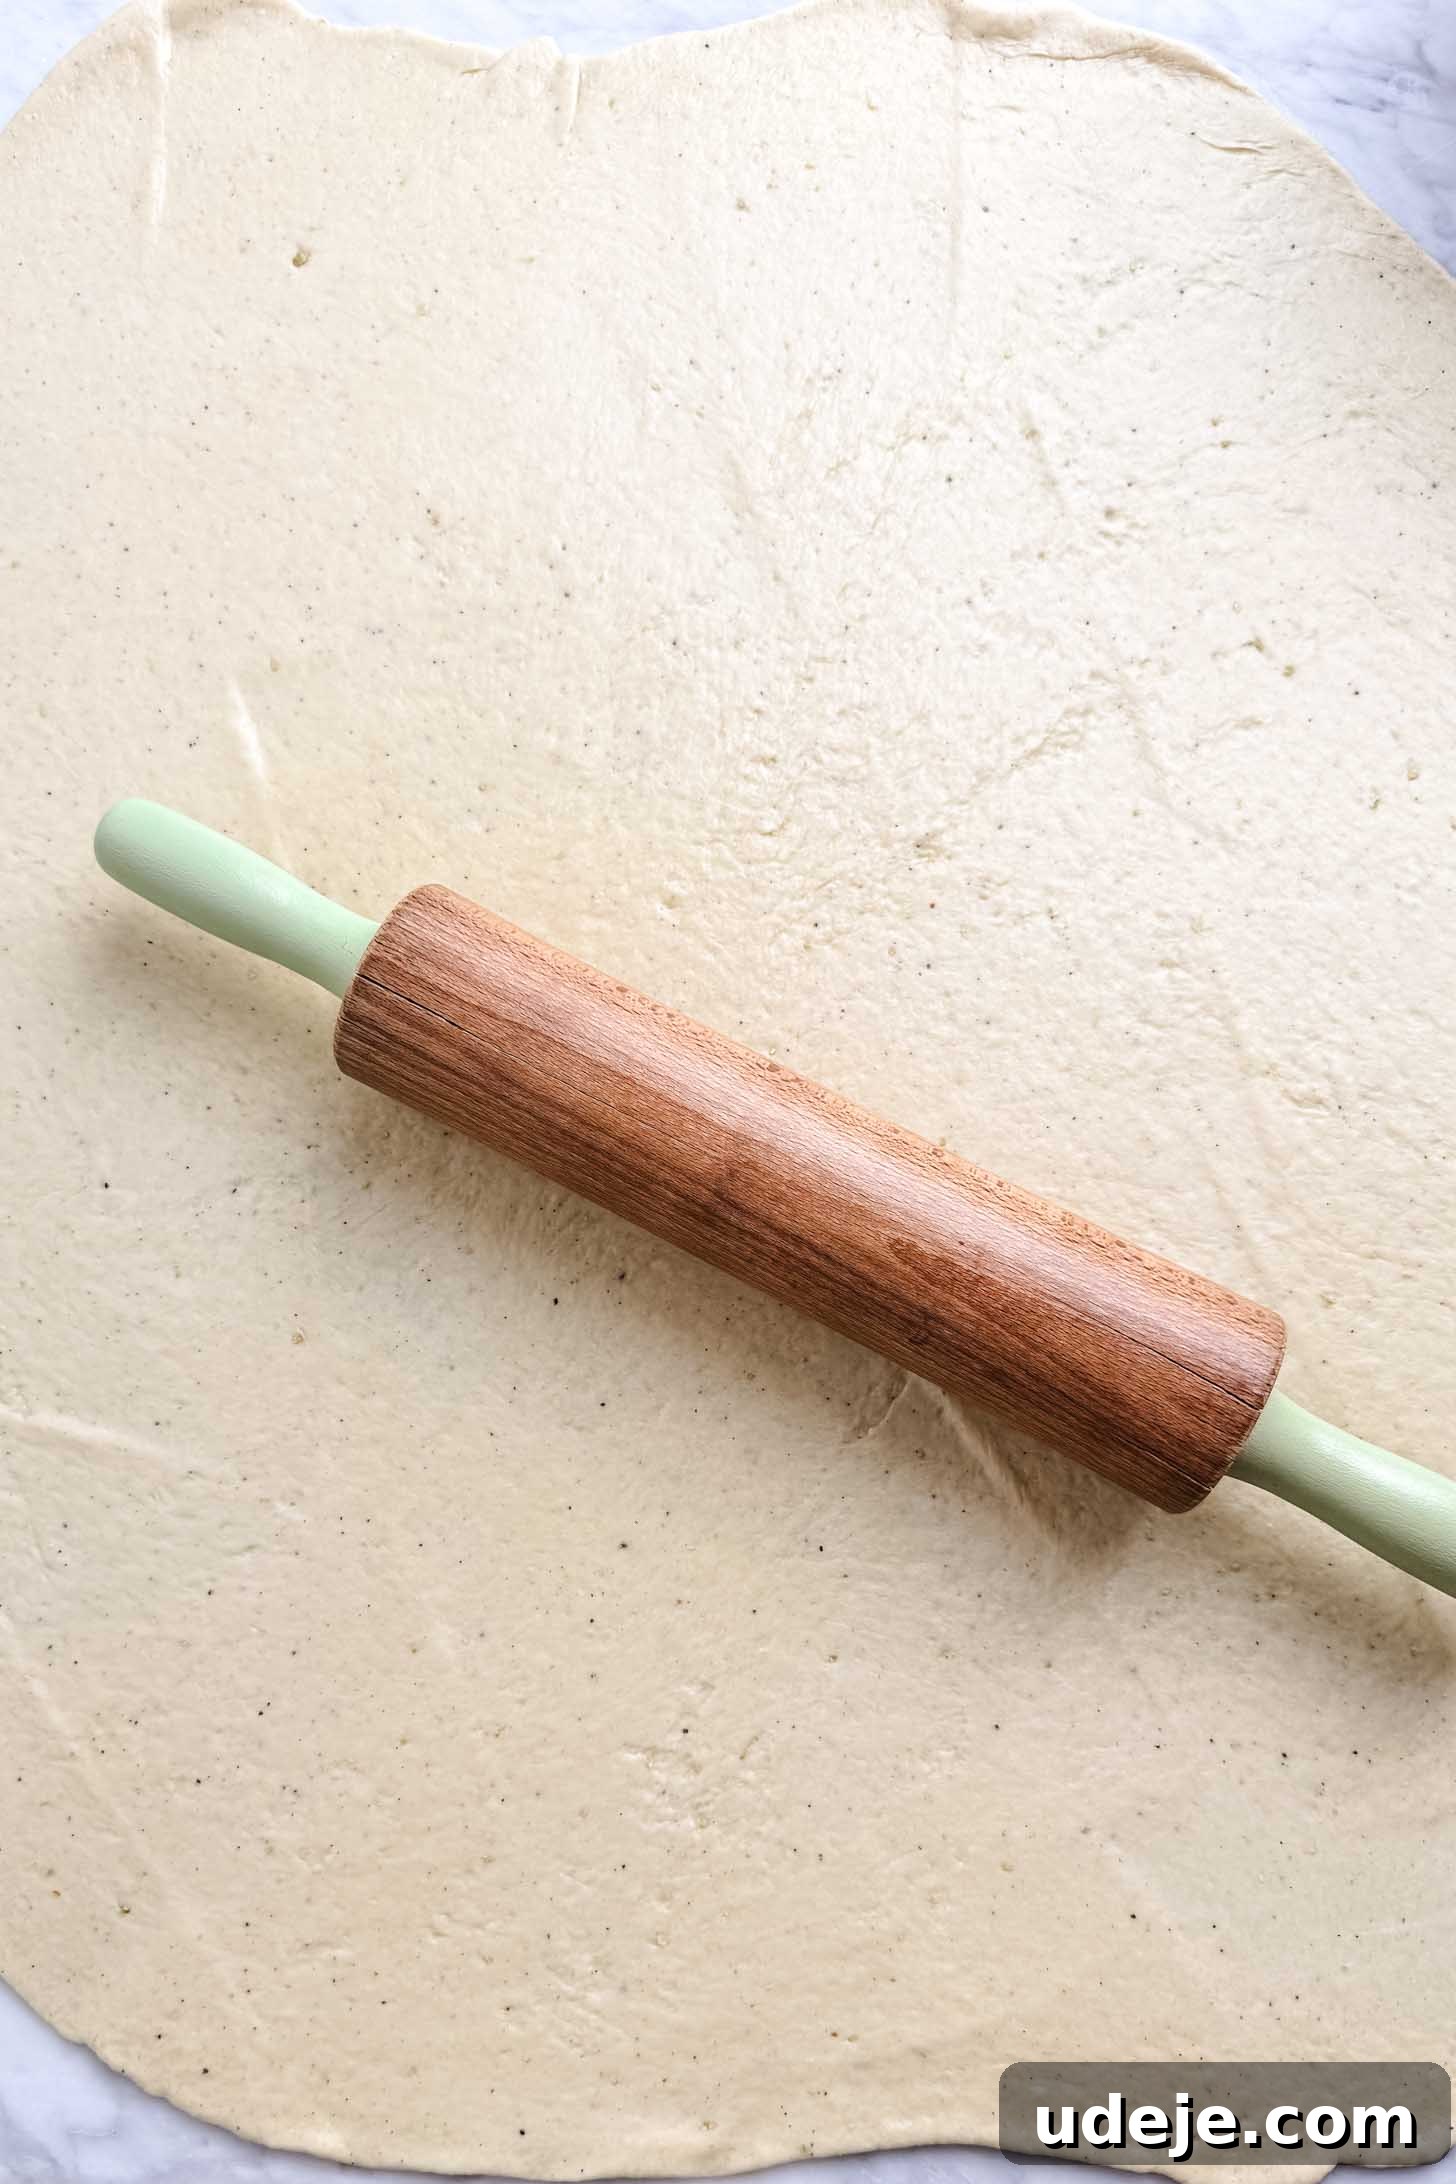
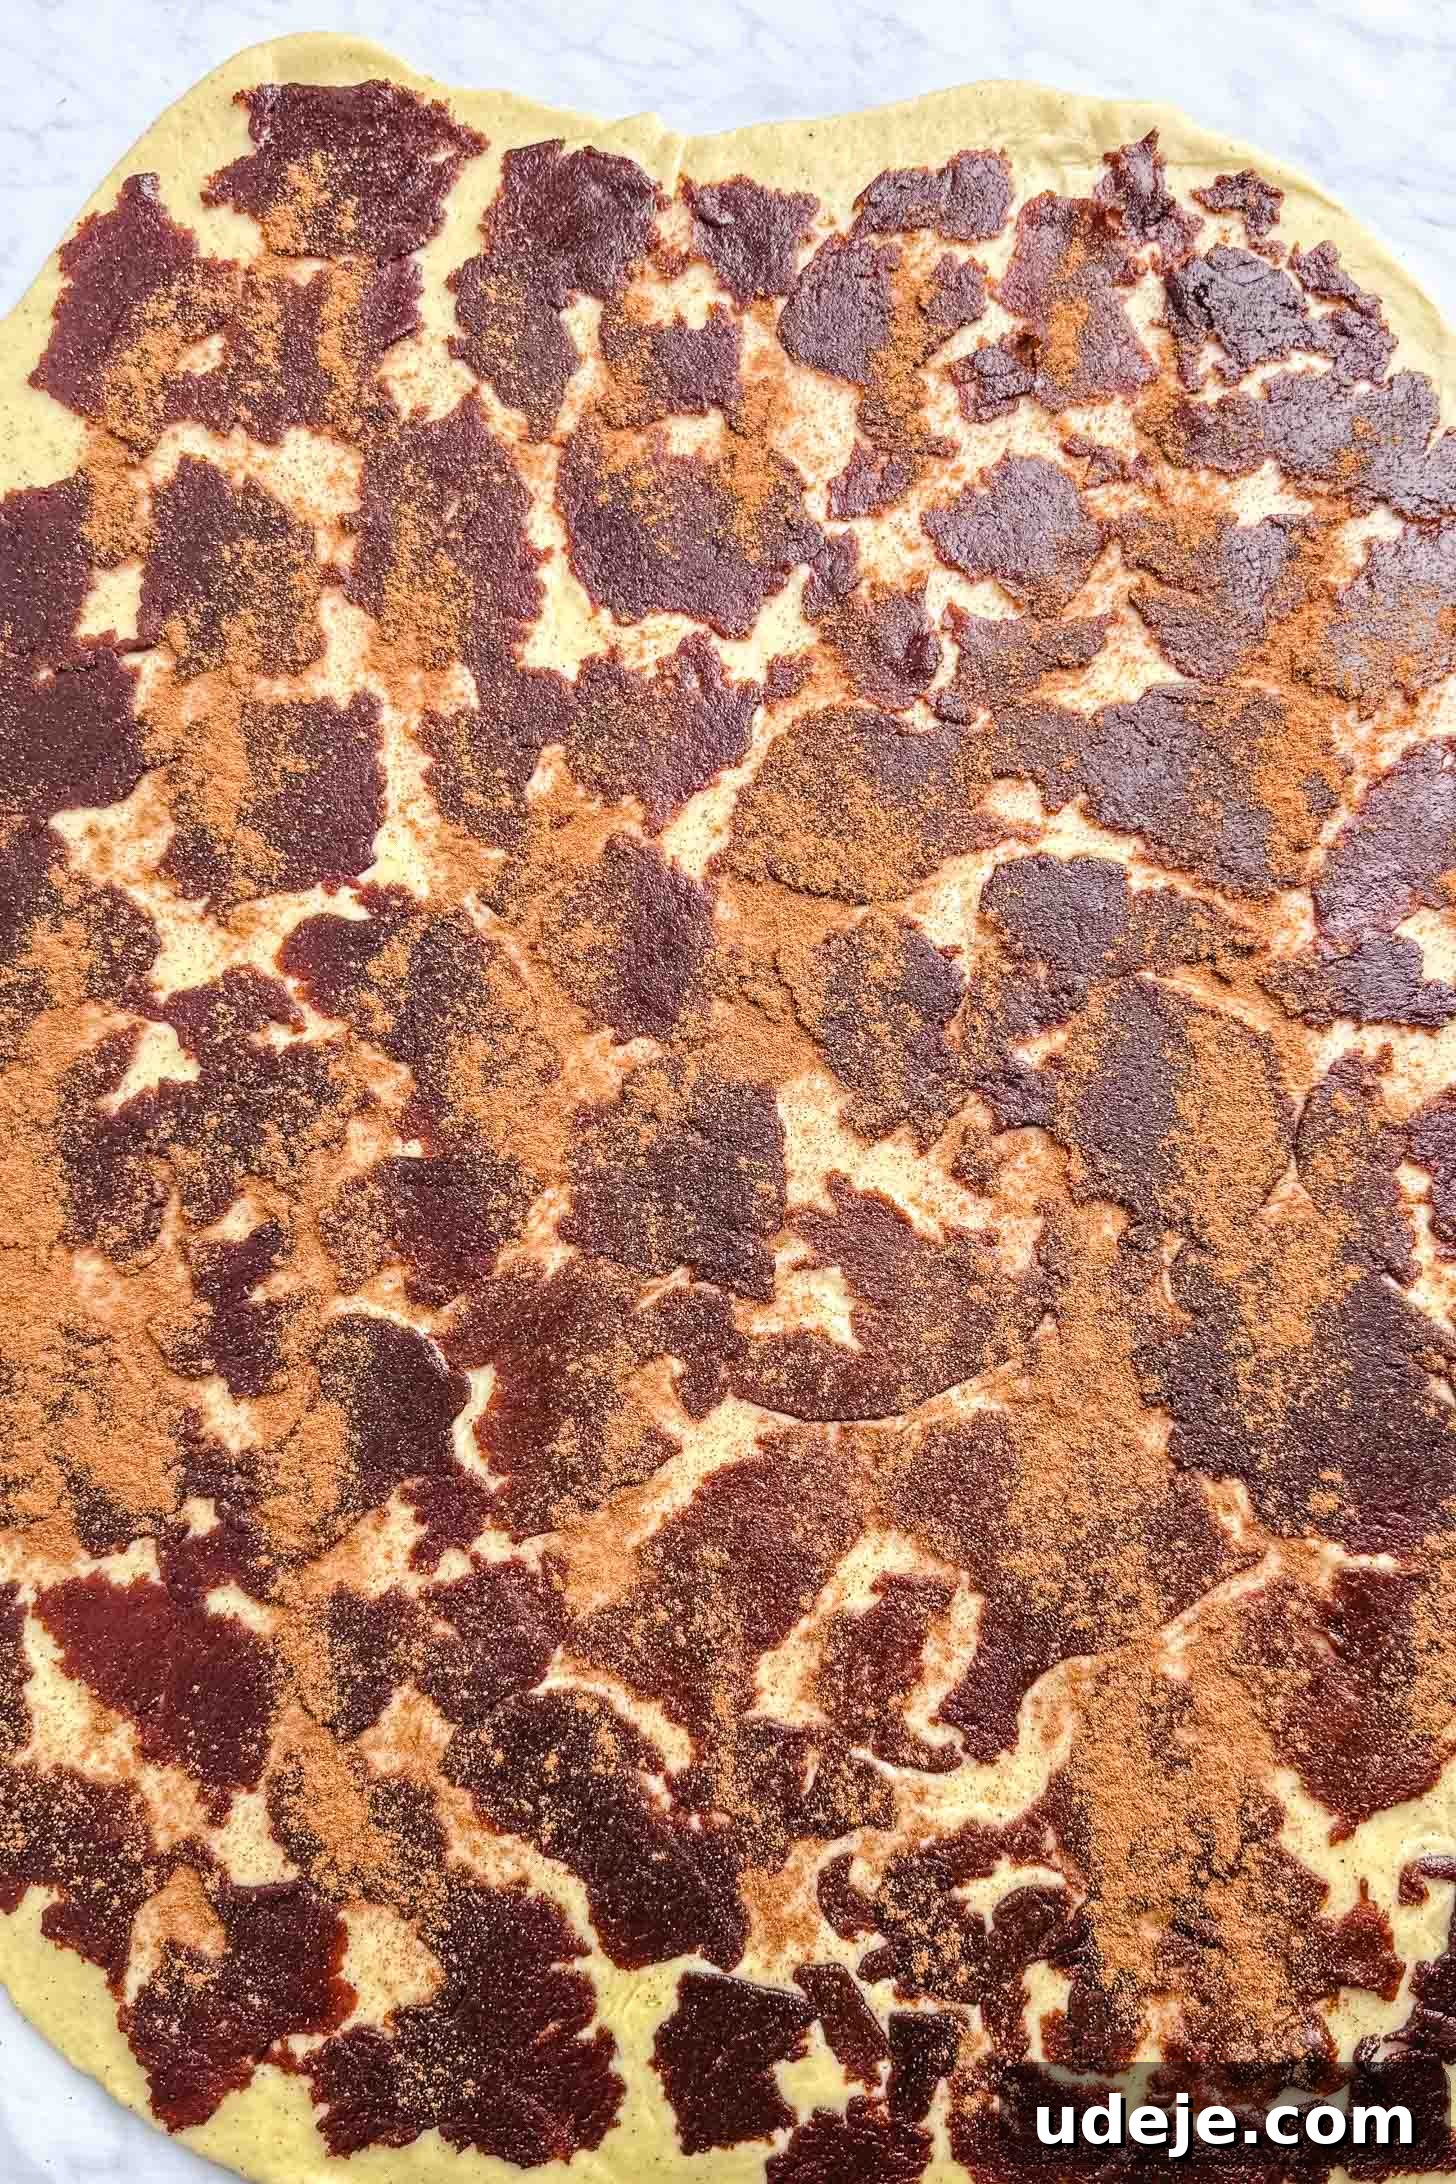
Now, gently peel off the top parchment paper from the rolled date paste. Use your hands to carefully break off small, irregular pieces of the date paste. Arrange these date pieces over the entire surface of the rolled-out Kleicha dough, leaving only small gaps (approximately 1/4 inch) between each piece. This technique, rather than attempting to lay down a whole sheet of date paste, makes the subsequent rolling much easier and prevents tearing. The pattern will resemble a cowhide print once completed. Once the dough is covered, sprinkle the remaining cinnamon evenly over the date-covered surface.
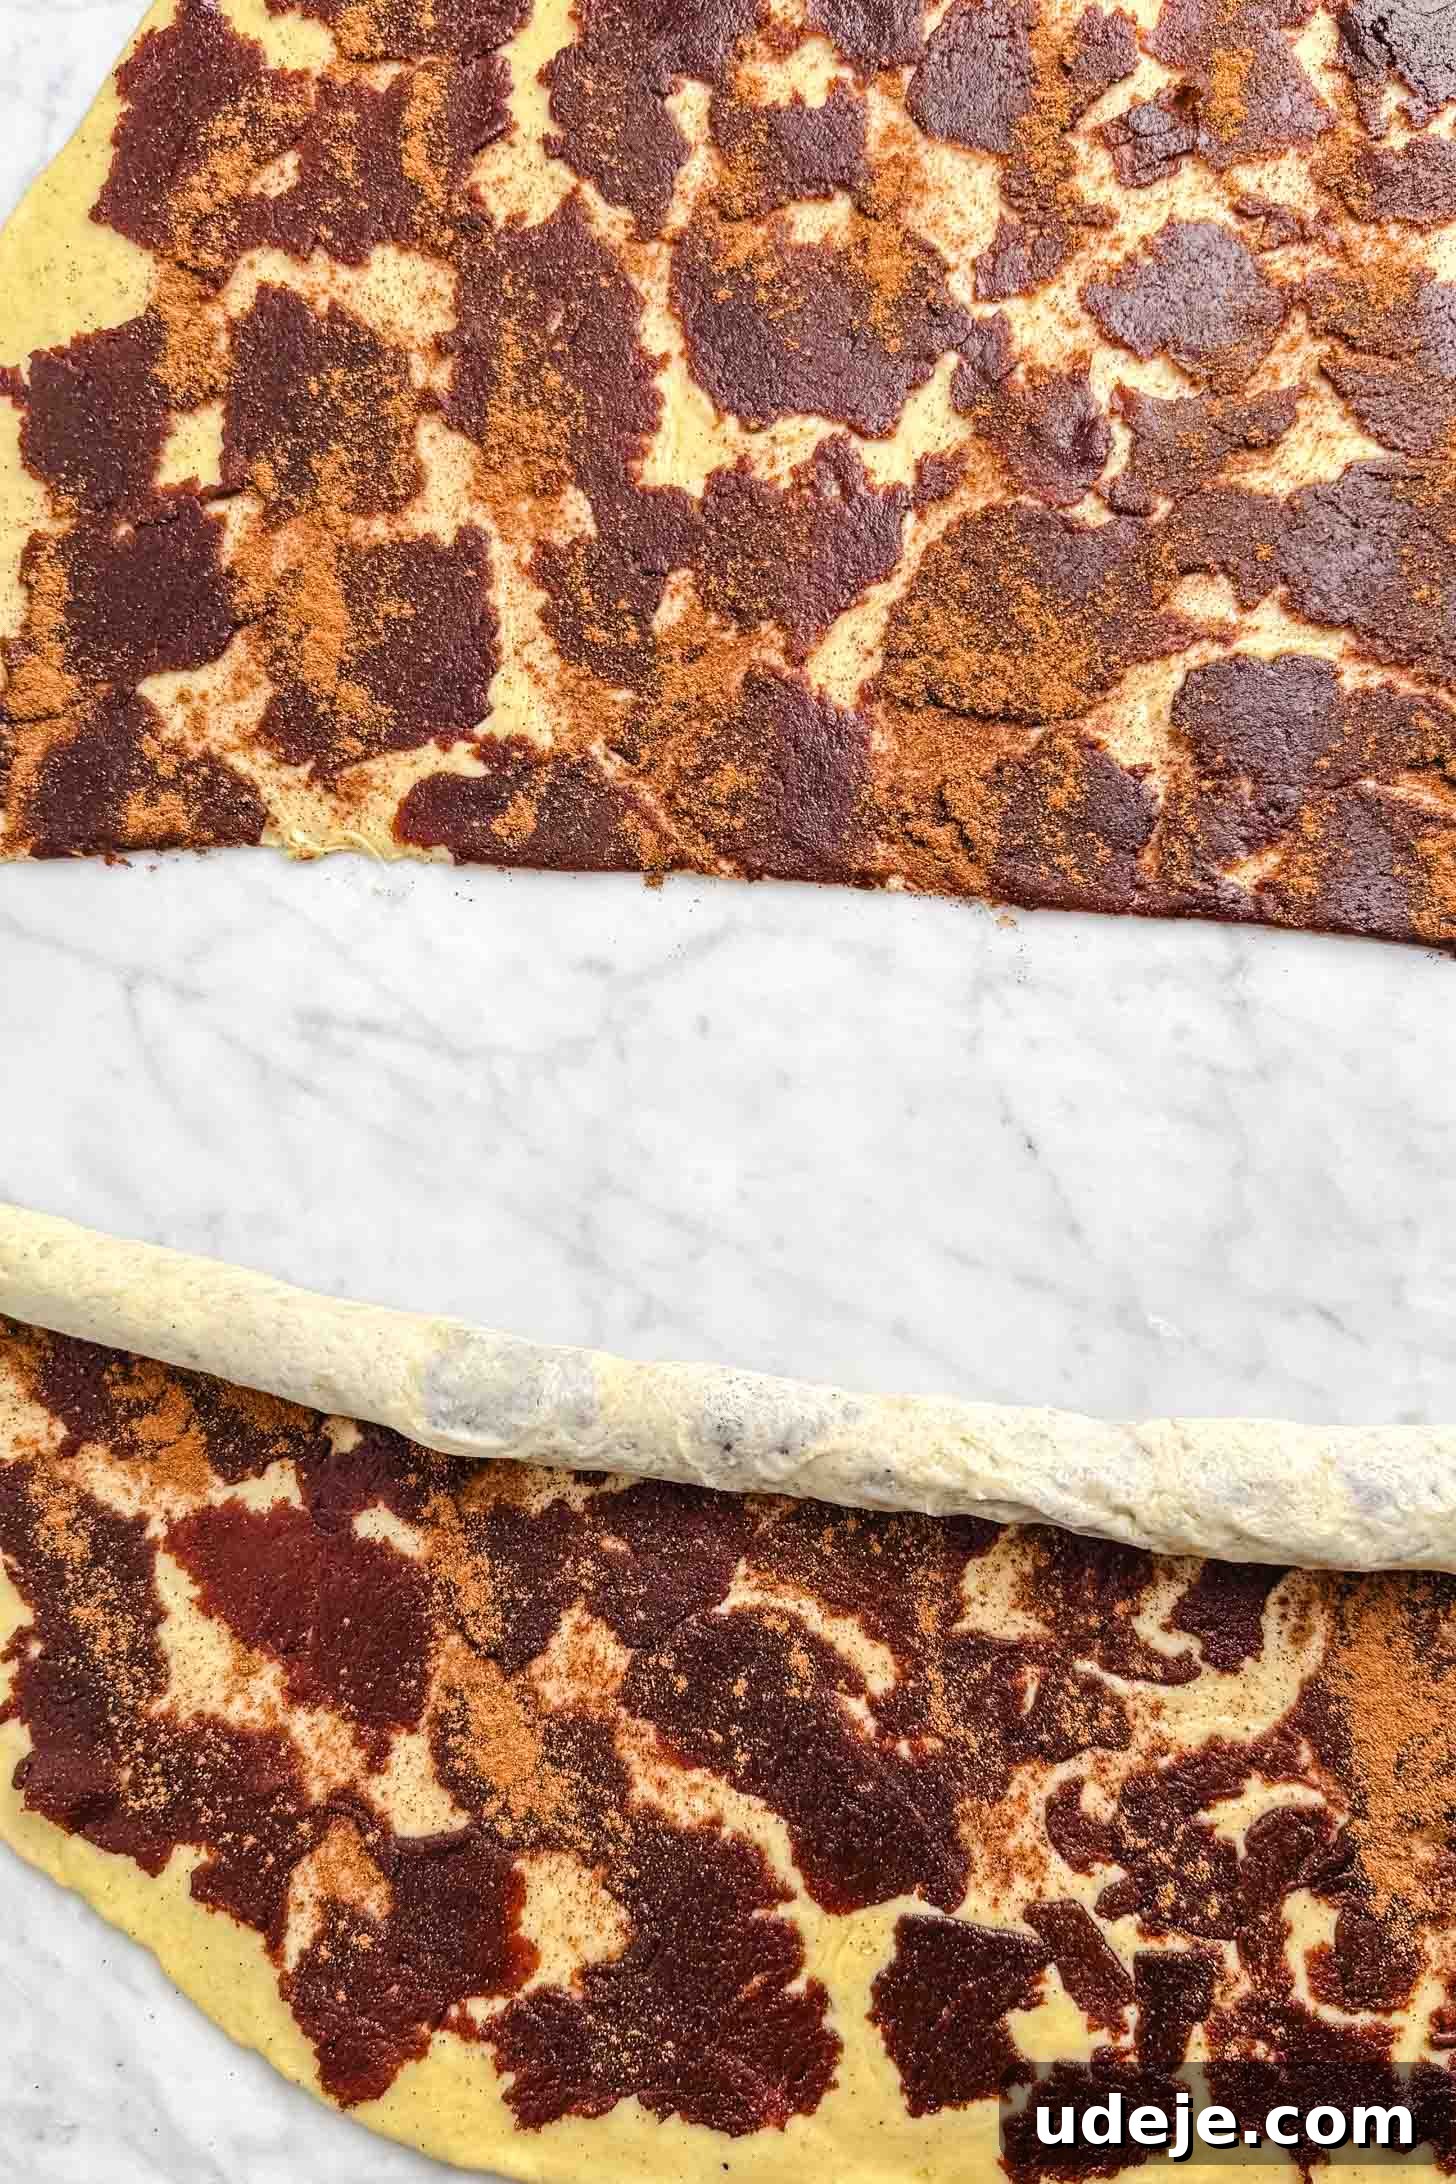
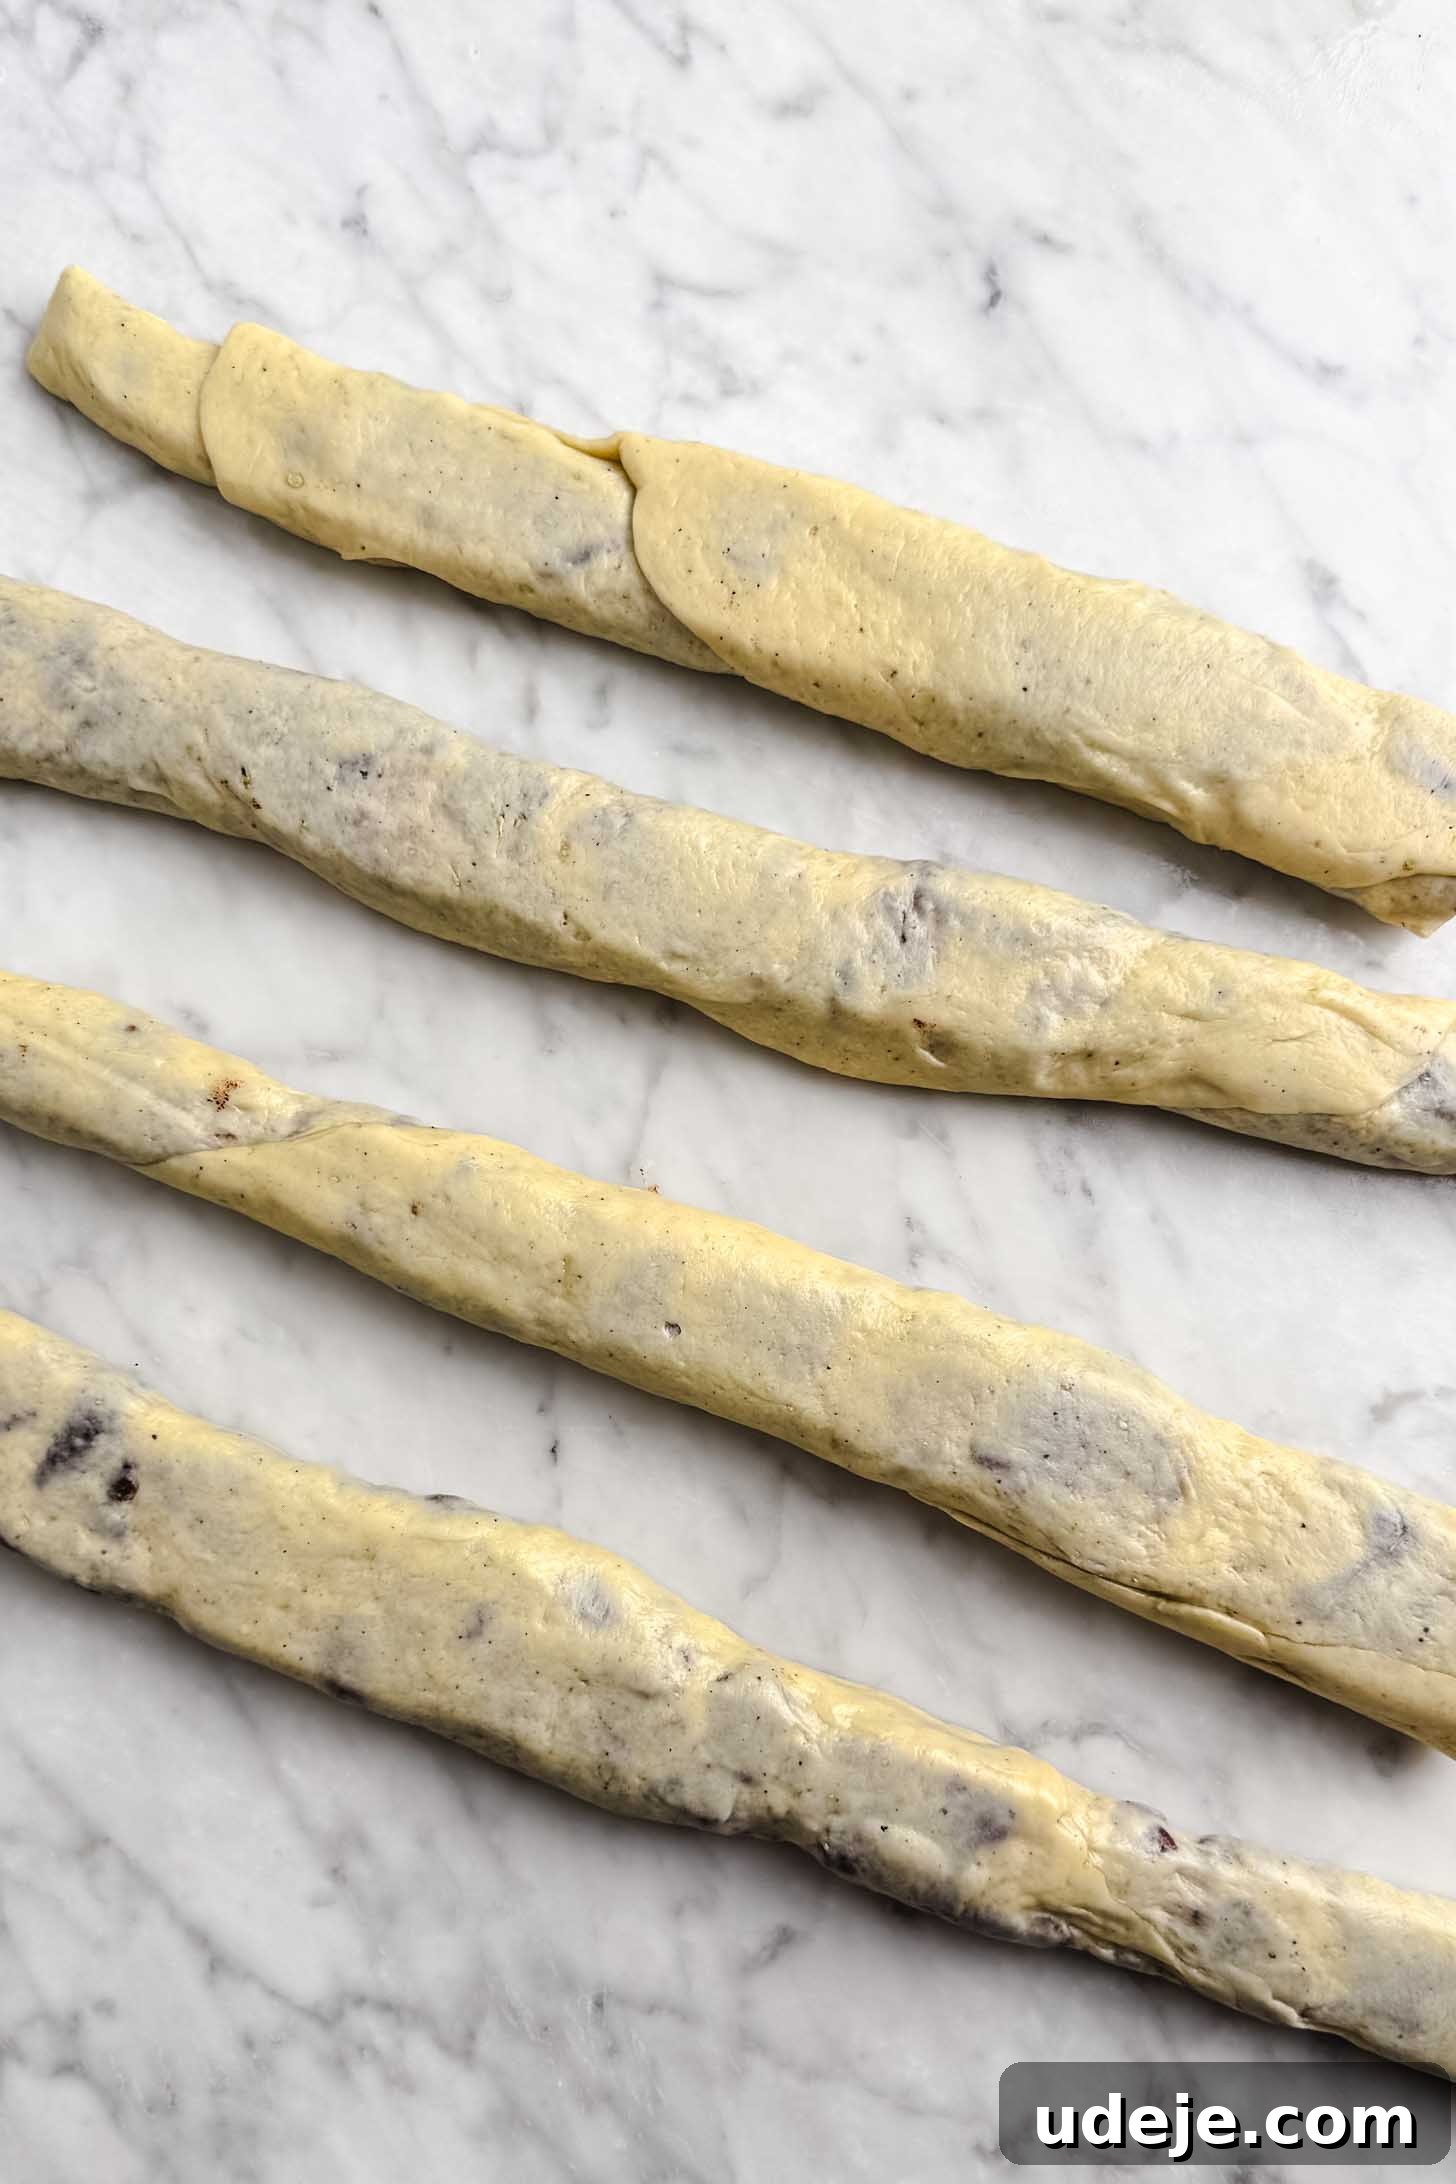
Using a sharp knife, make a single, clean cut along the width of the dough, dividing it into two equal rectangular pieces. Take one piece and, starting from one of the longer sides, gently roll the dough tightly onto itself. As you roll, ensure the date paste remains neatly tucked inside, while the Kleicha dough forms the outer layer. Continue until you’ve created a long, uniform log. Repeat this process with the second half of the dough, yielding two long logs. For easier handling, you can cut each of these long logs in half, resulting in four shorter, more manageable logs. Lightly flatten each log with a rolling pin to slightly compress them and ensure even baking.
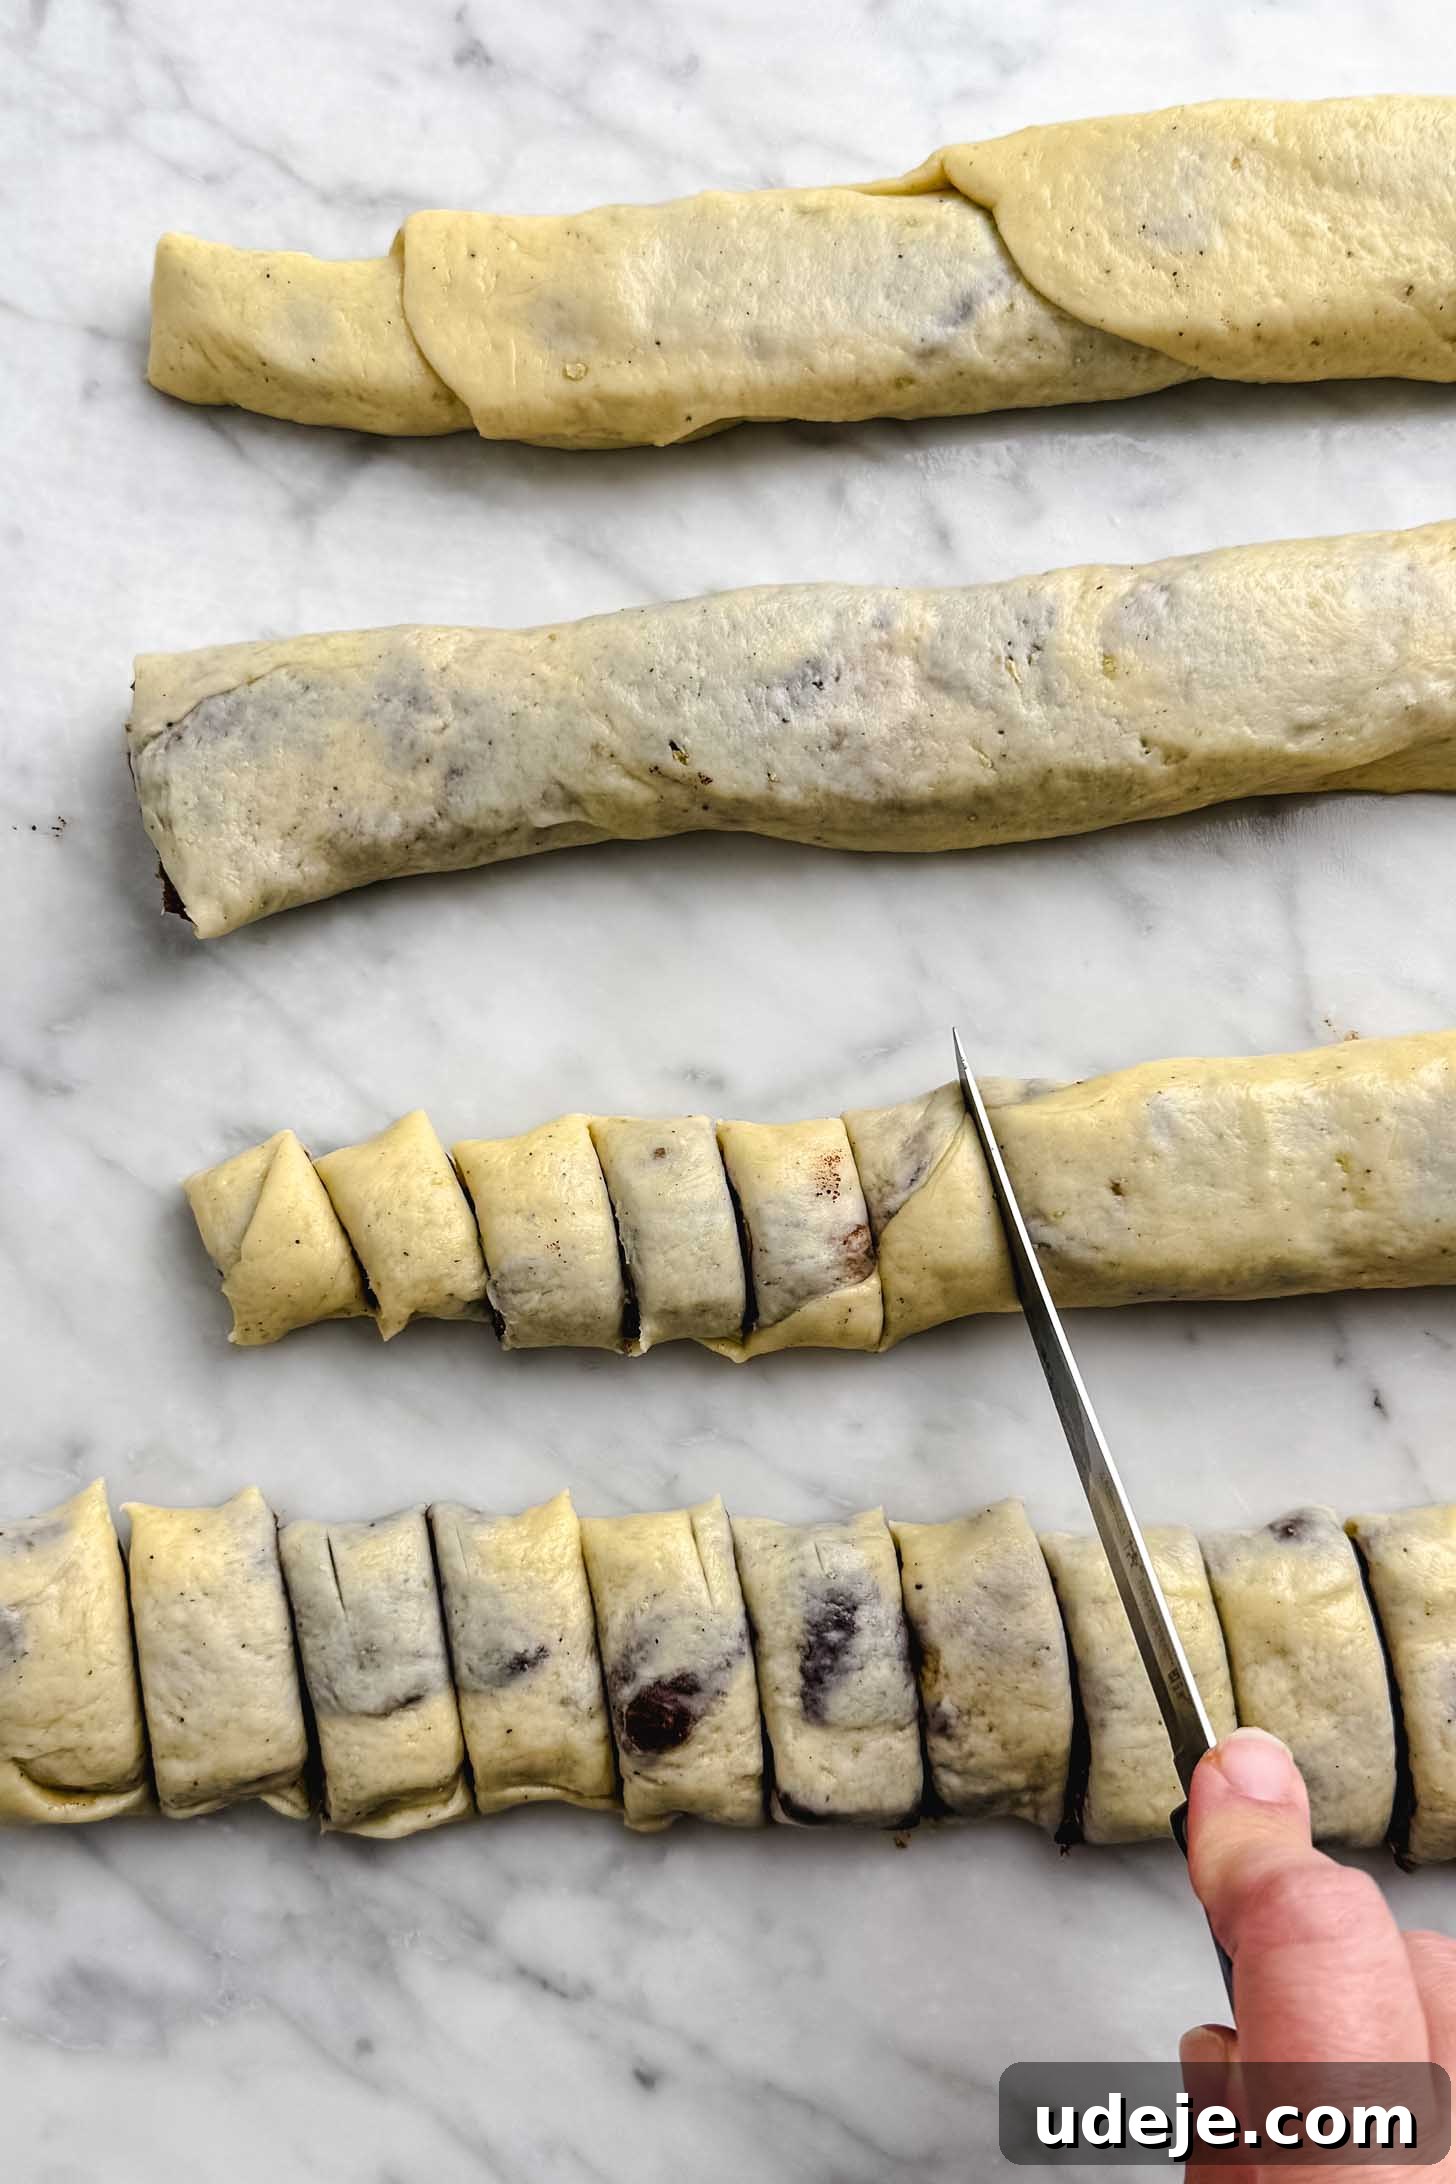
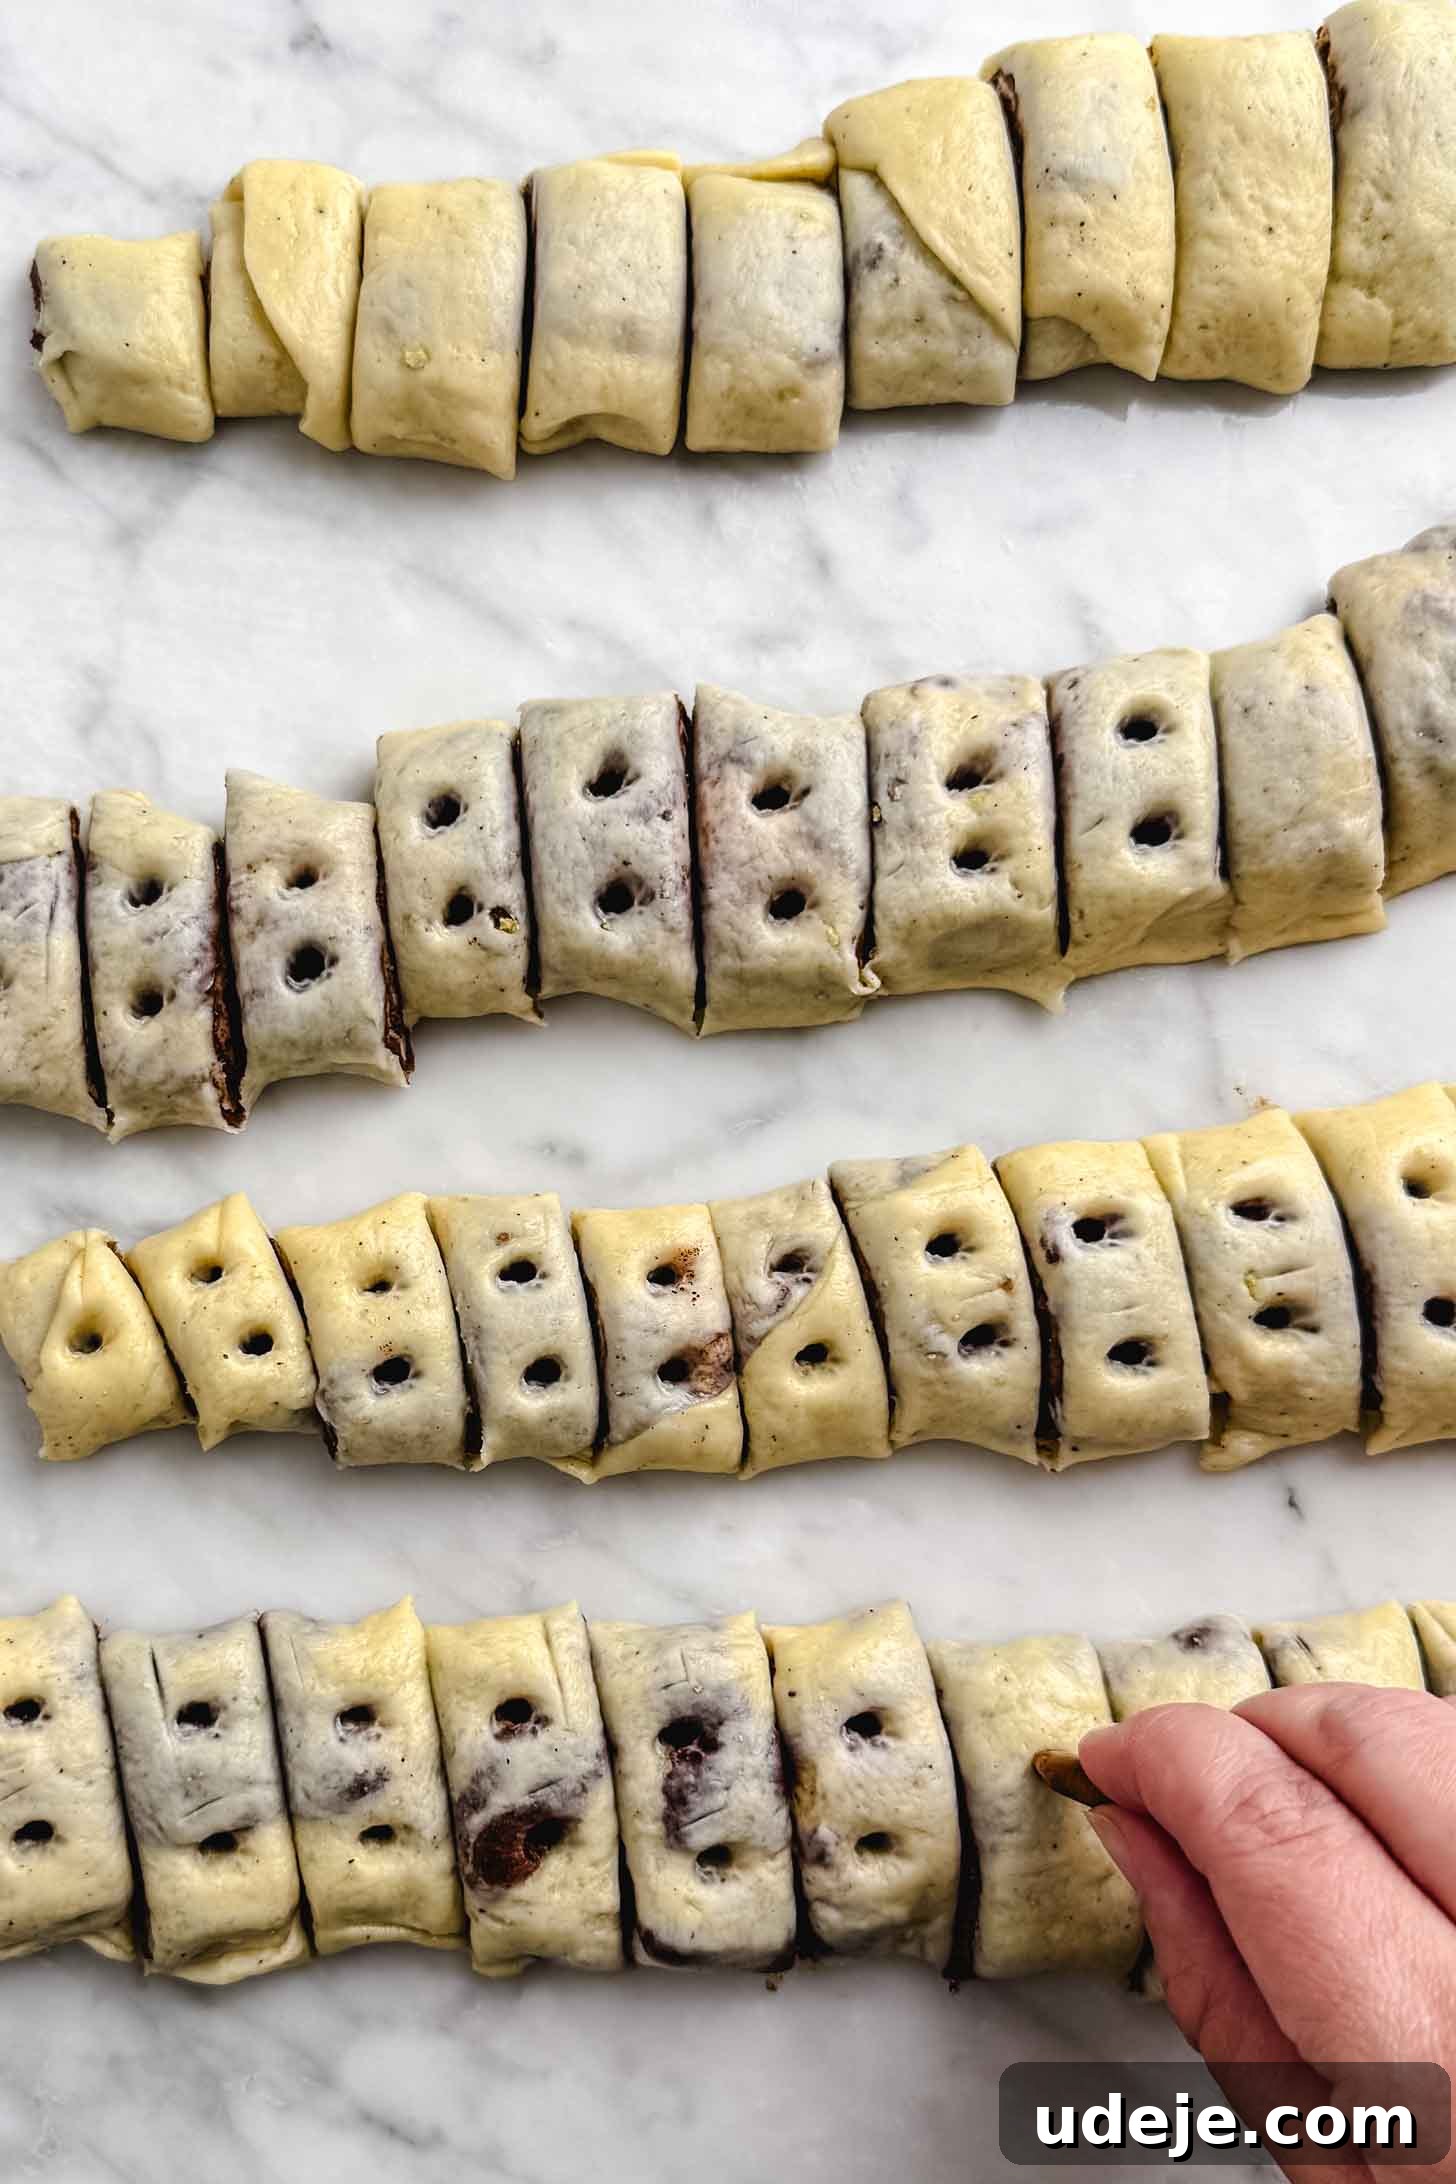
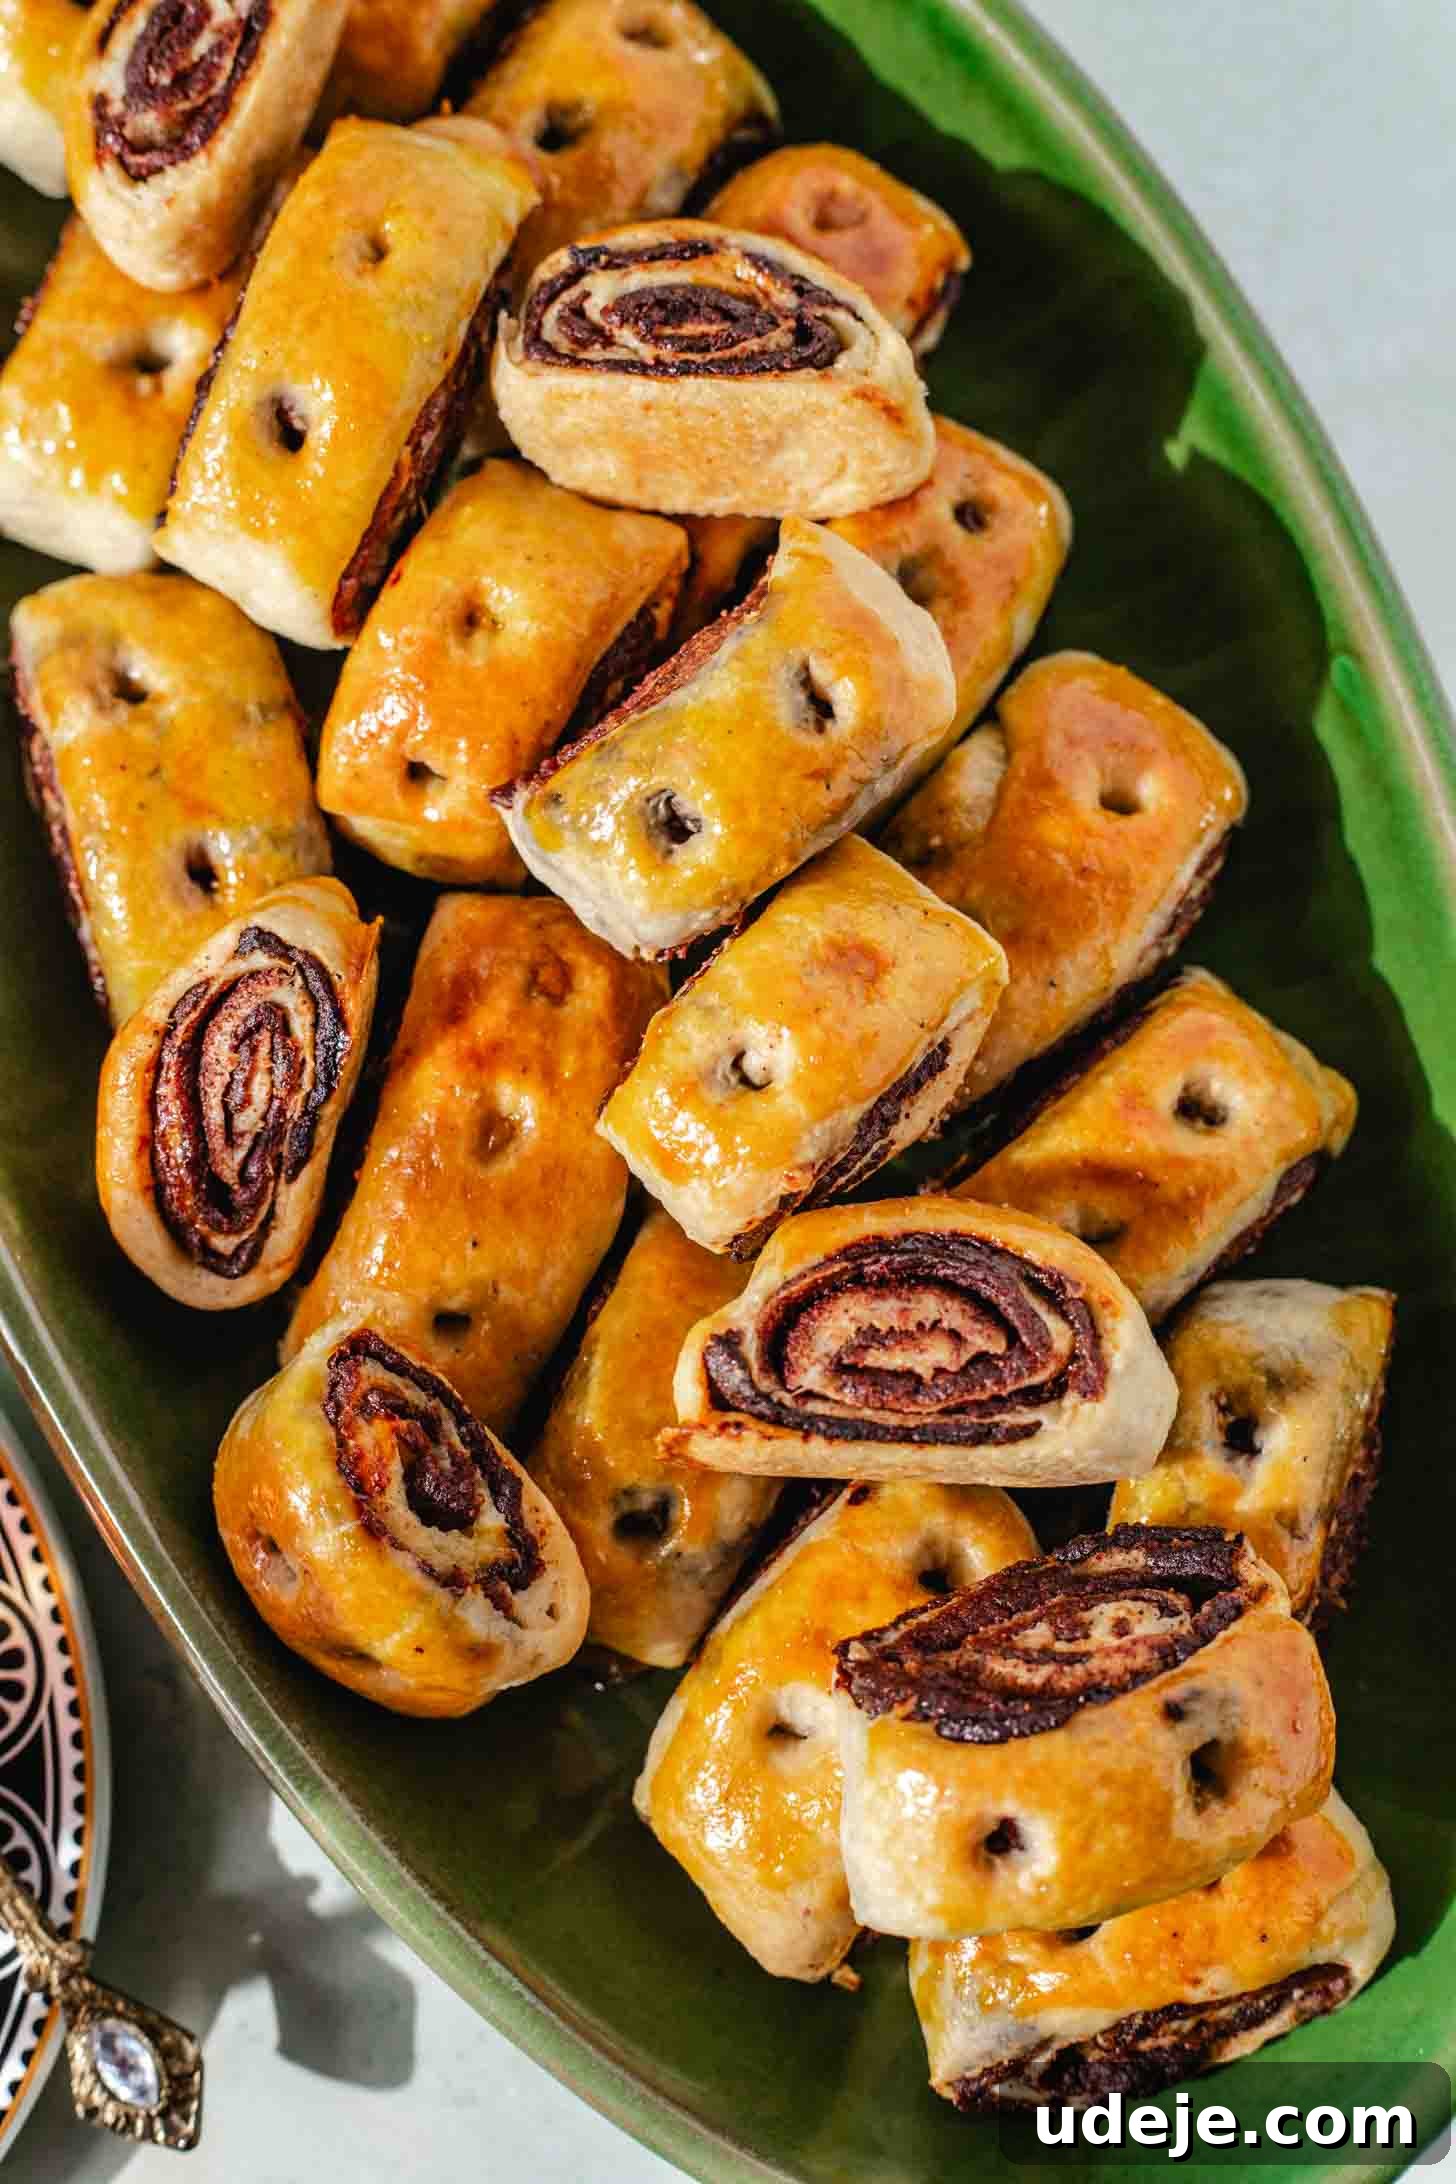
Next, use a sharp knife to cut these logs into small, individual pieces, each roughly 3/4 of an inch (about 2 cm) in width. Once all the pieces are cut, take a date seed or any small, blunt tool (the back of a skewer works well) and make two small indentations in the center of each Kleicha piece. Press only halfway through the dough, not all the way to the bottom. This helps with even cooking and gives the classic Kleicha appearance.
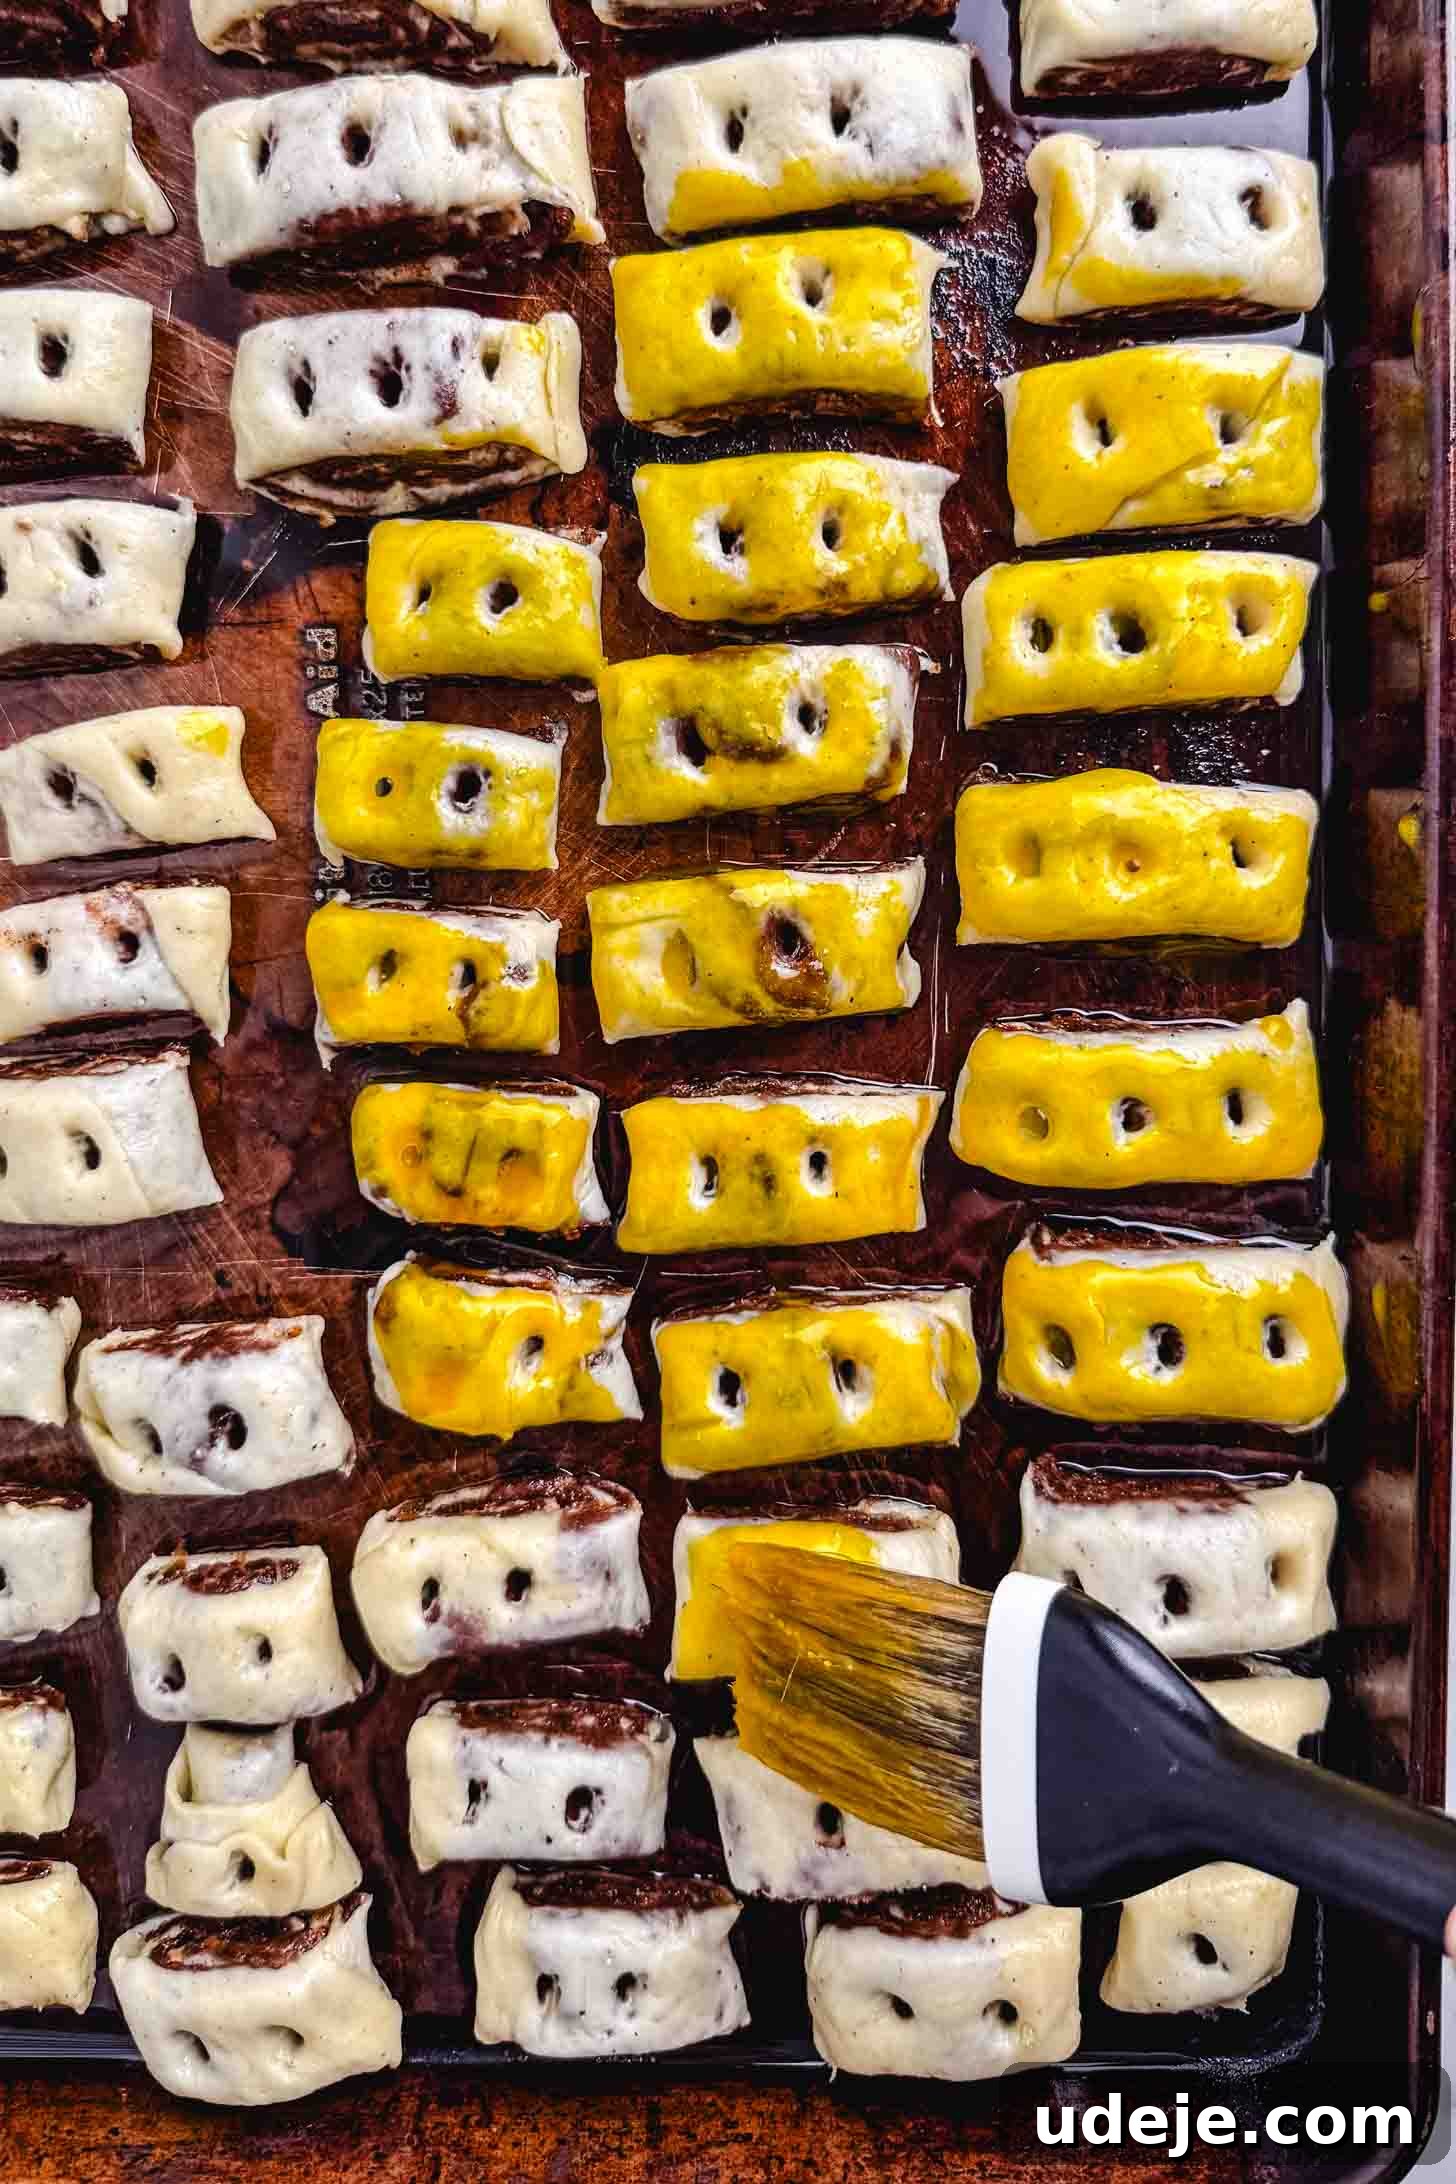
Generously grease a large baking sheet with vegetable oil to prevent sticking. In a small bowl, whisk together one small egg and one extra yolk for the egg wash (the extra yolk contributes to a beautiful golden color). Arrange the cut Kleicha pieces on the prepared baking sheet, ensuring about 1/4 inch of space between each one to allow for slight expansion during baking. Lightly brush the top of each Kleicha piece with the egg wash. Bake on the bottom rack of your preheated oven at 425°F (220°C) for 15 to 18 minutes, or until the bottoms are evenly golden brown. Then, switch to the broiler setting and broil for an additional 2 to 3 minutes until the tops achieve a beautiful golden hue. Be sure to stay vigilant during broiling, as Kleicha can brown very quickly and burn if unsupervised. Once baked, remove the Kleicha from the oven and transfer them to a large tray. Immediately cover the tray with a clean kitchen towel to retain moisture and prevent them from drying out, ensuring they remain soft and tender.
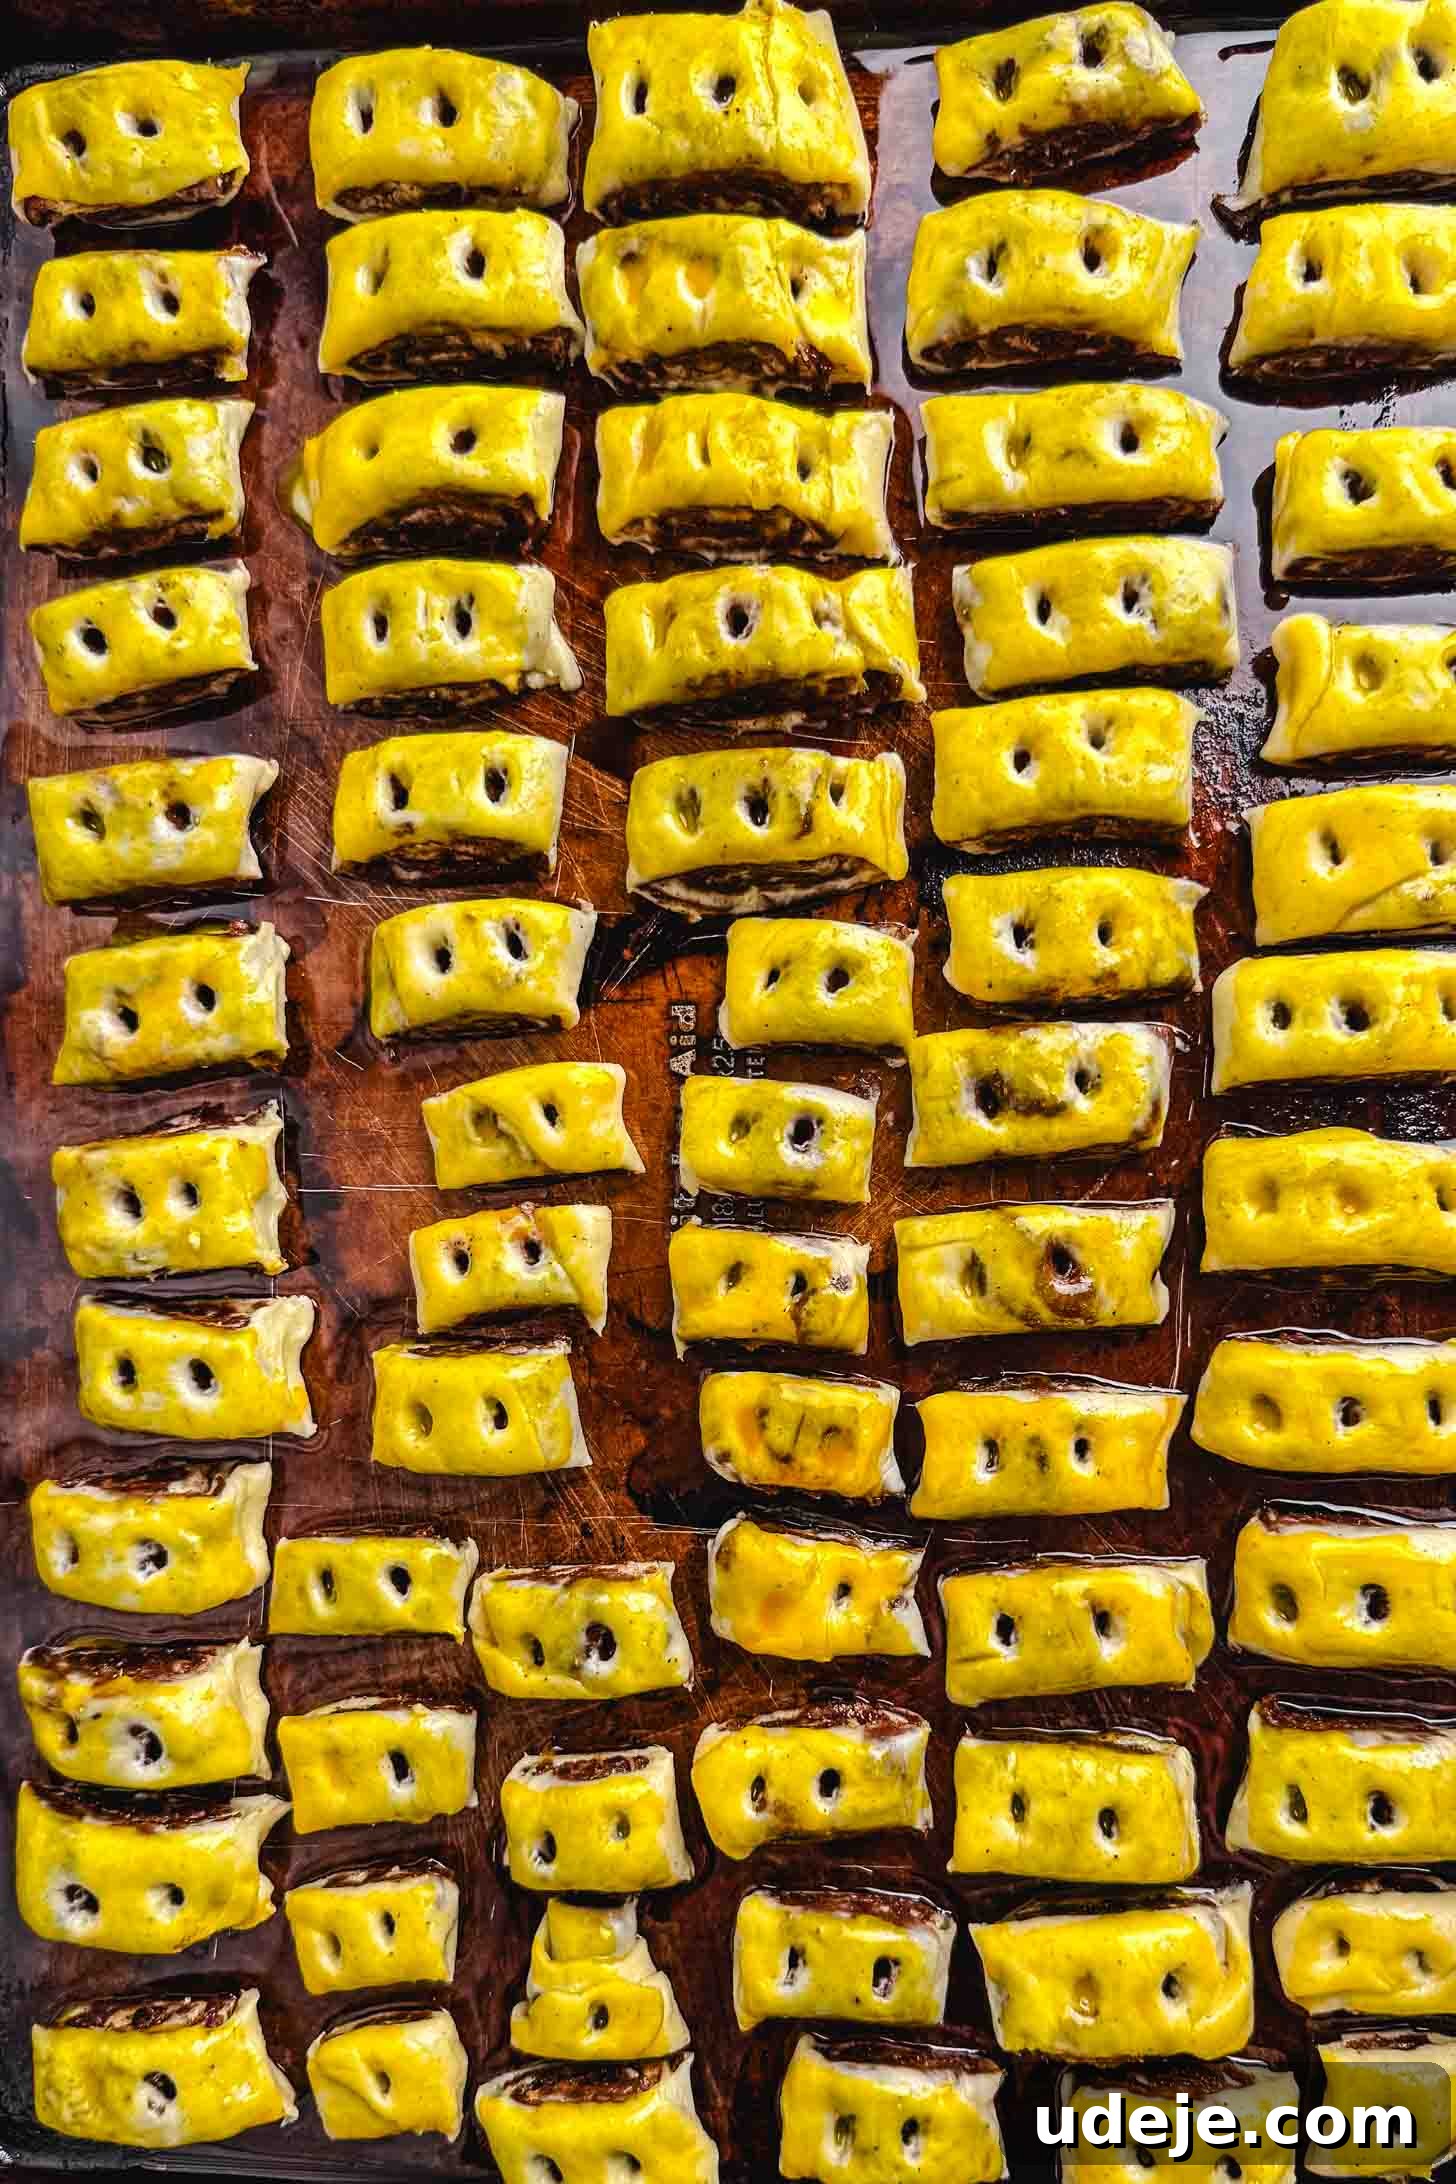
Walnut Filling and Shaping (The Half-Moon Delight)
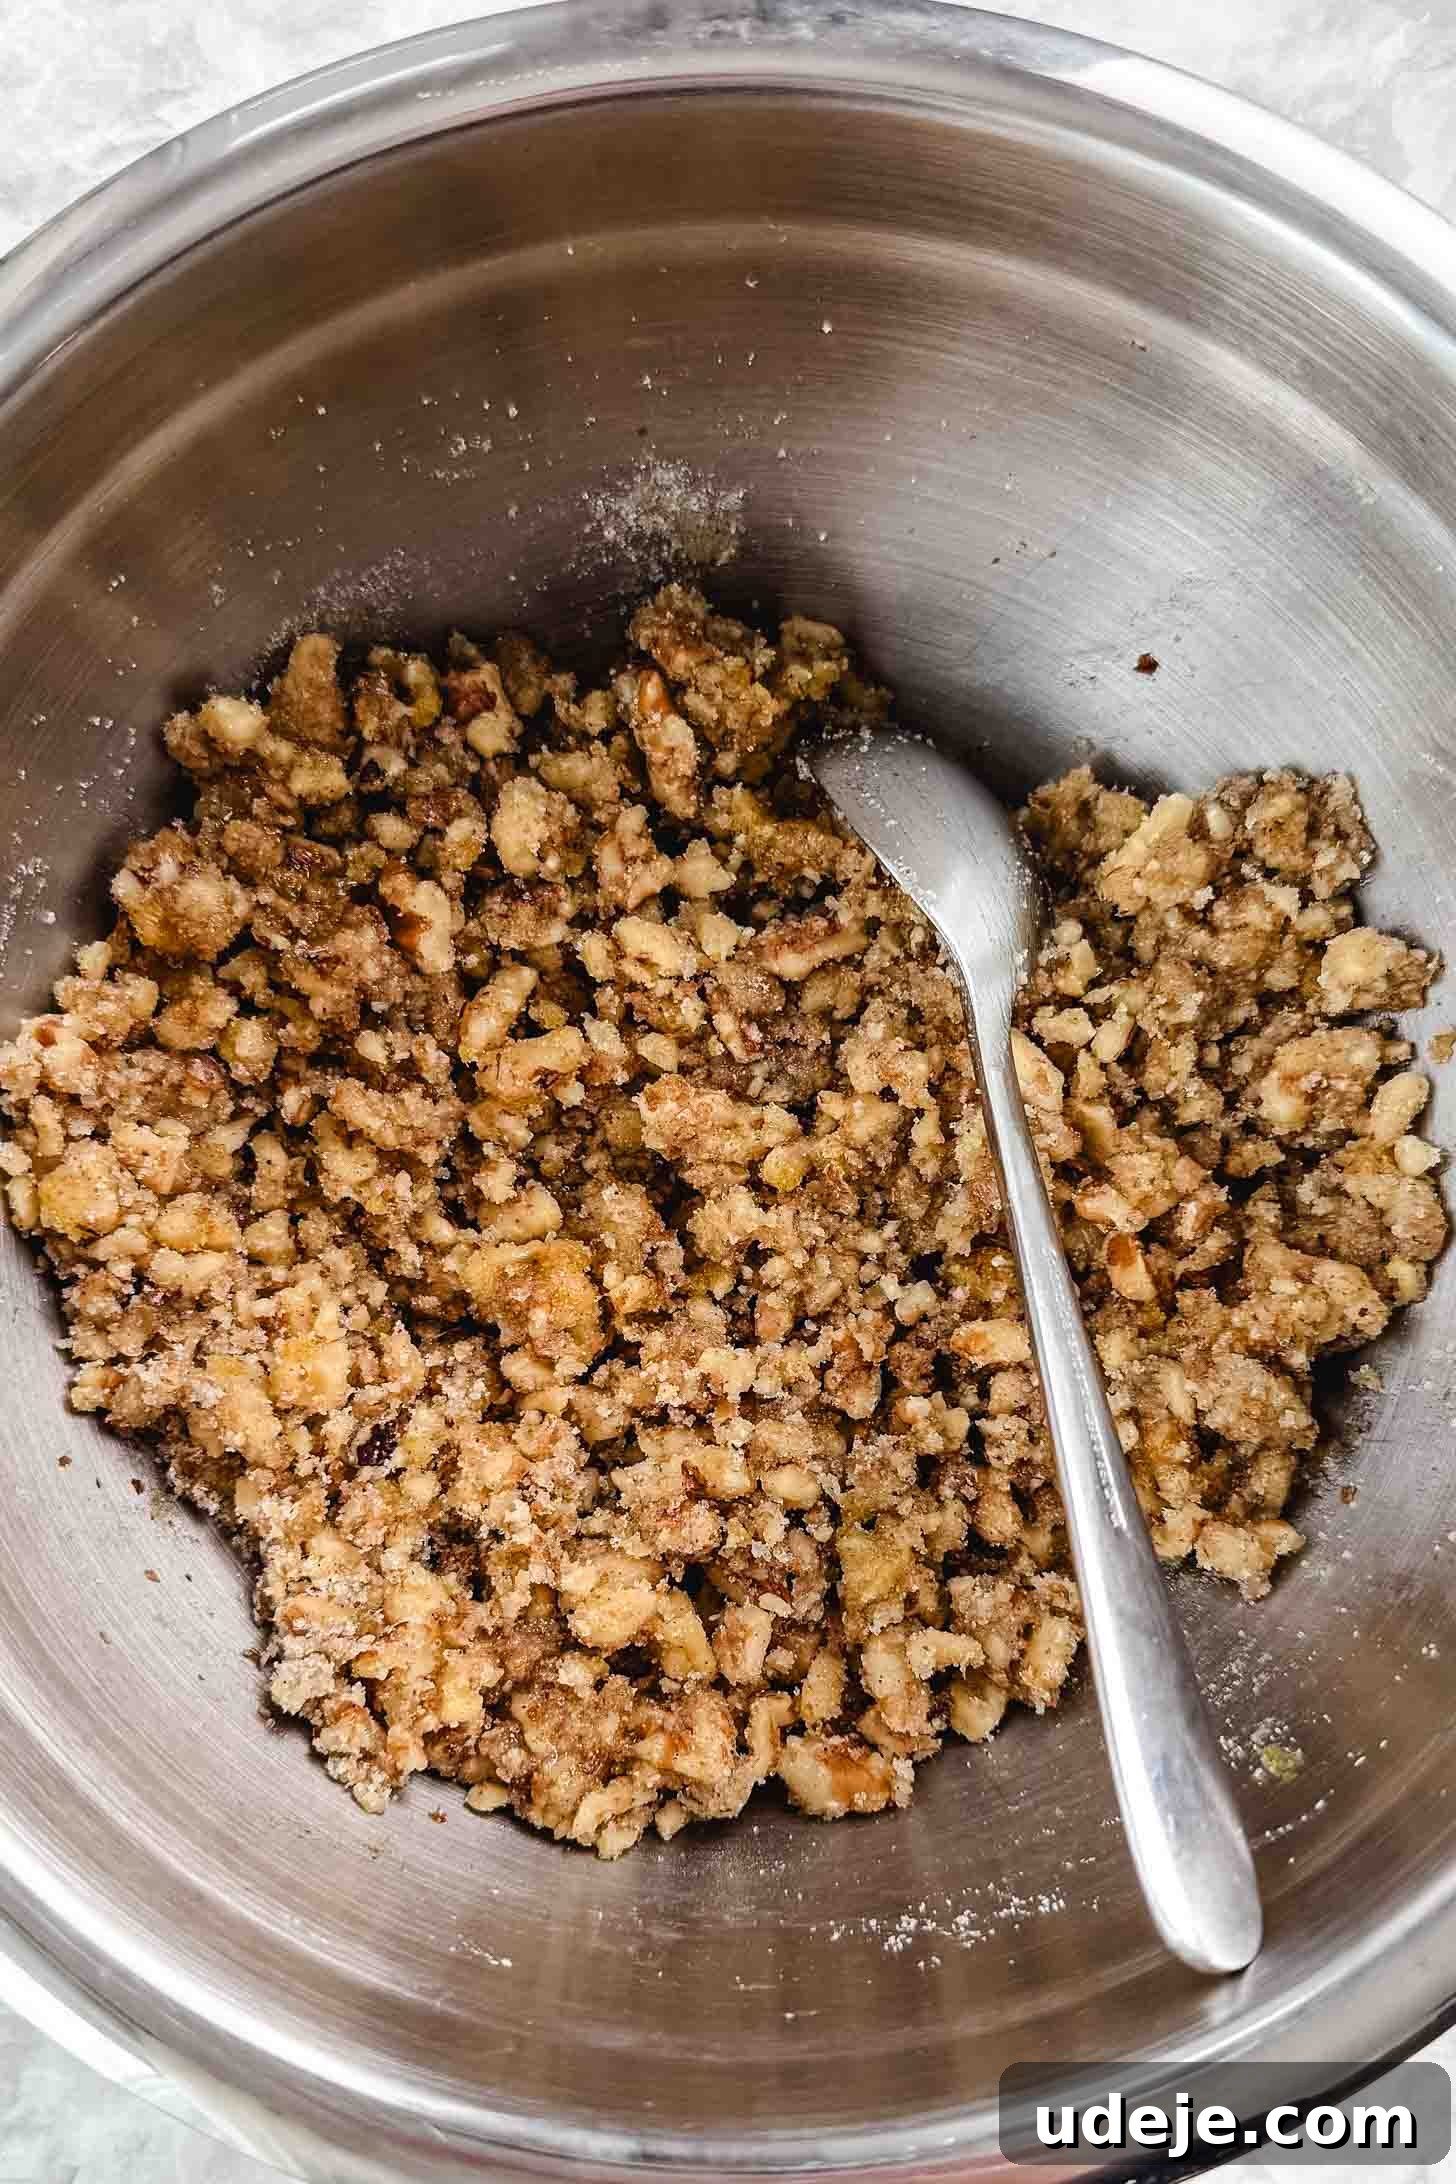
To prepare the exquisite walnut filling, begin by crushing your walnuts. You can use a food processor for this, pulsing until they are in small pieces but deliberately avoiding over-processing them into a fine powder; a slightly coarse texture adds a pleasant bite. Alternatively, you can place the walnuts in a sturdy freezer bag and gently pound them with a rolling pin until adequately crushed. Transfer the crushed walnuts to a mixing bowl, then add the ground cardamom, granulated sugar, and the small egg. Mix these ingredients thoroughly with a spoon until everything is well combined and forms a cohesive, moist filling.
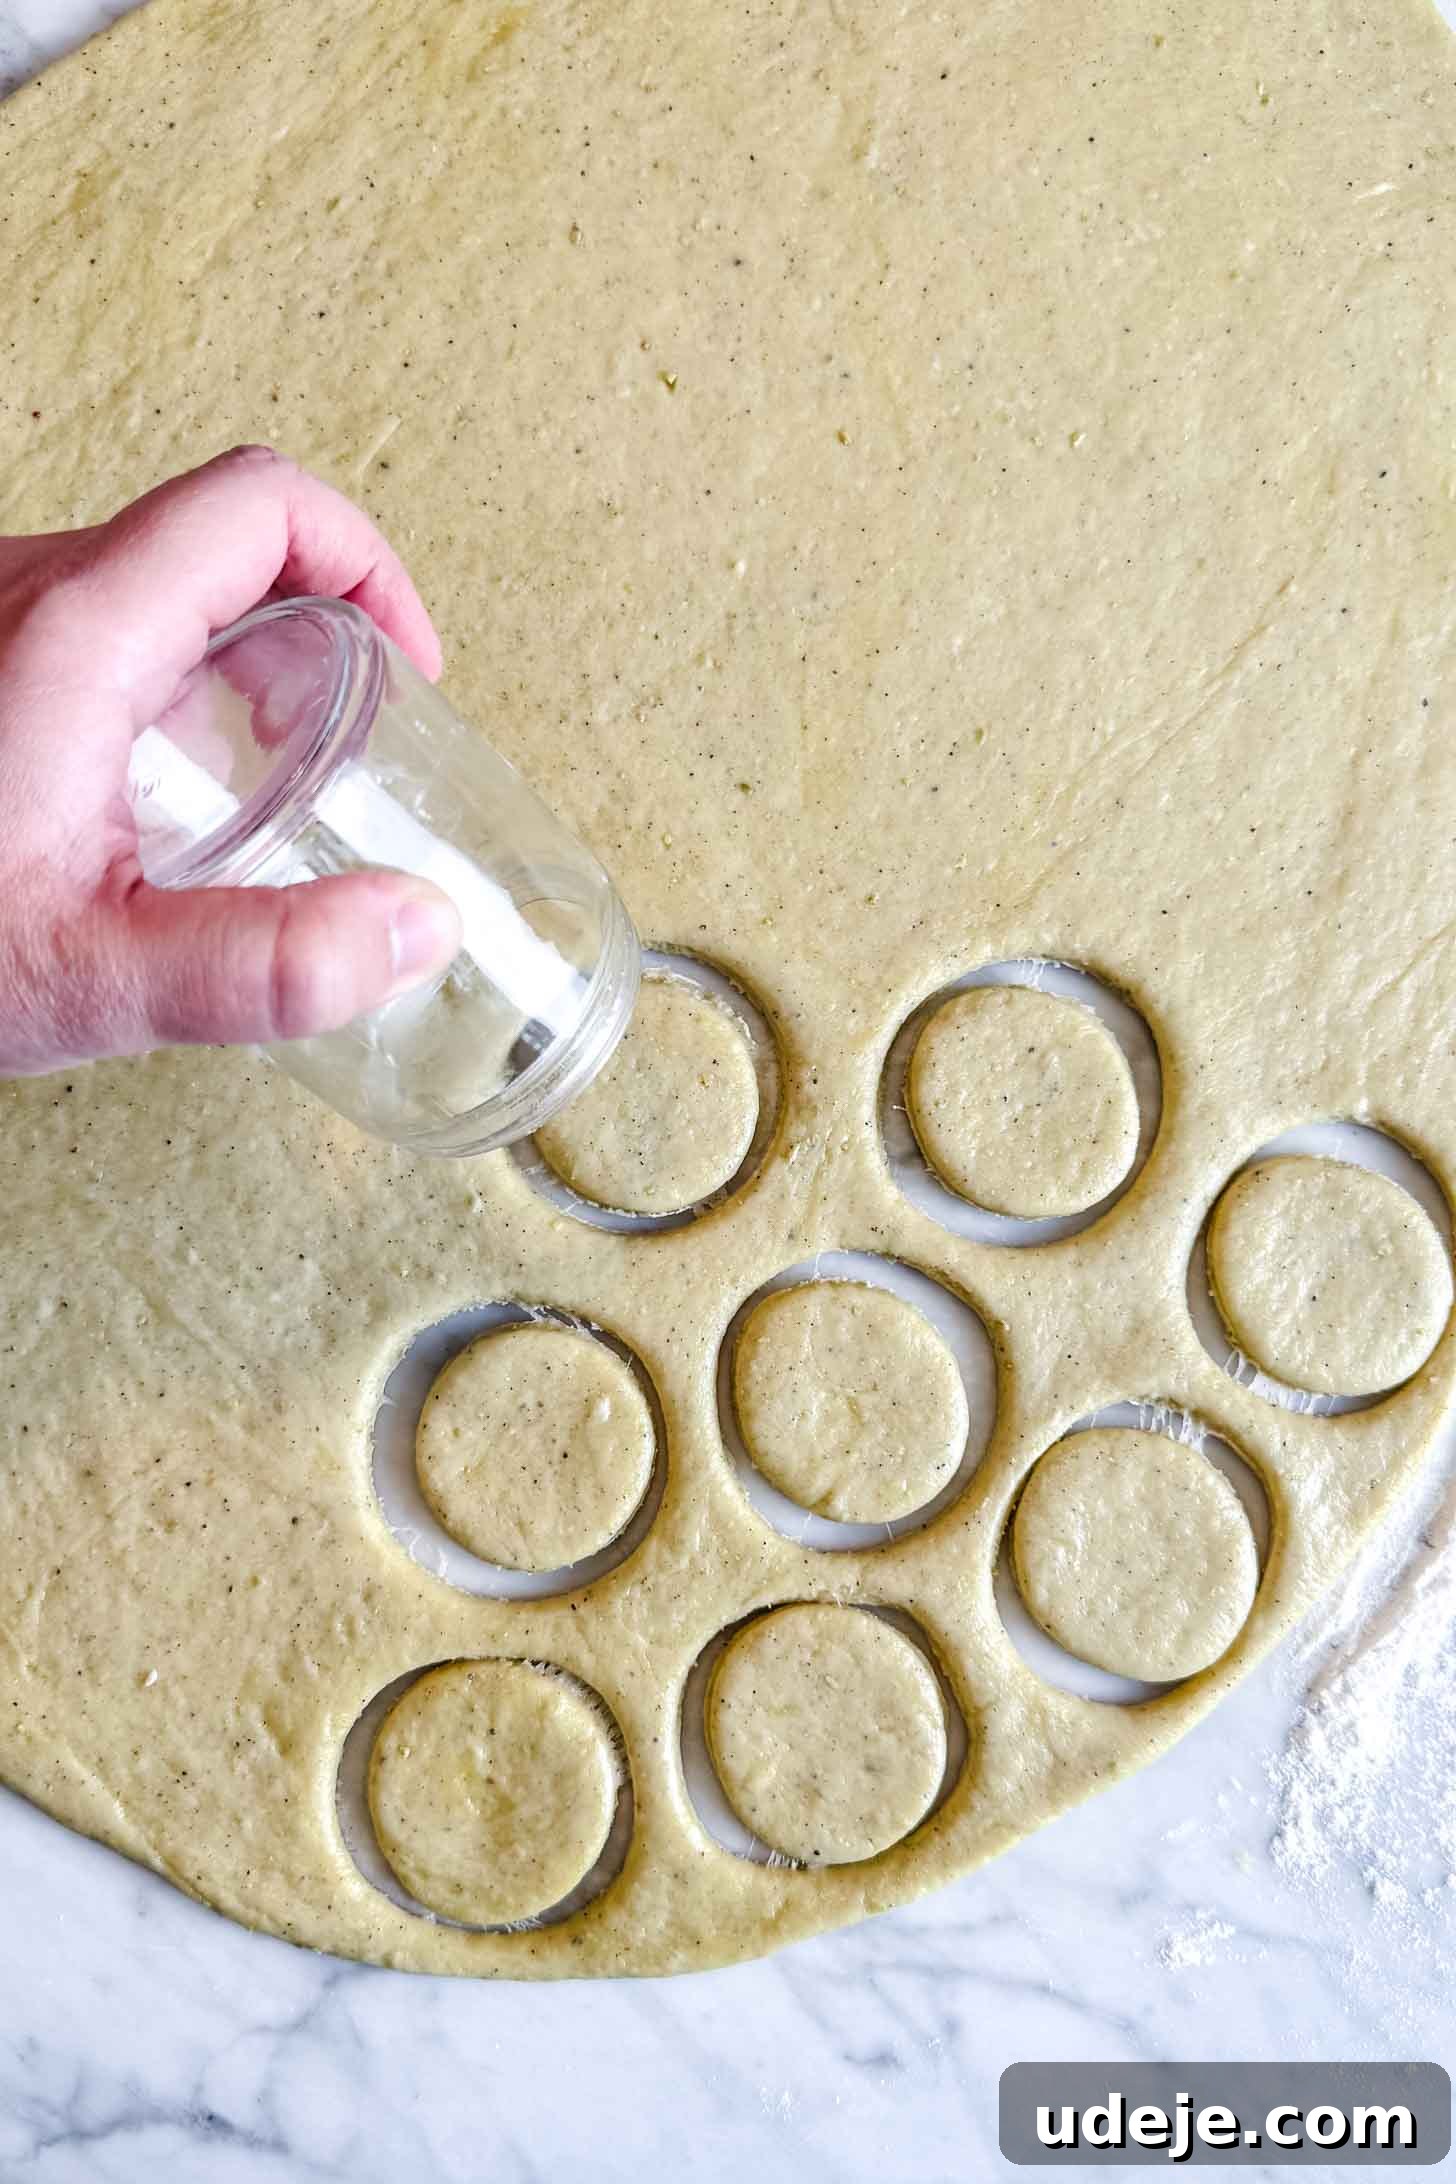
On a clean, lightly floured flat surface, roll out your Kleicha dough to a thin, even layer, approximately 1/8 inch (3mm) thick. As with the date Kleicha, the dough’s pliability and slight greasiness will make this process effortless. Once rolled, use a 2-inch diameter tea cup, coffee cup, or a round cookie cutter to cut out as many circles as possible from the dough. Gather any dough scraps, gently re-roll them, and continue cutting circles until all the dough is utilized.
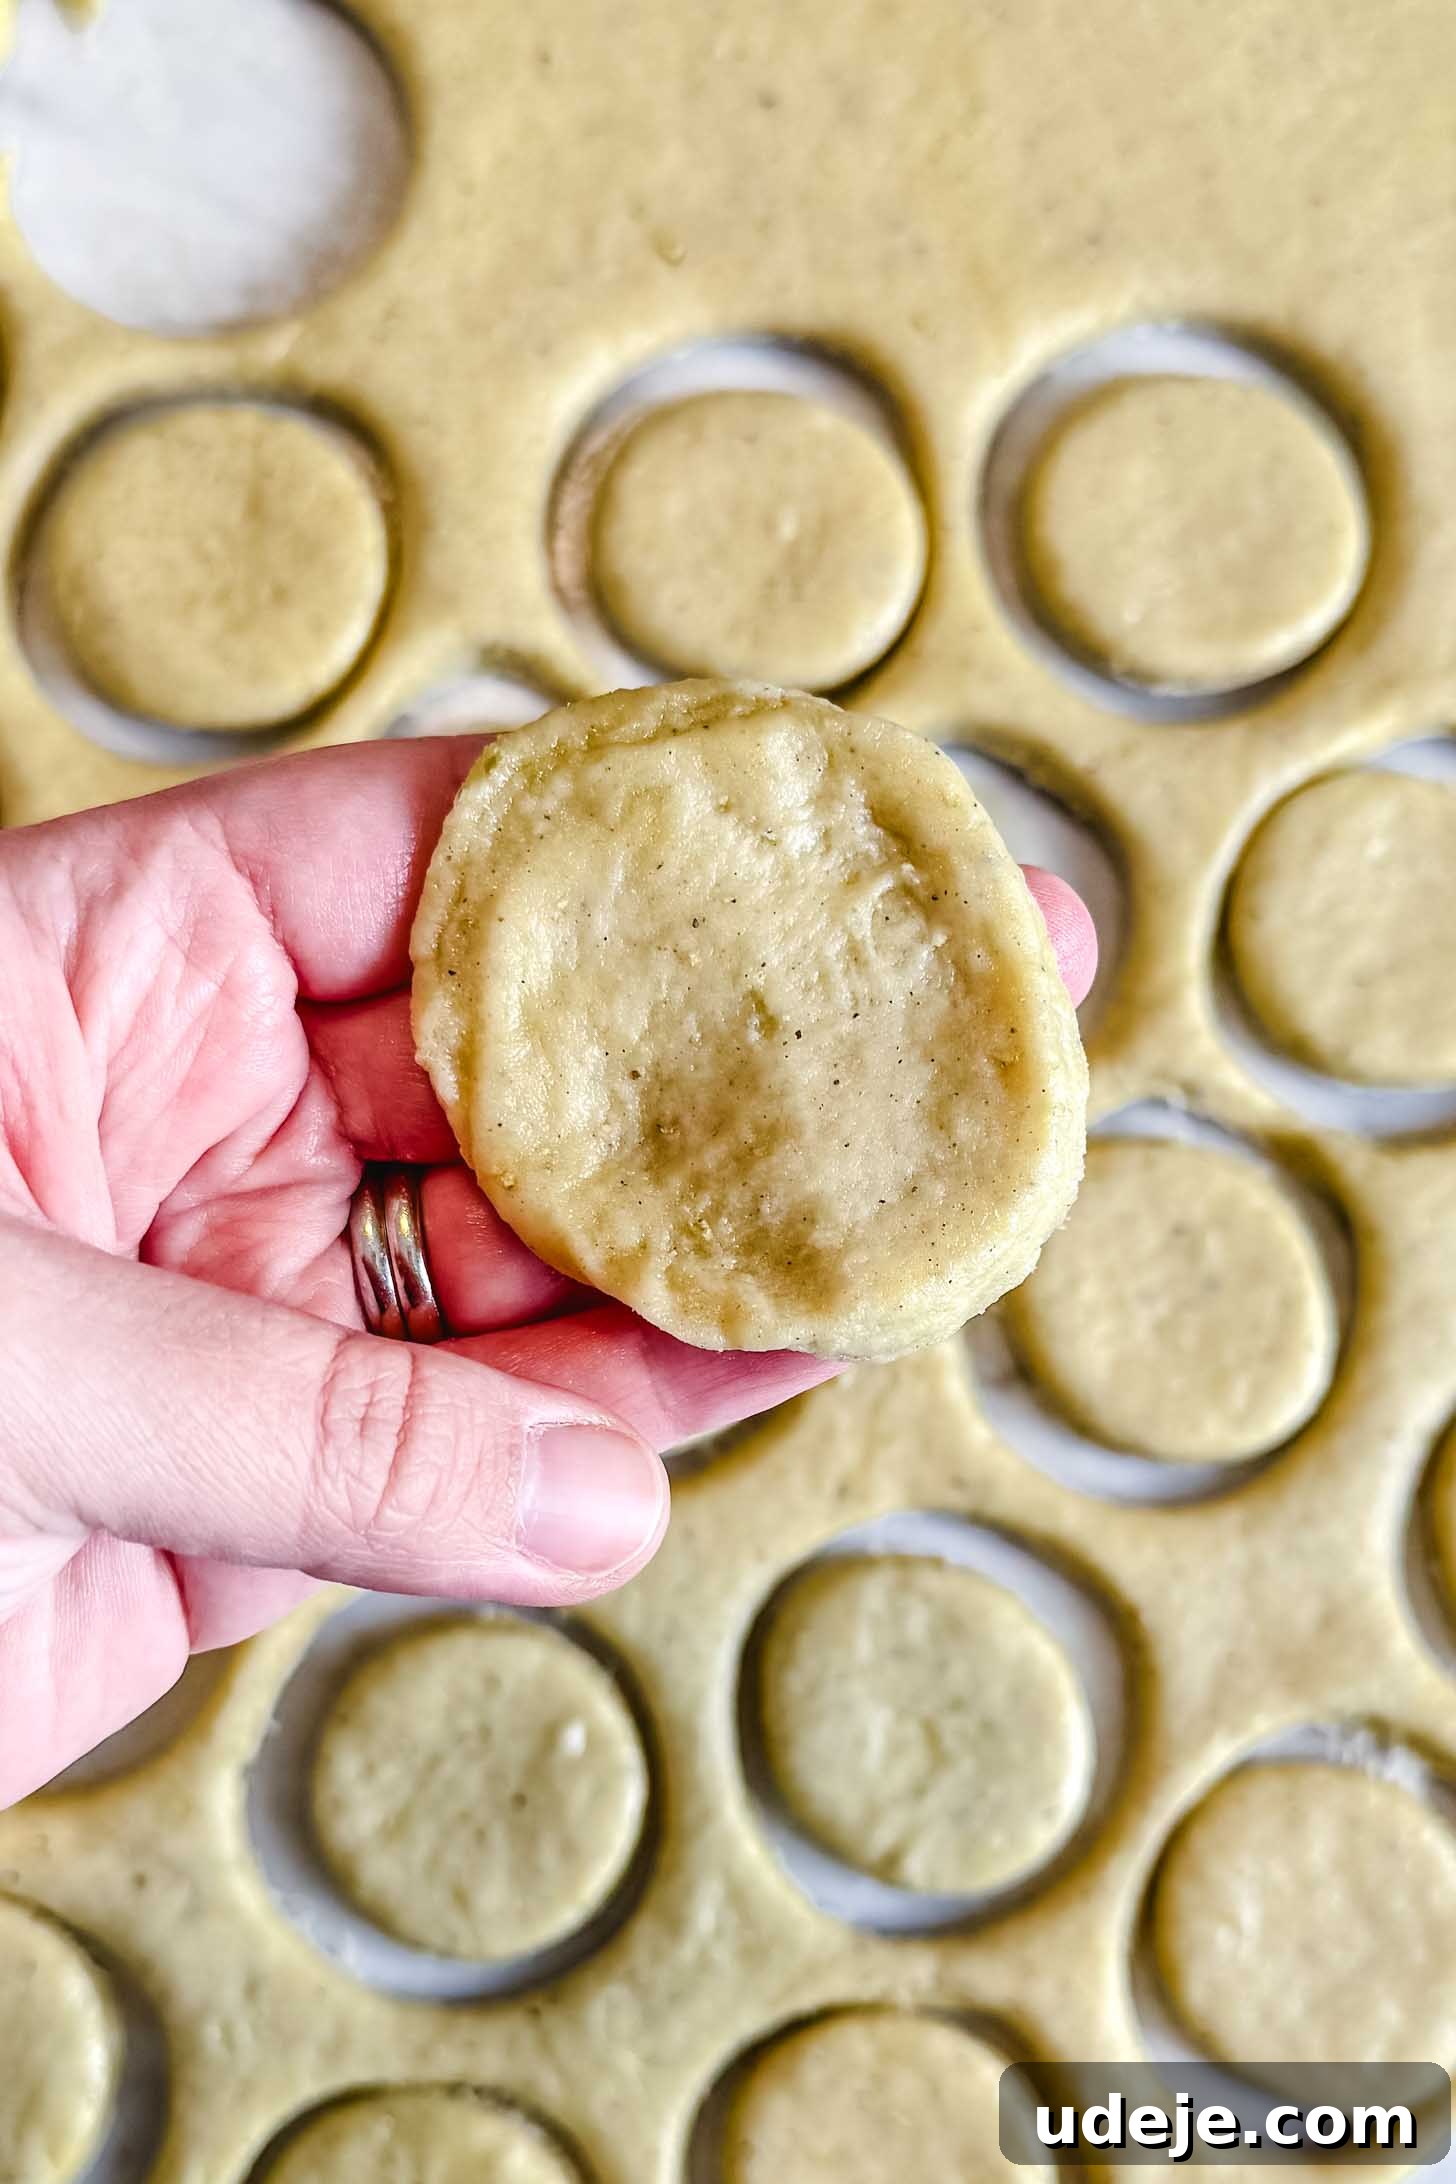
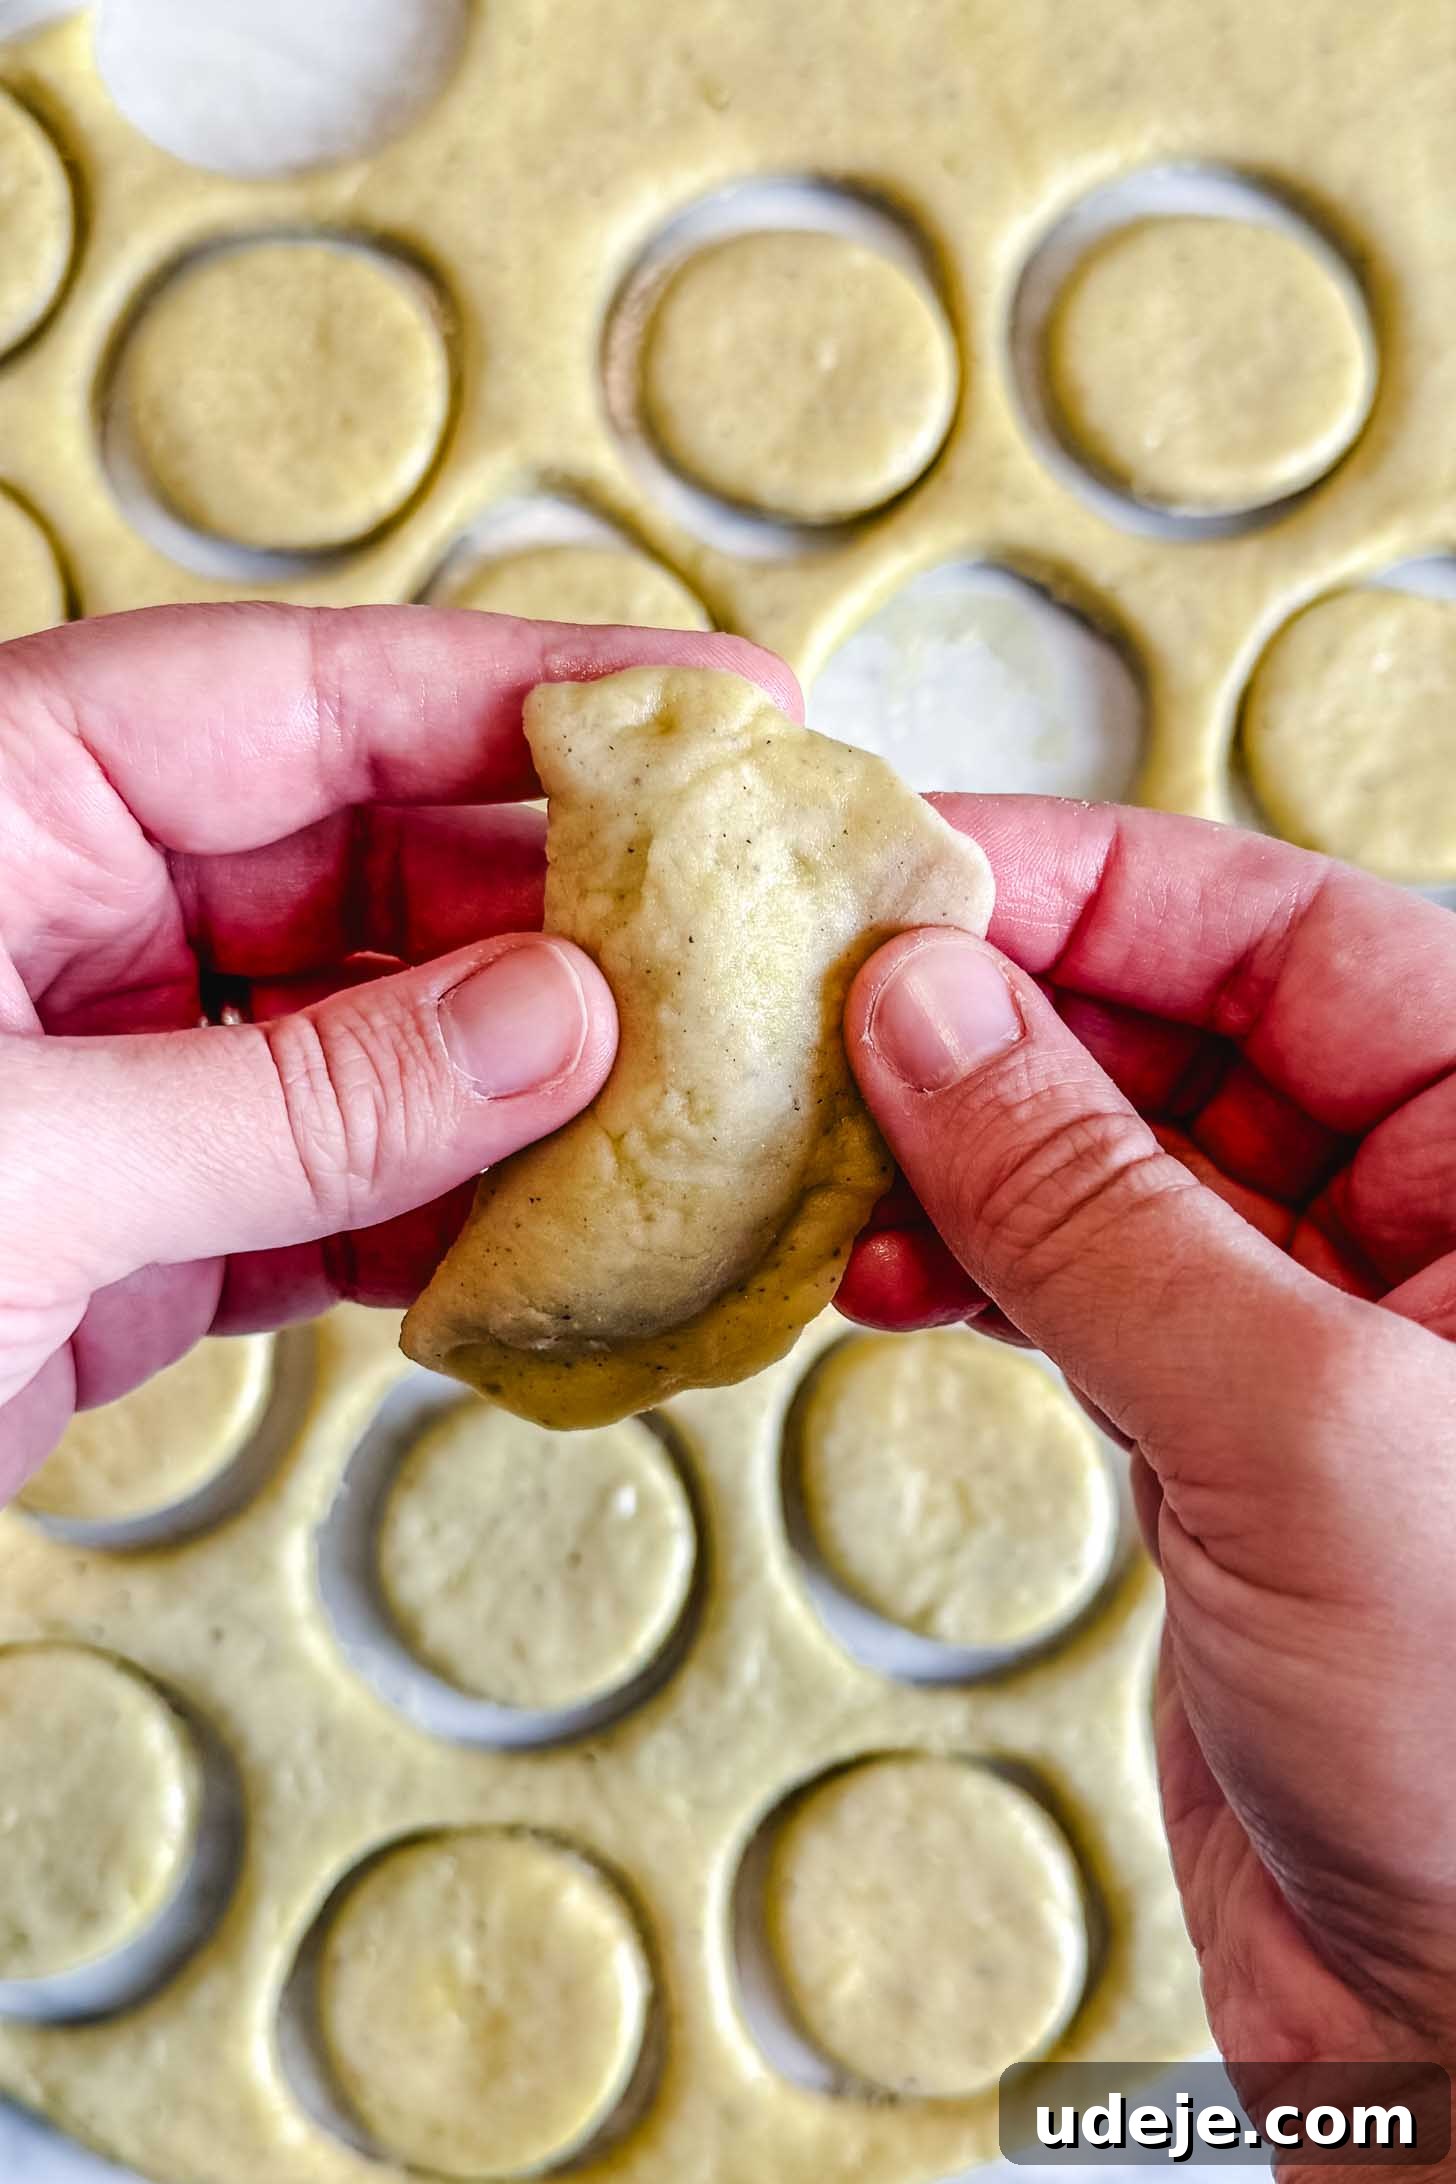
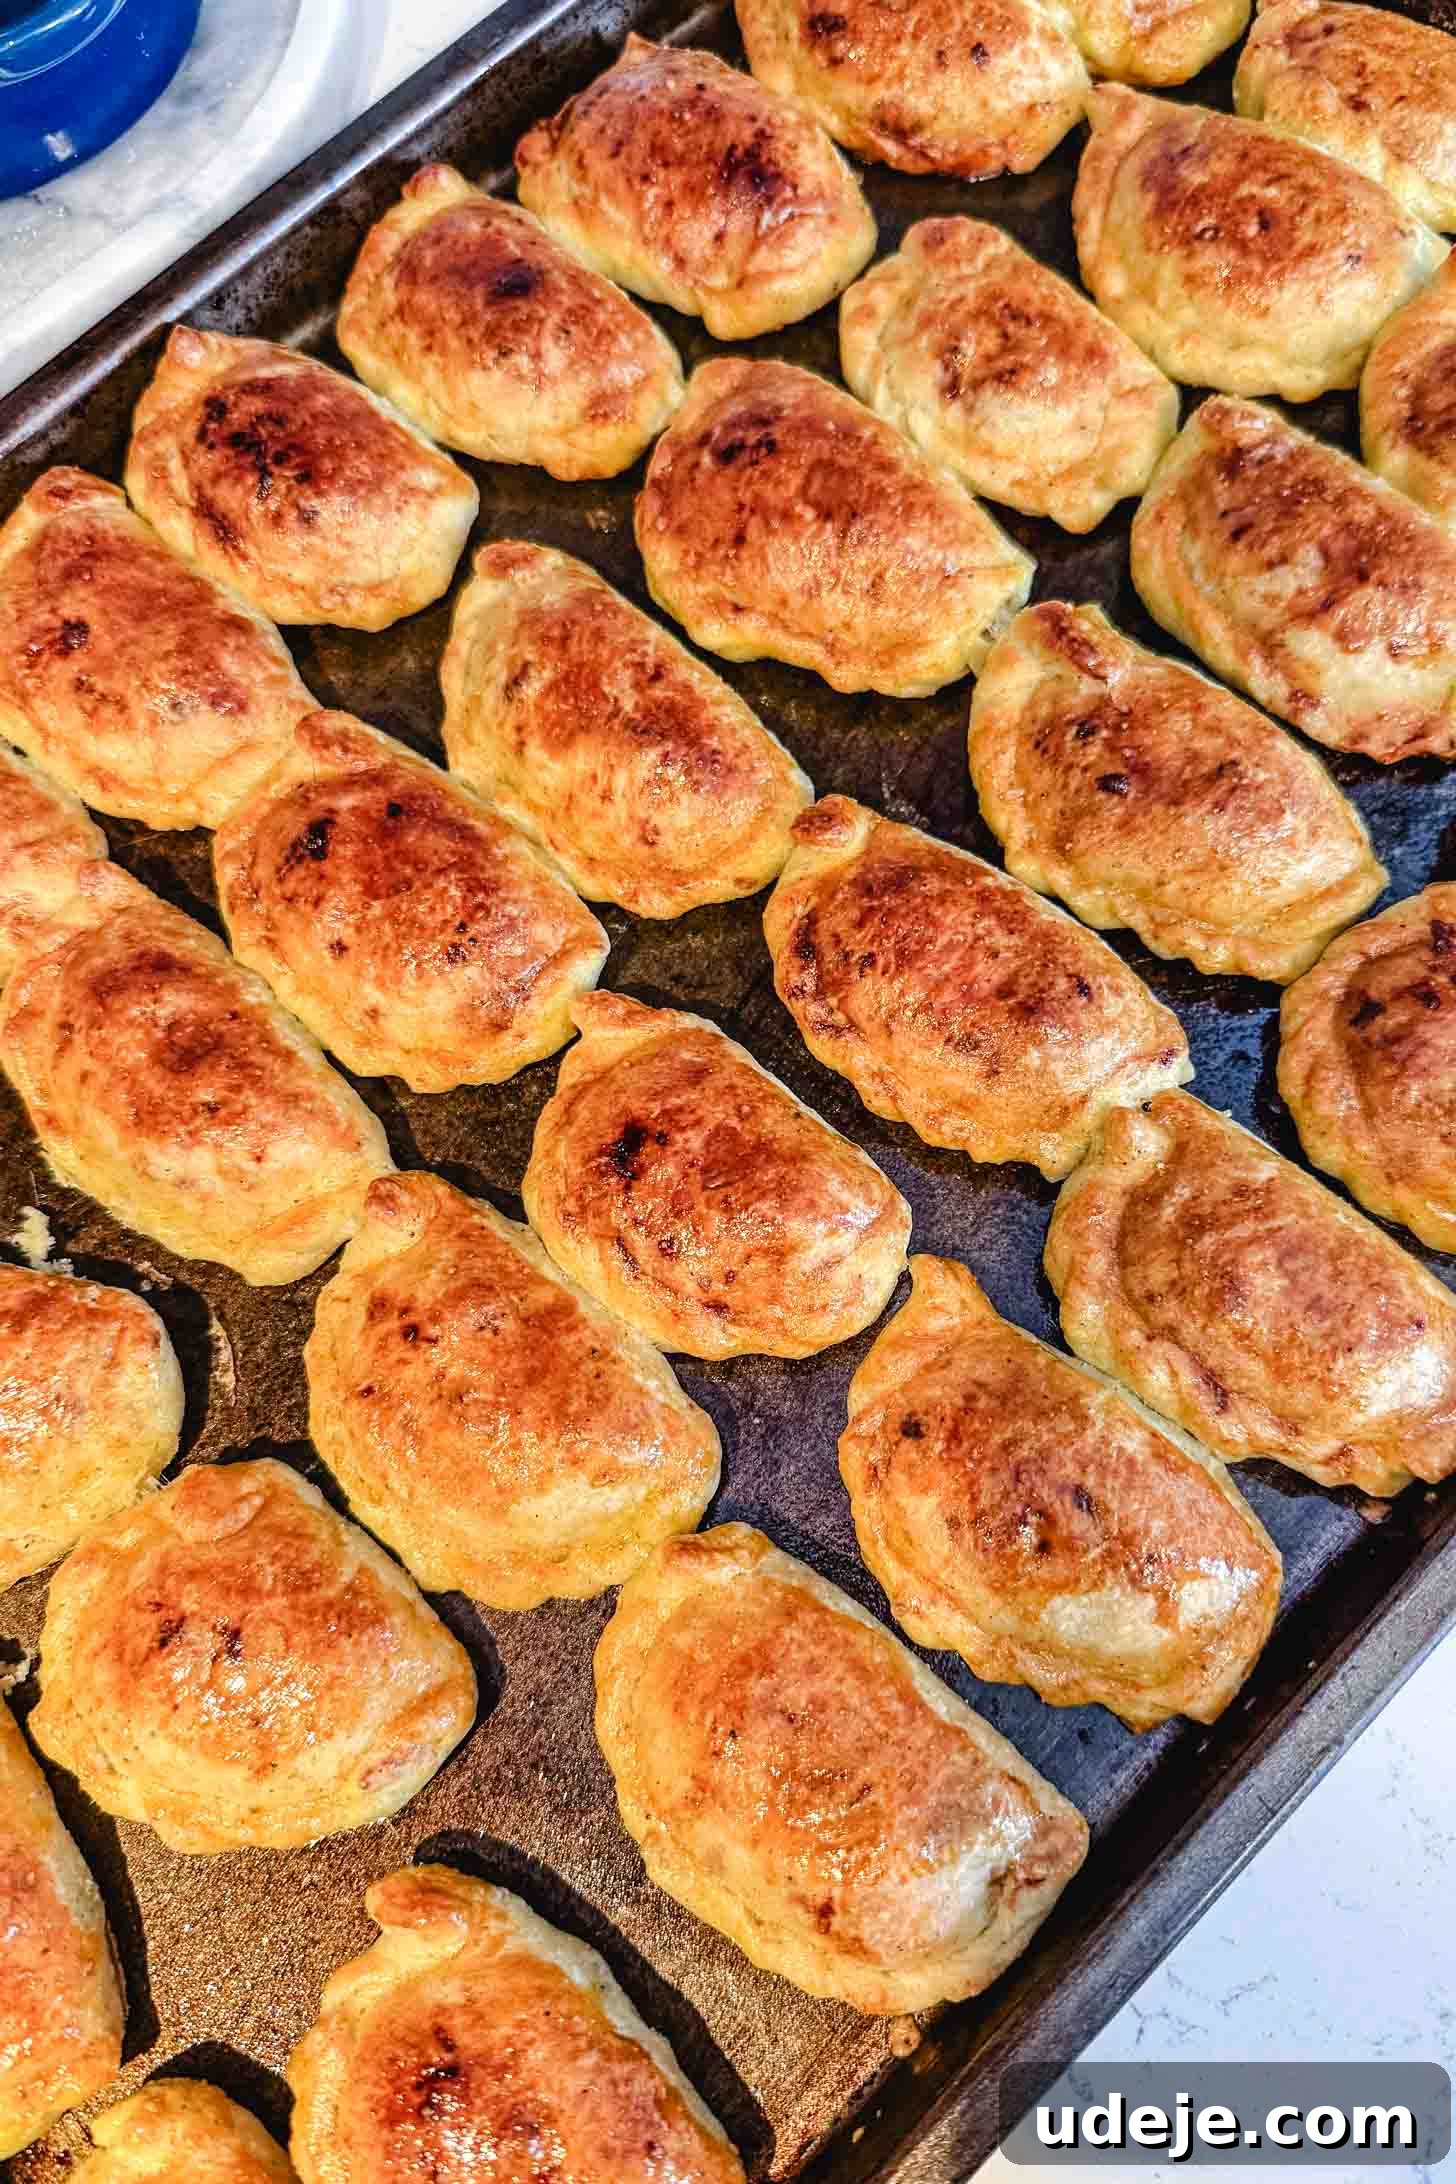
Take each individual dough circle and gently flatten it further with your fingers, slightly enlarging it. Place about a tablespoon of the walnut filling in the center of the flattened circle. Carefully fold the dough over the filling to create a half-moon shape, then firmly press the edges together to seal them completely. Adjust the amount of filling as needed to ensure the dough can be sealed without tearing or becoming overly bulky.
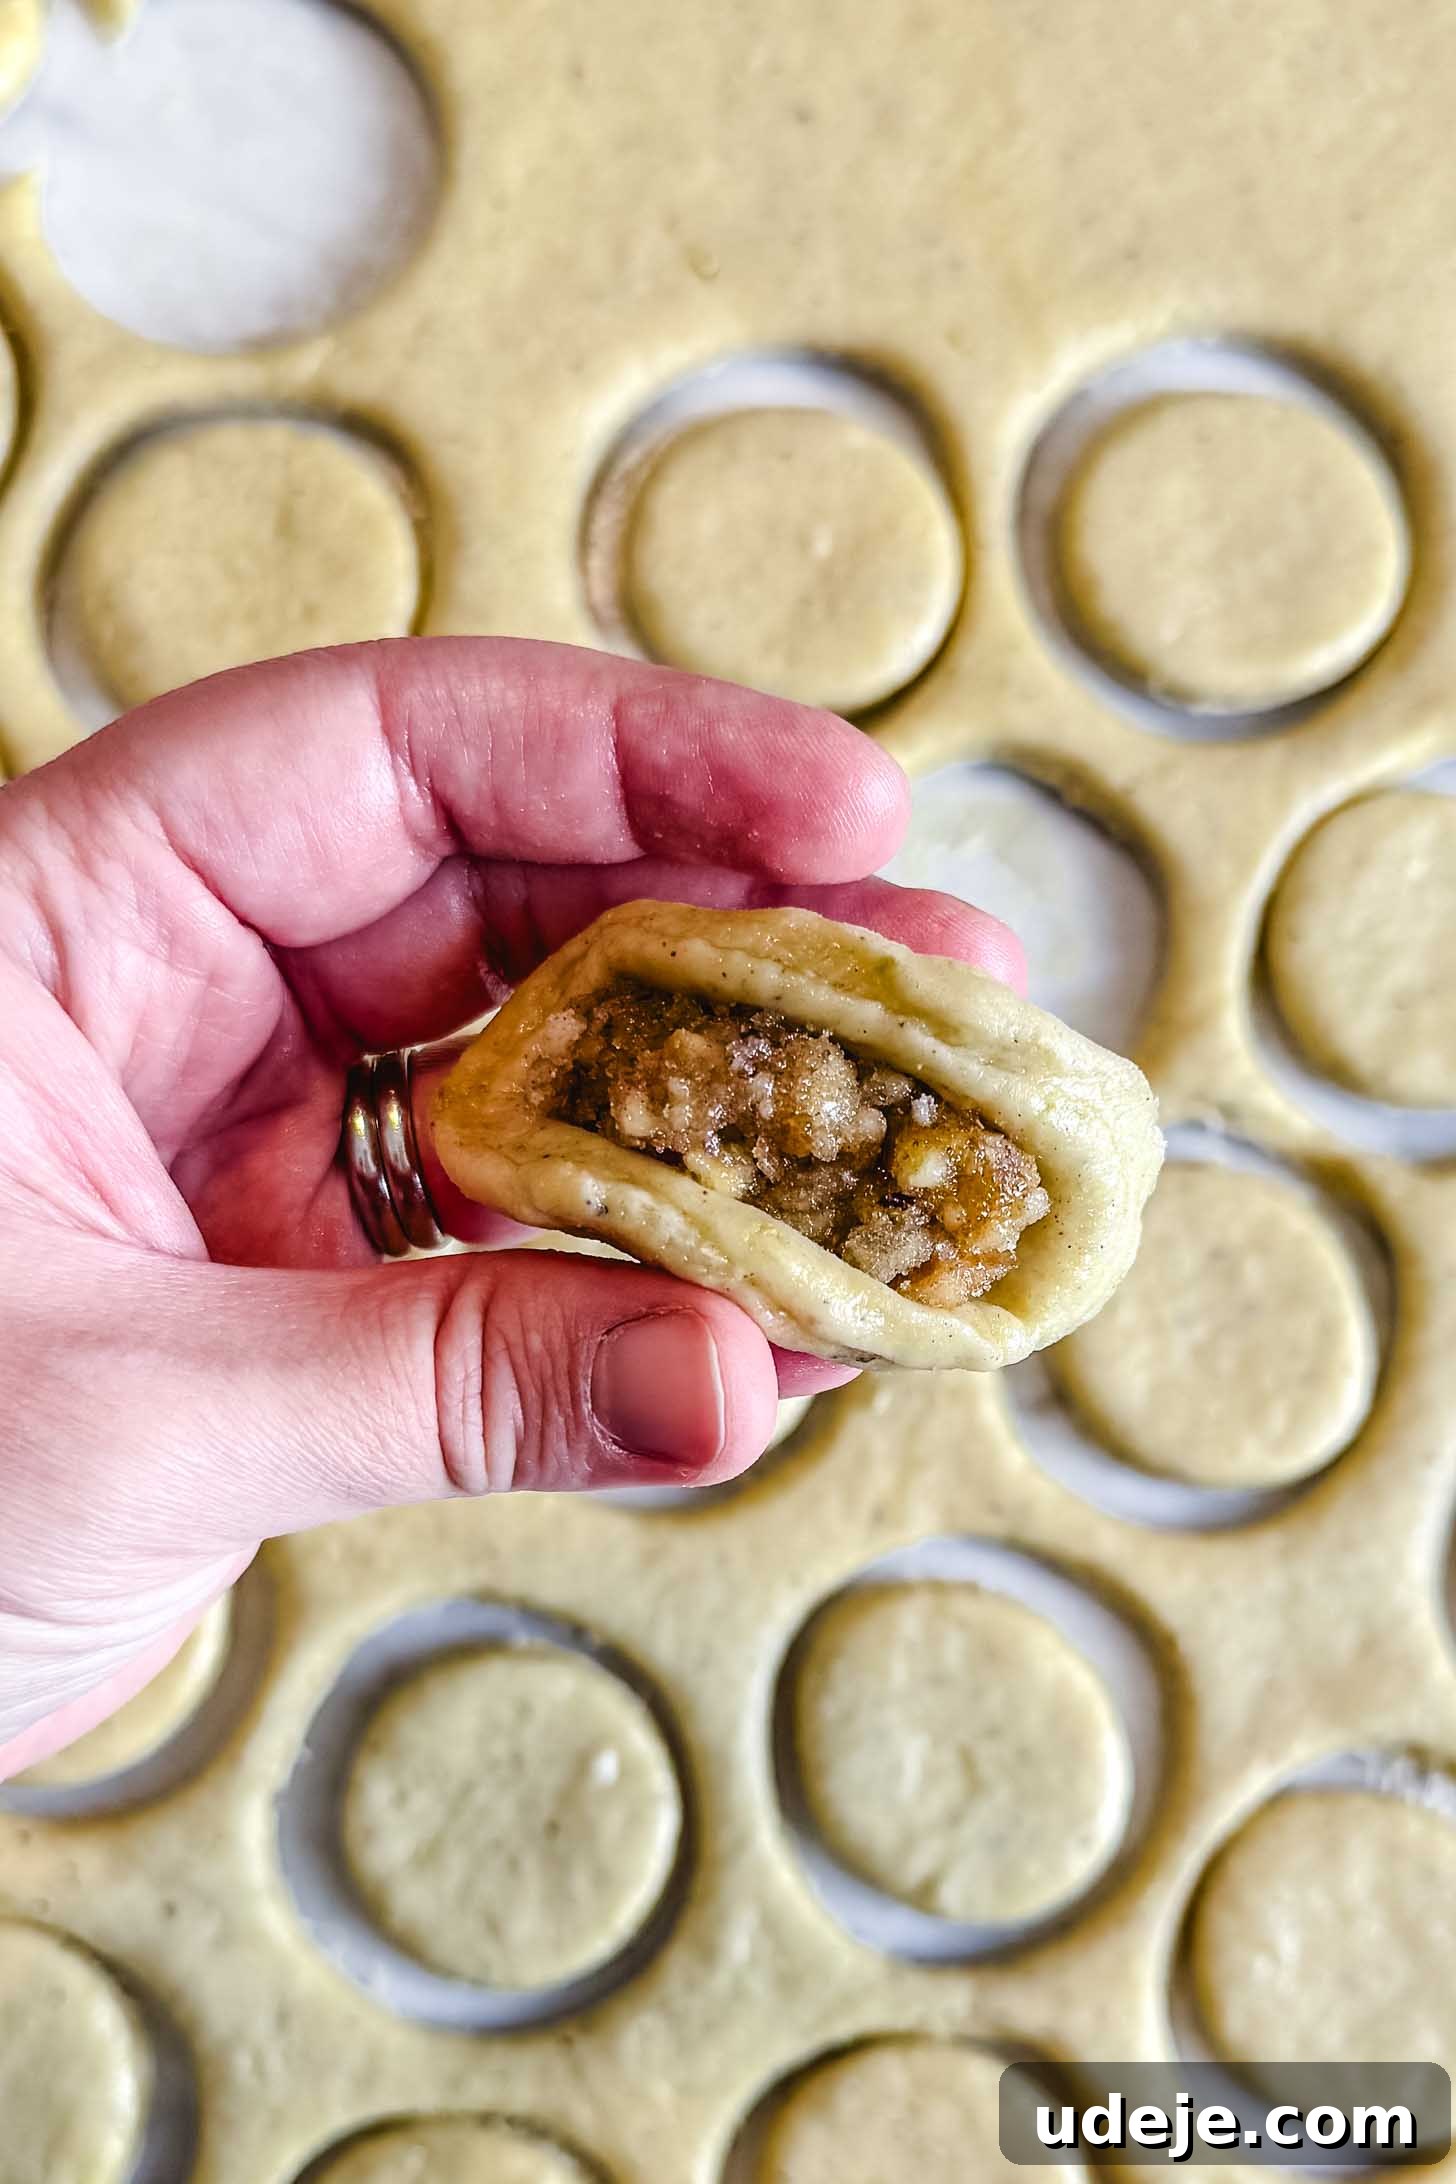
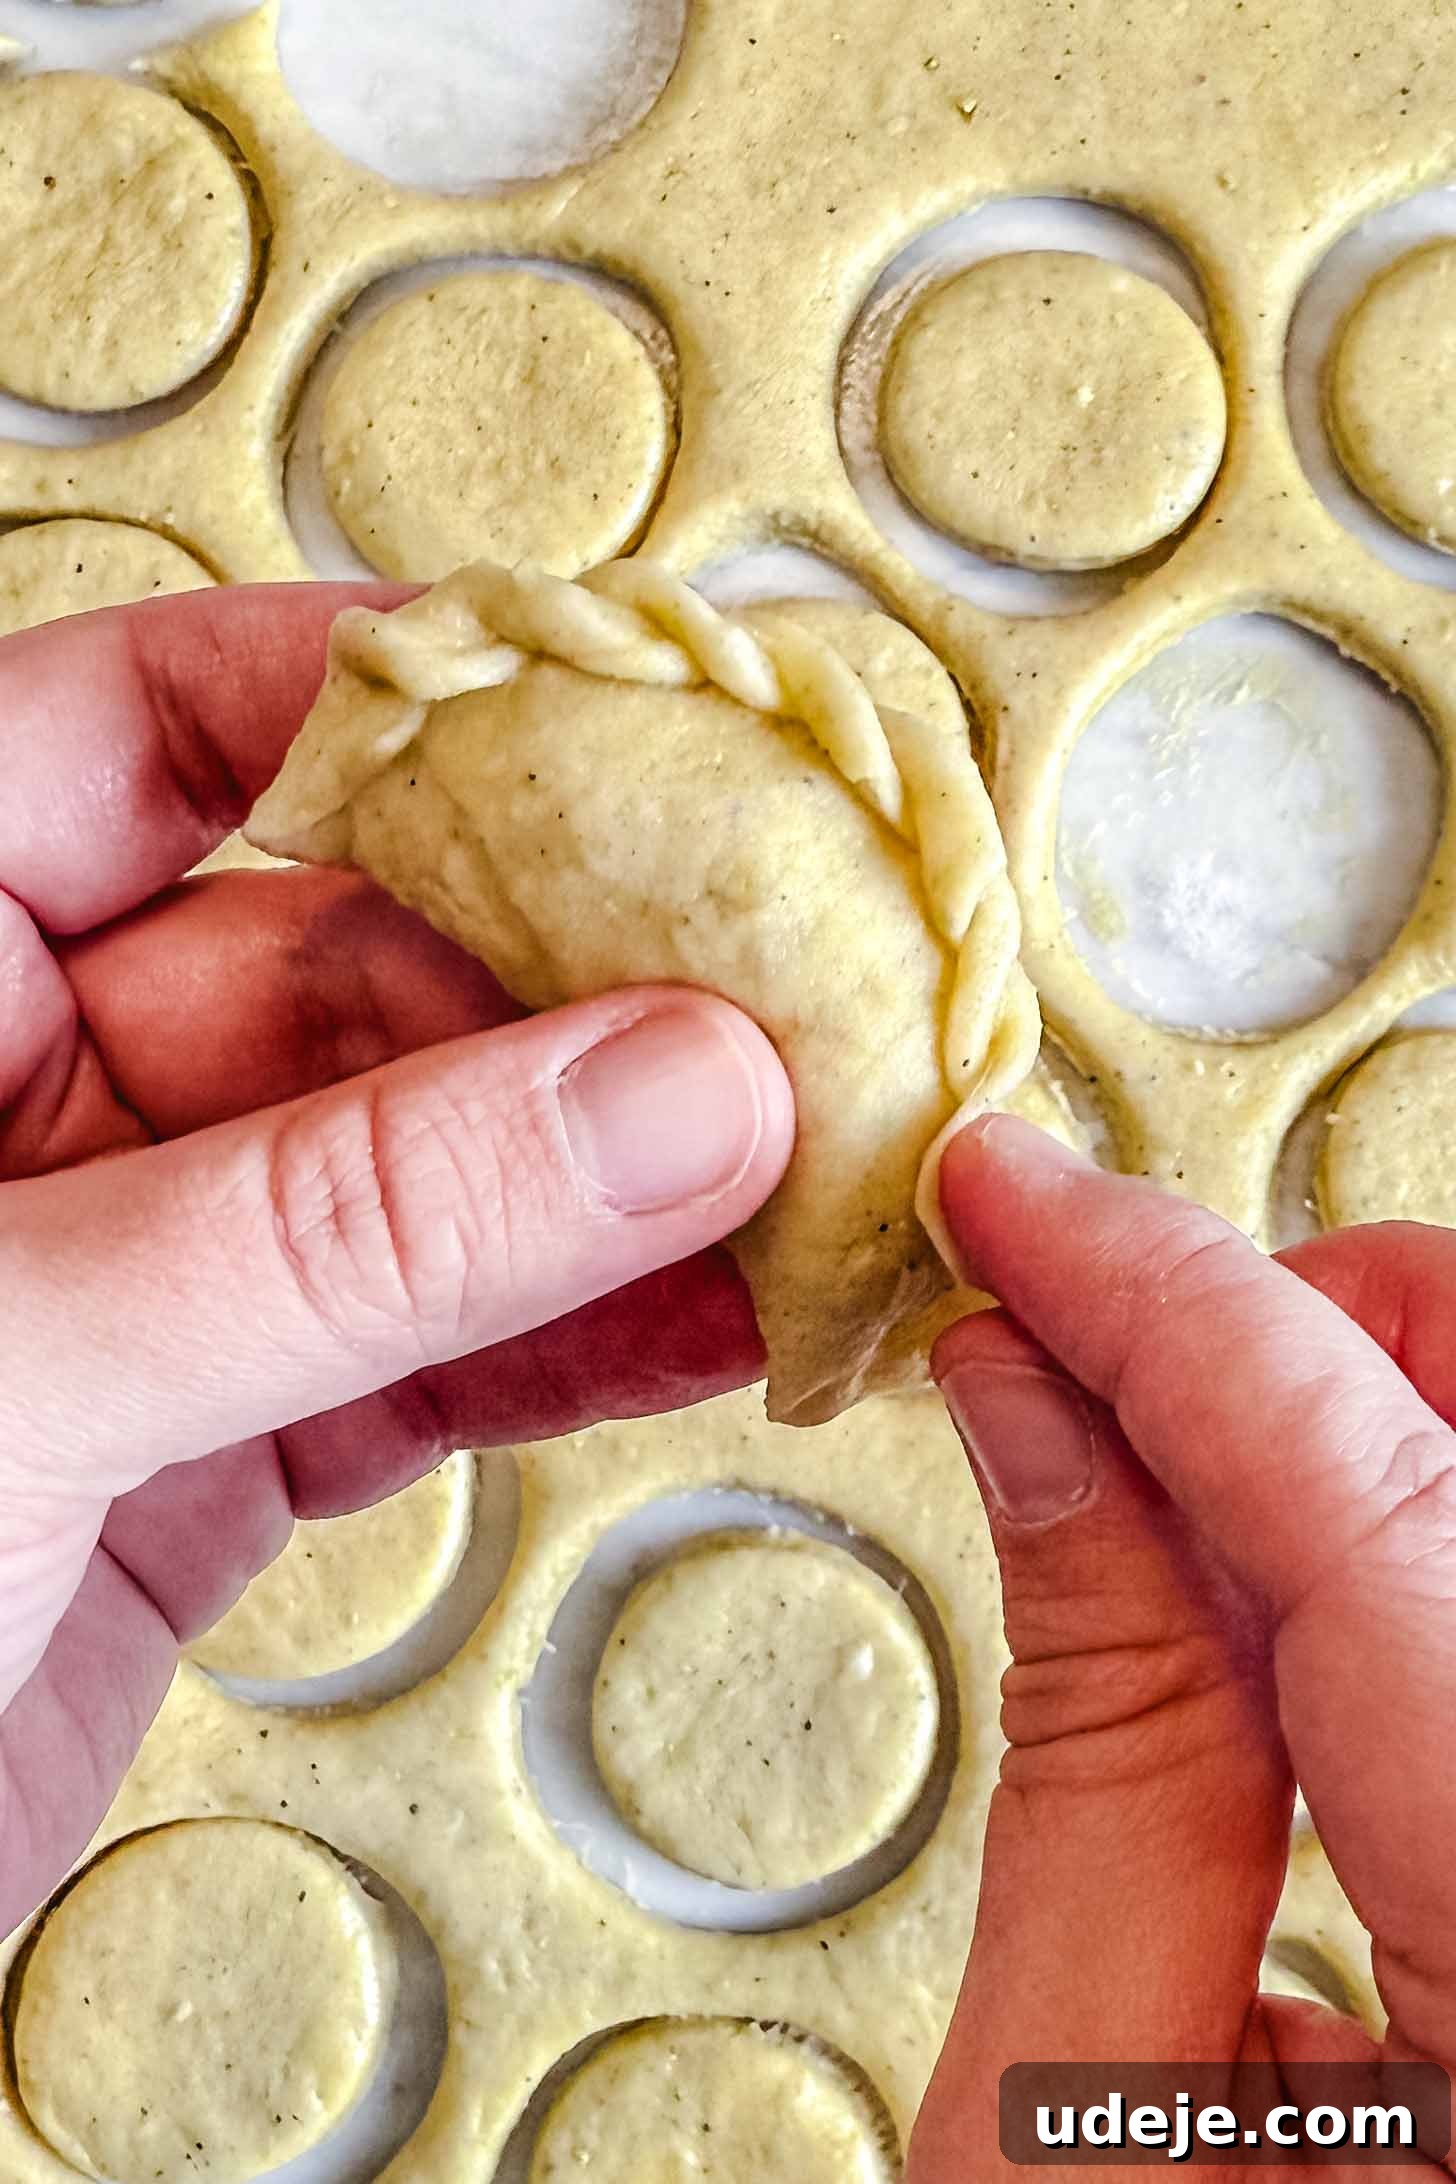
For a traditional finish, use your fingers to create a decorative braid-like pattern along the sealed edge of each half-moon. This not only enhances the visual appeal but also helps to secure the filling. If intricate braiding proves challenging, simply press the edges firmly together with a fork or your fingers to seal them flat. Finally, use your pinky finger (or a small, round object) to create a tiny indent in the middle of the top of each walnut Kleicha. This small detail helps prevent the dough from puffing up excessively during baking, maintaining its elegant shape.
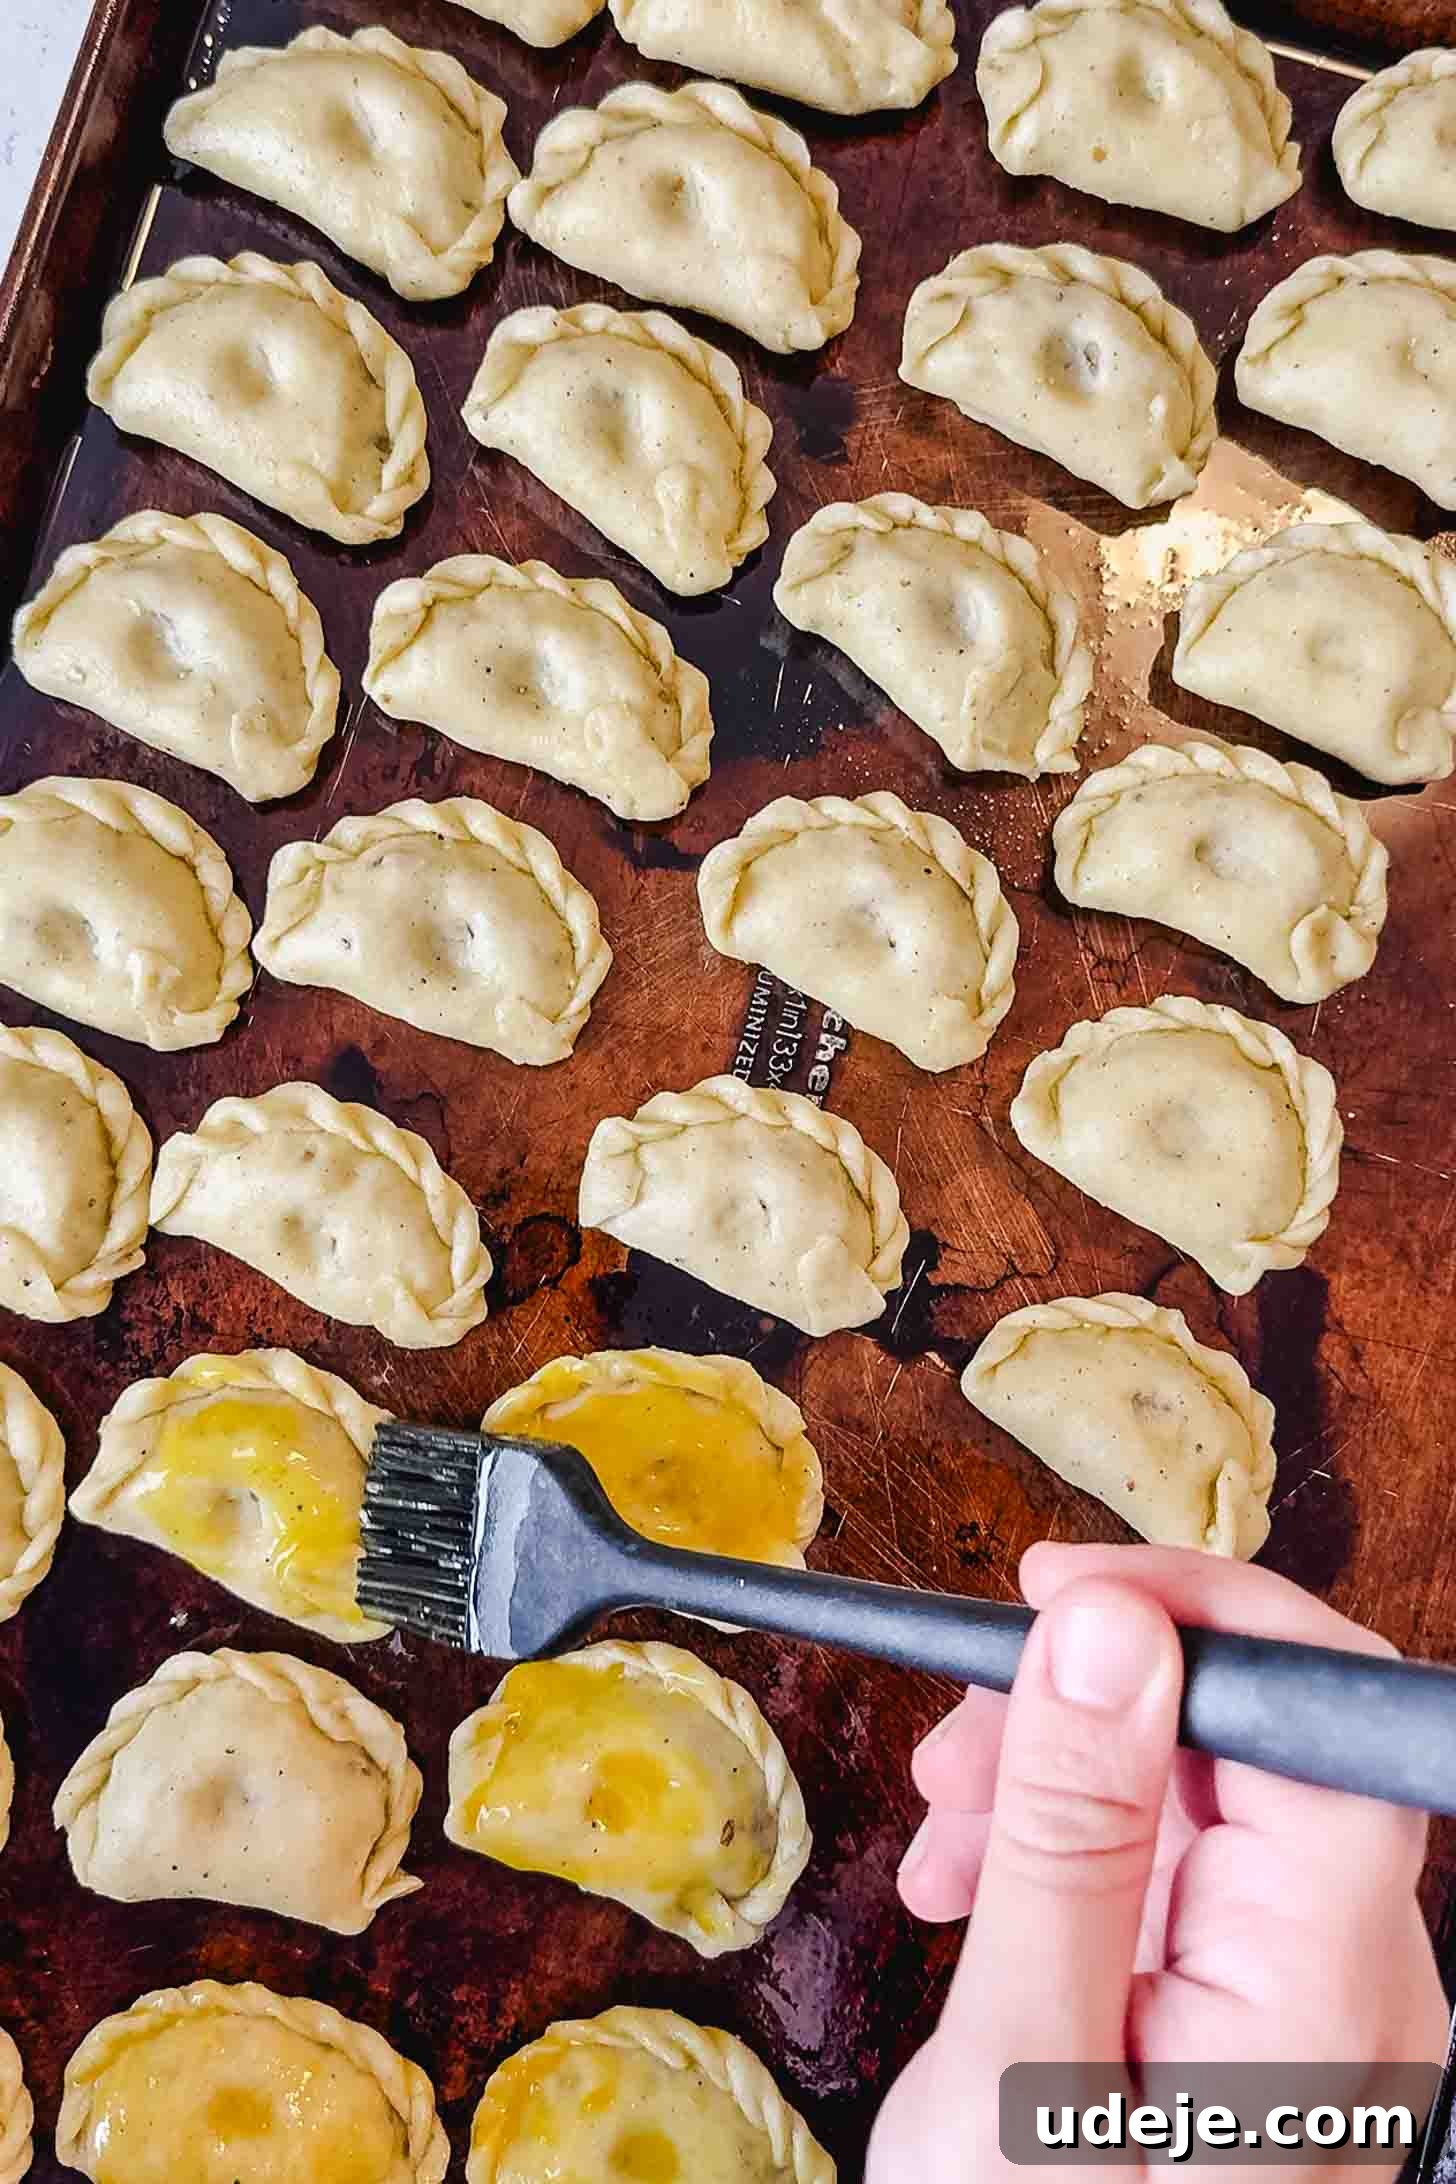
Place the shaped walnut Kleicha pieces on a generously greased baking sheet, leaving approximately 1/4 inch of space between each one. Prepare your egg wash by whisking one small egg and an additional yolk, then gently brush the top surface of each cookie. Bake on the bottom oven rack at 425°F (220°C) for 15-18 minutes, mirroring the baking time for the date Kleicha, until the bottoms are beautifully golden. Finish by broiling the tops for a few minutes until they achieve a rich golden brown color, always keeping a close eye to prevent burning. Once removed from the oven, transfer the hot Kleicha to a large tray and cover it immediately with a clean kitchen towel. This helps to lock in moisture, ensuring the cookies remain tender and prevents them from drying out as they cool.
Serving and Storage Instructions for Kleicha
Kleicha is truly best enjoyed when it’s either warm from the oven, allowing its buttery aromas to fully envelop you, or at a comfortable room temperature. It pairs exquisitely with a steaming cup of sweet Arabic tea, creating a moment of pure culinary bliss.
For short-term storage, your freshly baked Kleicha will remain wonderfully fresh for up to a week when stored in an airtight container at room temperature. To ensure maximum longevity and freshness for future enjoyment, allow the Kleicha to cool completely after baking. Then, transfer portions into freezer-safe bags or airtight containers and freeze them for up to 6 months. When you’re ready to indulge again, simply remove the desired amount from the freezer and let them thaw at room temperature. They will taste as delightful as if they were freshly baked!
More Iraqi & Middle Eastern Recipes to Explore:
If you tried this recipe, please share your experience! We’d love to hear from you in the comments section further down the page – your feedback is invaluable! You can also hop on over to Instagram and say hello!
Authentic Iraqi Kleicha (Date or Walnut Filling)
A classic Iraqi delight, these Kleicha cookies are made with a flaky, crumbly dough and stuffed with rich dates or aromatic walnuts, creating a flavorful snack that pairs wonderfully with your tea.
Yield: Approximately 65 pieces (date filling) or 35 pieces (walnut filling)
Prep time: 30 minutes
Cook time: 20 minutes
Resting time: 1 hour
Total time: 1 hour 50 minutes
Author: Amina Al-Saigh
Ingredients
For The Dough (1 Batch):
- 1 tablespoon instant yeast
- 1 cup warm water (to the touch)
- 3 cups All-Purpose Flour, plus 4 tablespoons (435g total)
- 1 teaspoon salt
- 1 1/2 tablespoons ground cardamom, freshly ground preferred
- 1/2 cup vegetable oil, or olive oil (118ml)
- 1/2 cup melted unsalted butter (118ml)
For the Date Filling (using 1 Batch of dough ~ 65 pieces):
- 1 kg Date paste
- 2 tablespoons unsalted butter
- 1/2 cup ground cinnamon
For the Walnut Filling (using 1 Batch of dough ~ 35 pieces):
- 150 g walnuts, crushed
- 1/2 tablespoon ground cardamom, freshly ground preferred
- 1/2 cup granulated sugar (100g)
- 1 small egg, or half a large egg
For Baking:
- 4 tablespoons vegetable oil, to generously grease the pan
- 1 small egg plus 1 yolk, for egg-wash (the extra yolk adds color)
Instructions
To Make the Dough:
- Important Note: This recipe makes 1 batch of dough, which is enough for either the date filling or walnut filling quantities specified. If you want to make both, either double the dough, or halve the fillings. Visual instructions are provided with images above in the main post body.
- Start by mixing the warm water (this should be warm tap water, not hot water) and the yeast in a small bowl. Mix with a spoon, then leave the yeast to activate for 5 minutes until frothy.
- In the bowl of a stand mixer, add the flour, salt, and ground cardamom. Use a dough hook and mix briefly to combine the dry ingredients. Then, add the melted butter and vegetable oil. Mix with the dough hook until the butter and oil are incorporated evenly in the flour, and the mixture starts to resemble wet sand. This will take at least 5 minutes.
- Add the water and yeast mixture to the stand mixer and start kneading the dough on medium speed. Continue to knead for at least 5 to 7 minutes, until the dough starts to come together into a single ball. Make sure you scrape the sides of the bowl if required. You’ll know it’s ready when the sides of the bowl are clean and the dough is together as one ball. It will feel soft and greasy to the touch, and it will look slightly dark and speckled with cardamom. Cover with a towel and allow it to rise for an hour while you prepare the filling.
To Make the Date Kleicha (Refer to in-post photos for visuals):
- Preheat the oven to 425°F (220°C) and place a rack on the bottom. In a skillet on medium-low heat, melt the butter. Add the date paste to the skillet and use a non-stick spatula to mix the paste into the butter for a few minutes. This step caramelizes the dates, adds extra flavor, and softens it. The paste will be a bit sticky, but that’s okay. Remove from the heat and allow it to cool for a few minutes.
- Since the date paste is sticky, you need to use a large non-stick silicone baking mat OR a large piece of greased parchment paper or wax paper, at least 15 by 20 inches in size, placed on a flat surface. Place the date paste onto the mat and sprinkle generously with about 3/4 of the cinnamon, then use your hands to knead the cinnamon in. The cinnamon will help make the date less sticky. Continue to knead the cinnamon into the paste.
- Then gather the date paste into a disc on the surface and place a large parchment sheet or wax paper on top. Use a rolling pin to roll the date paste on top of the parchment paper so it does not stick. Roll it into a very thin layer, roughly 1/8 inch thick.
- On another large flat surface, roll out the dough using a rolling pin to a thin layer, approximately 1/8 inch thick. This should be easy to do since the dough will be pliable and greasy. Once rolled out, you are ready to start filling it with the dates.
- Break small pieces of the rolled-out date paste using your hands and place them on top of the rolled-out dough. Continue to break up small pieces and stick them over the dough, covering the whole surface and leaving just 1/4 inch of space between the pieces. It will start to resemble a cow-like pattern. The reason the date paste is added in this manner is to make rolling much easier than using a whole sheet of the paste.
- Once the date paste is used up, sprinkle the rest of the cinnamon over the dough and dates.
- Use a knife to make a straight cut across the length of the dough to divide it into two equal halves. Starting from the inside, roll the dough gently onto itself so that the dates are on the inside and the dough is on the outside. Roll each half into a long log until you reach the end.
- You can cut the logs in half to make them slightly shorter and more manageable, in which case you will have 4 shorter logs. Use the rolling pin to flatten them just slightly. Then use a sharp knife to cut them into pieces roughly 3/4 of an inch wide.
- Once all the pieces are cut, use a date seed or any other utensil to make two small holes in the middle of the date Kleicha pieces, pressing only halfway through.
- Grease a large sheet pan generously with the vegetable oil, and whisk together the egg and the yolk. Arrange the Kleicha pieces on the pan, leaving roughly 1/4 inch of space between each. Brush each piece with the egg wash. Bake for 15 to 18 minutes until the bottom is golden brown, then broil for 2 minutes. Stay close by as you broil so the Kleicha does not get too dark. Remove from the oven and place in a large tray covered with a towel so they don’t dry out.
To Make the Walnut Kleicha (Refer to in-post photos for visuals):
- Prepare the walnut mixture by crushing the walnuts into small pieces, but avoid crushing them into a powder. You can crush them using a food processor or pound them in a closed freezer bag with a rolling pin. Add the cardamom, sugar, and the egg and mix well using a spoon until the mixture is well incorporated.
- On a large flat surface, roll out the dough using a rolling pin to a thin layer, approximately 1/8 inch thick. This should be easy to do since the dough will be pliable and greasy.
- Use a small tea or coffee cup, or a cookie cutter that has a diameter of roughly 2 inches, to cut out 2-inch circles in the dough. Do this all over the dough, then gather up the dough scraps to roll them out again and cut more 2-inch circles until the dough is used up.
- Take each circle and flatten it out using your fingers. Place a spoonful of the walnut mixture in the middle and fold the circle into a half-moon shape, securing the edges. Use as much or as little filling as possible without overfilling the dough.
- Use your fingers to create a braid-like edge (similar to an empanada) to secure the Kleicha. If you find this difficult, you can simply press it shut without creating a pattern. Use your pinky finger to create a small indent in the middle of each piece (this prevents it from bubbling).
- Grease a large sheet pan generously with the vegetable oil, and whisk together the egg and the yolk. Arrange the Kleicha pieces on the pan, leaving roughly 1/4 inch of space between each. Brush each piece with the egg wash. Bake for 15 to 18 minutes until the bottom is golden brown, then broil for 2 minutes. Stay close by as you broil so the Kleicha does not get too dark. Remove from the oven and place in a large tray covered with a towel so they don’t dry out.
Notes:
- Important note: this recipe provides quantities for 1 batch of dough, which is enough to make 1 batch of the date-filled Kleicha (approx. 65 pieces) OR 1 batch of the walnut Kleicha (approx. 35 pieces).
- If you want to make both fillings, either double the dough to accommodate 1 batch of each Kleicha type, or halve the filling portions and use half the dough for each of the fillings.
- Visual step-by-step photos are included in the blog post above. I highly recommend you reference them to guide you through this recipe.