

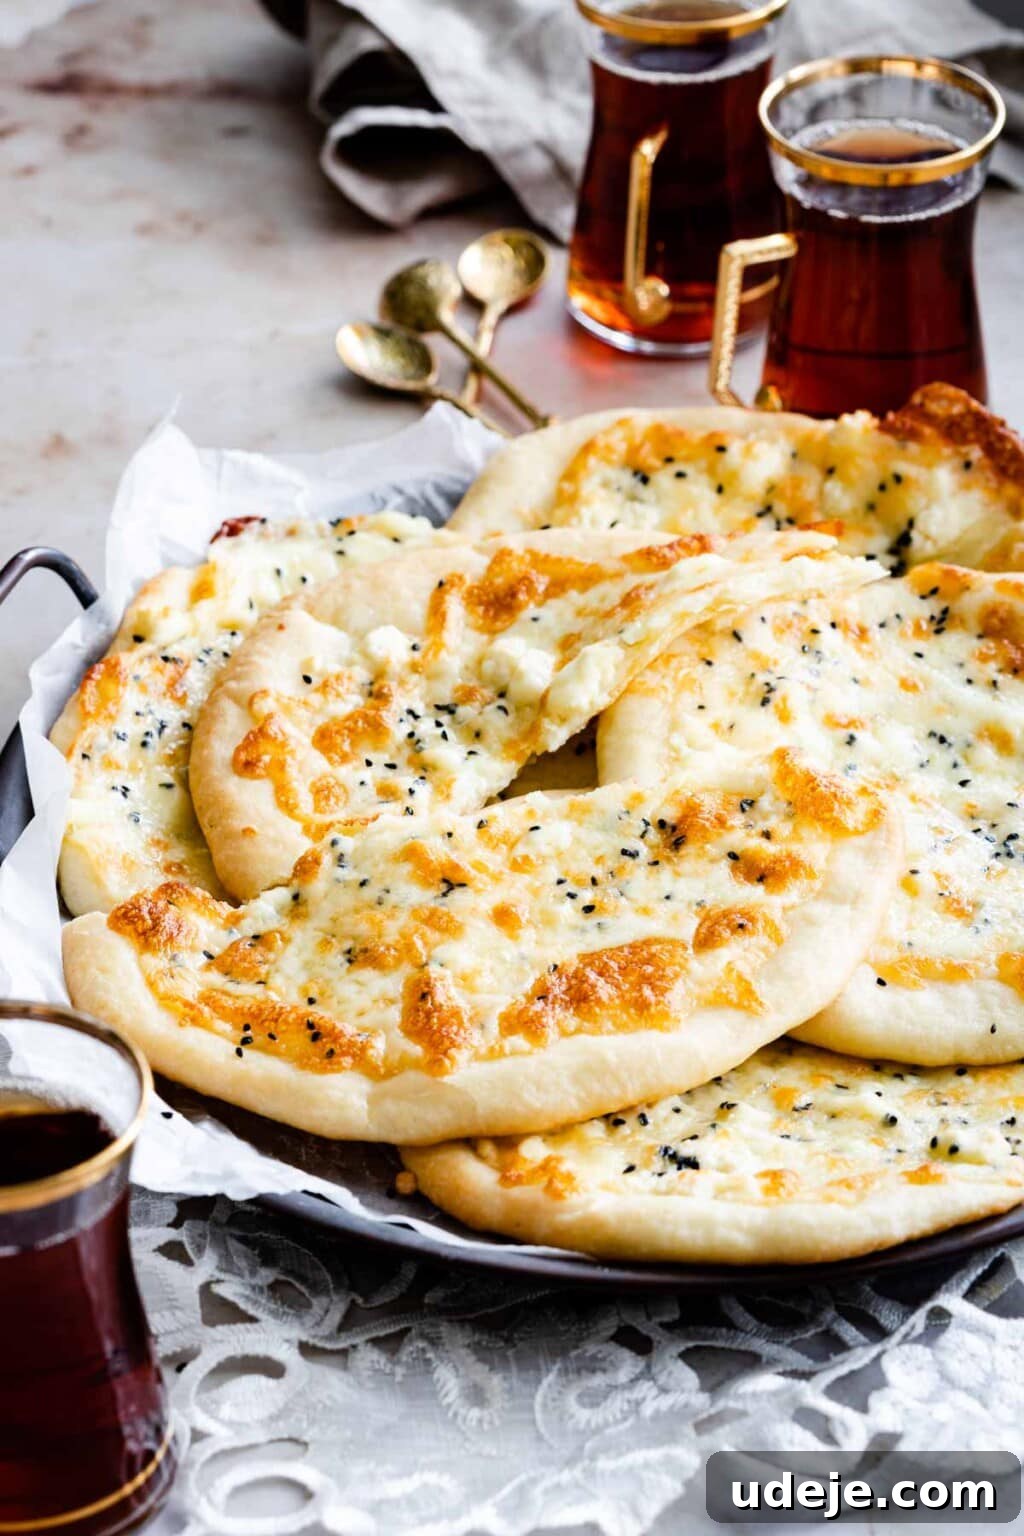
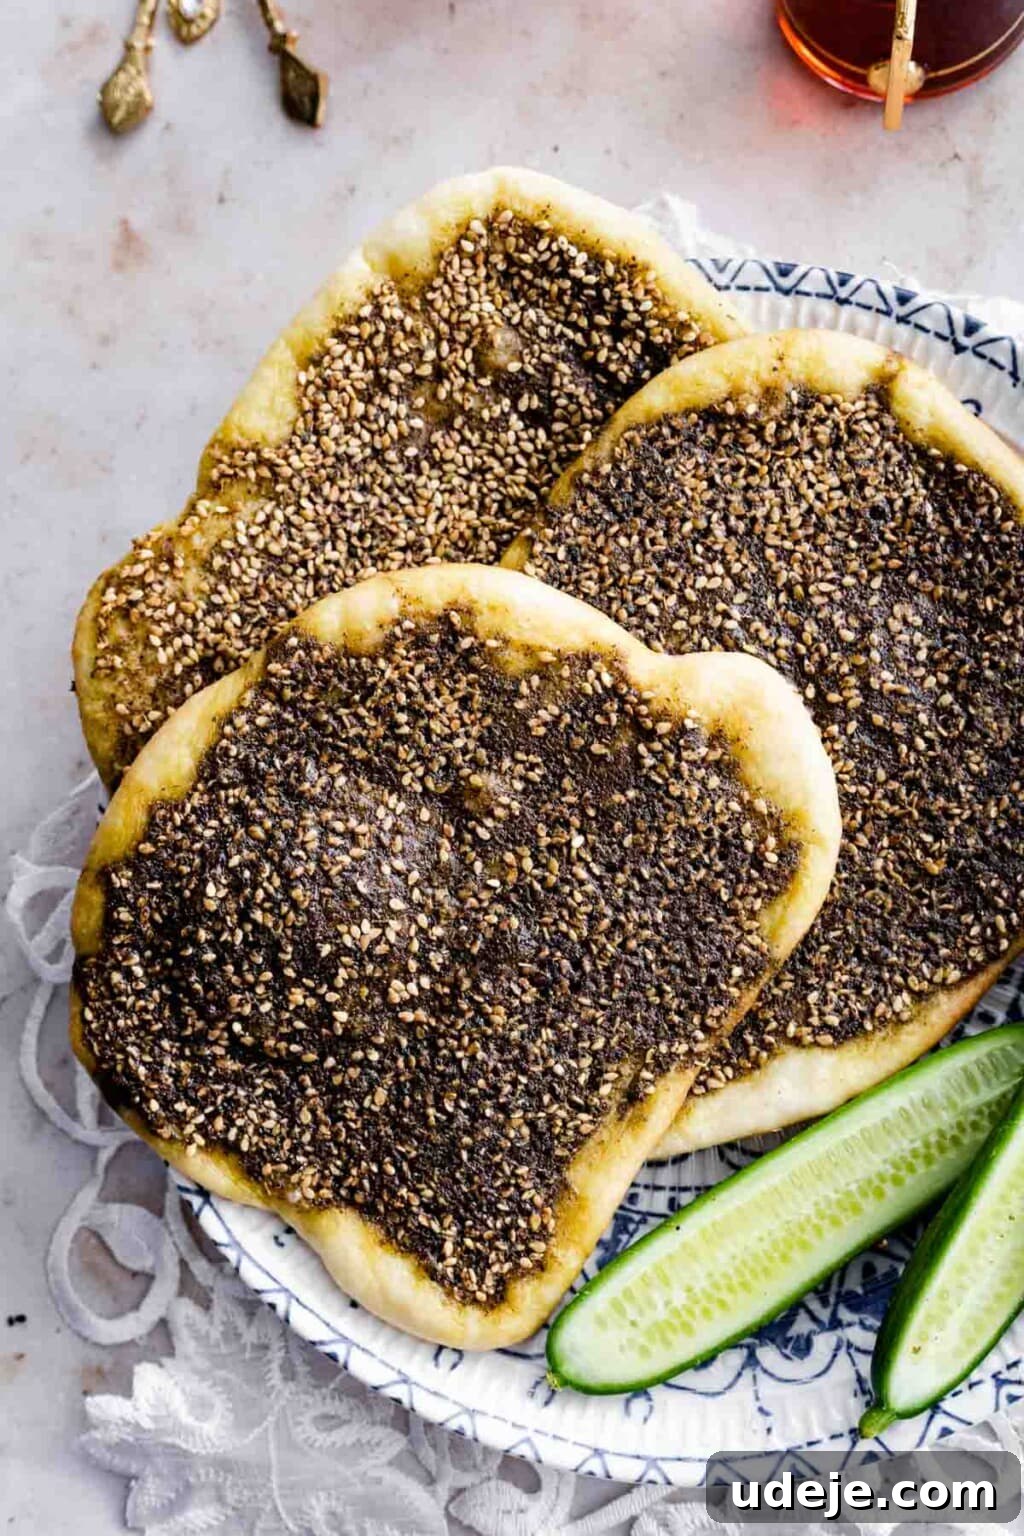
Manakish (pronounced mah-NAH-keesh), also known as Manaeesh, is a beloved Lebanese flatbread that holds a special place in Middle Eastern cuisine. This versatile and incredibly flavorful dish typically features simple yet potent toppings like savory za’atar spice blend or a gooey, rich cheese mixture, or often both! It’s the quintessential breakfast item, a satisfying light snack, or a delightful accompaniment to a warm cup of tea. This comprehensive guide will walk you through creating the most incredible homemade manakish, complete with a foolproof dough recipe that yields a supremely soft, fluffy interior and a wonderfully crisp bottom. Whether your heart yearns for the aromatic zest of classic za’atar manakish or the comforting melt of cheese adorned with nigella and sesame seeds, this recipe ensures a bakery-quality result right in your own kitchen.
5-STAR READER REVIEW
“After scouring the internet for a manoush dough, I decided to give this one a shot and wow! Quick to throw together, delish with zaatar or cheese on top – nice and thin manoush like you’d get from your local Lebanese bakery. Definitely a keeper! ”
—Rola
For many, including myself, Sunday mornings were synonymous with the comforting aroma of soft, warm manakish served fresh, piled high with a variety of tantalizing toppings, and always alongside a steaming cup of tea. My mother, a culinary artist in her own right, often diversified our manakish spread by adding homemade labneh, spicy sujuk (a type of sausage), or a savory ground beef topping reminiscent of lahm bi ajeen. This tradition highlighted the incredible versatility of this Lebanese staple, transforming a simple flatbread into a canvas for countless delicious creations.
If you’ve ever found yourself with a jar of za’atar in your pantry, this recipe presents the most authentic and satisfying way to put it to use. Beyond its delightful use on manakish, za’atar is also fantastic for marinating za’atar chicken – an absolute must-try for any fan of Middle Eastern flavors. For years, the idea of crafting homemade dough for manakish felt daunting, a culinary challenge I hesitated to tackle. However, after extensive testing and refining, I’ve finally perfected a recipe that consistently delivers bakery-style manakish: incredibly soft on top, with an irresistibly crispy bottom when baked correctly. This journey began with my popular “10-minute dough recipe,” which garnered viral attention when featured in my honeycomb bread. For manakish, we allow this remarkable dough a slightly longer rise, developing even more flavor and a beautiful texture.
Should time be of the essence, or if you’re simply in the mood for a quick culinary fix (we all have those days!), an excellent shortcut exists. You can prepare the delicious toppings as outlined below and generously spread them over store-bought naan or pita bread. While not quite the same as a fresh homemade dough, this convenient alternative still yields incredibly mouth-watering manakish, allowing you to enjoy these delightful flavors with minimal effort. It’s a testament to the power of the toppings themselves!
The Art of Homemade Manakish: Step-by-Step
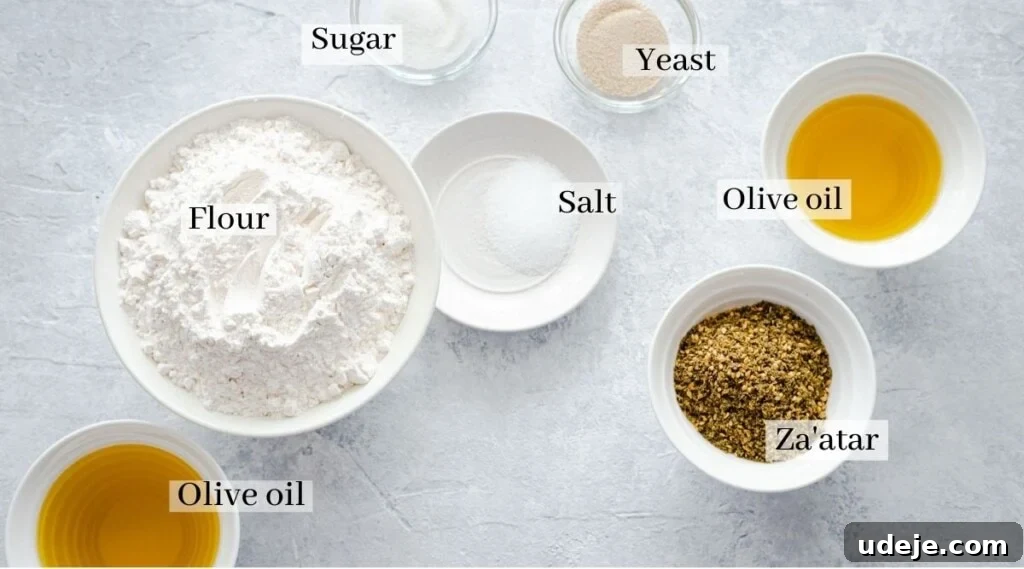
Embarking on your manakish-making journey begins with gathering your ingredients. Precision in measurement and quality components are key to unlocking the best flavors and textures.
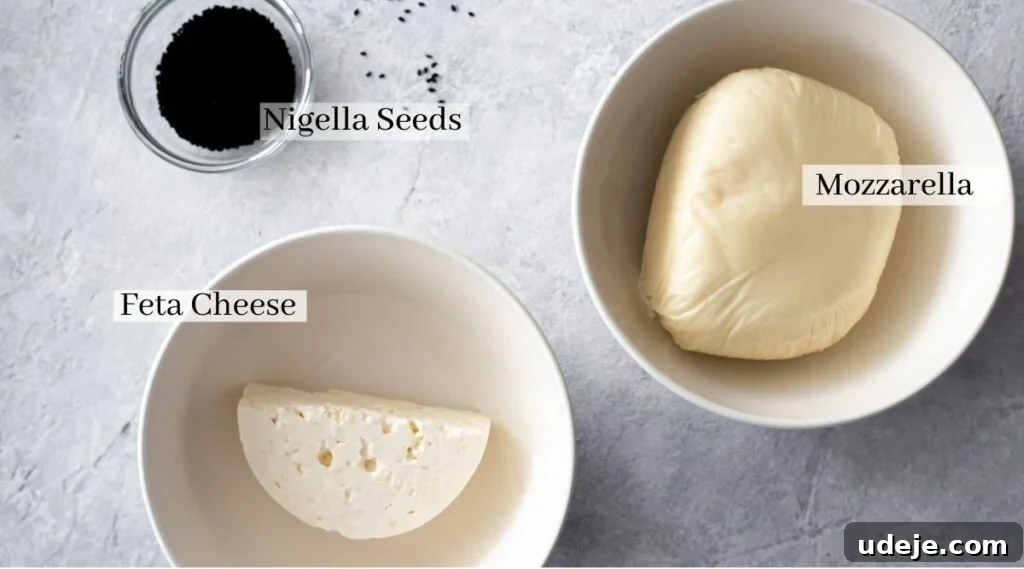
For the cheese topping, Akawi cheese is the traditional choice, celebrated for its mild, salty flavor and semi-hard texture. However, if Akawi is not readily available in your local stores, fear not! A mixture of crumbled feta and shredded mozzarella cheese provides an equally delicious and often preferred alternative. This blend offers a delightful balance of tangy and creamy, creating that signature stretchy, gooey texture when baked. For an authentic touch, and in my opinion, a non-negotiable element, don’t forget to sprinkle the cheese manakish generously with nigella and sesame seeds. These tiny seeds add a subtle nutty flavor and a beautiful textural contrast that elevates the entire experience.
First, Make the Dough: The Foundation of Flavor
The secret to exceptional manakish lies in its dough – a soft, pliable, and flavorful base. Begin by activating your yeast: combine it with warm water (ensure it’s not hot, as excessive heat can kill the yeast, but pleasantly warm to the touch). Let this mixture sit for 3-4 minutes until it becomes foamy, indicating the yeast is active and ready to work its magic. In a large mixing bowl, combine one cup of your flour with the yeast and water mixture and the sugar. Stir these ingredients thoroughly with a spoon until well combined. Cover the bowl tightly with plastic wrap and allow it to rest for exactly 10 minutes. This initial rest period allows the yeast to start fermenting and develops a flavorful starter, crucial for that authentic manakish taste.
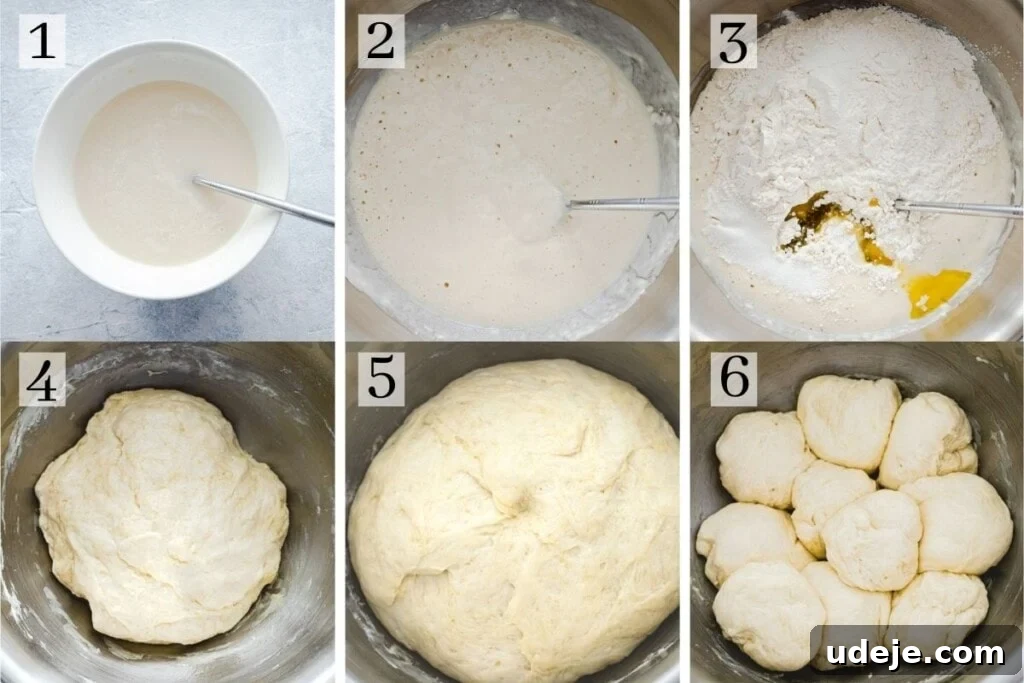
After the 10-minute resting period, add the remaining flour, olive oil, and salt to the bowl. Mix everything thoroughly with a spoon until a shaggy, somewhat rough dough begins to form. At this point, you can either switch to kneading by hand on a lightly floured surface for 3-4 minutes until the dough becomes smooth, elastic, and comes together beautifully, or for ultimate convenience, use a stand mixer fitted with a dough hook for the same duration. The goal is a supple, non-sticky dough. Once kneaded, cover the dough again and let it rise in a warm place for approximately 30 minutes. During this time, the dough will double in size, becoming light and airy. While the dough is rising, preheat your oven to 375°F (190°C) so it’s ready for baking.
Second, Prepare the Toppings: Za’atar and Cheese Perfection
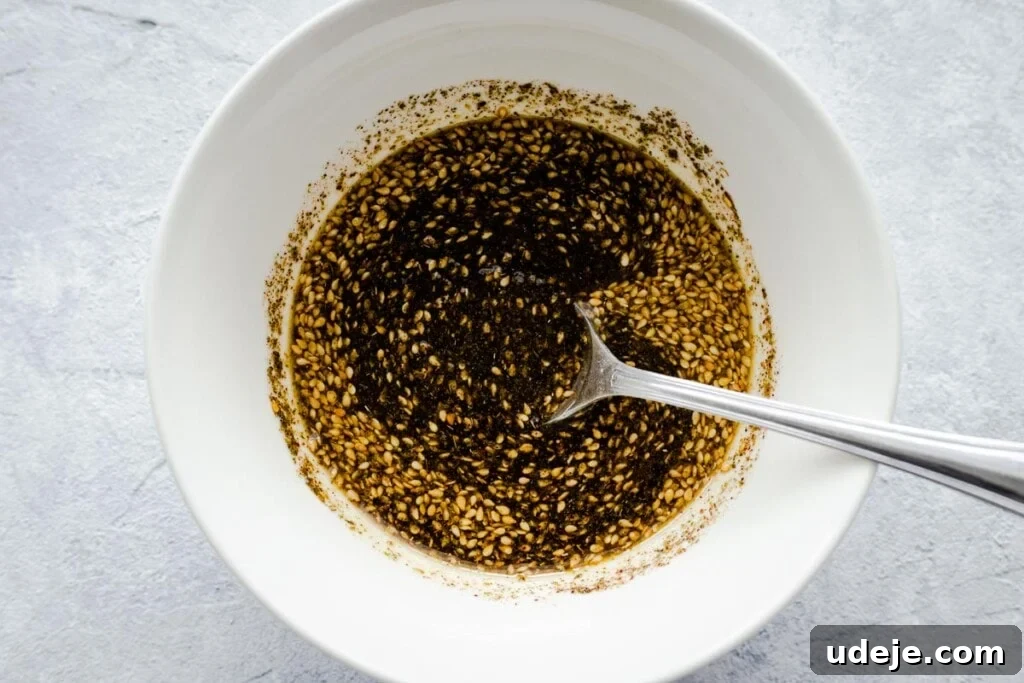
With your dough happily rising, it’s time to prepare the star toppings that define manakish. For the classic Za’atar topping, simply combine the fragrant za’atar spice blend with high-quality extra virgin olive oil in a small bowl. The ratio is crucial here to achieve a paste-like consistency that’s easy to spread but rich in flavor. I highly recommend using a premium brand of Za’atar and a robust olive oil; the quality of these ingredients significantly impacts the final taste, making all the difference between a good manakish and an exceptional one.
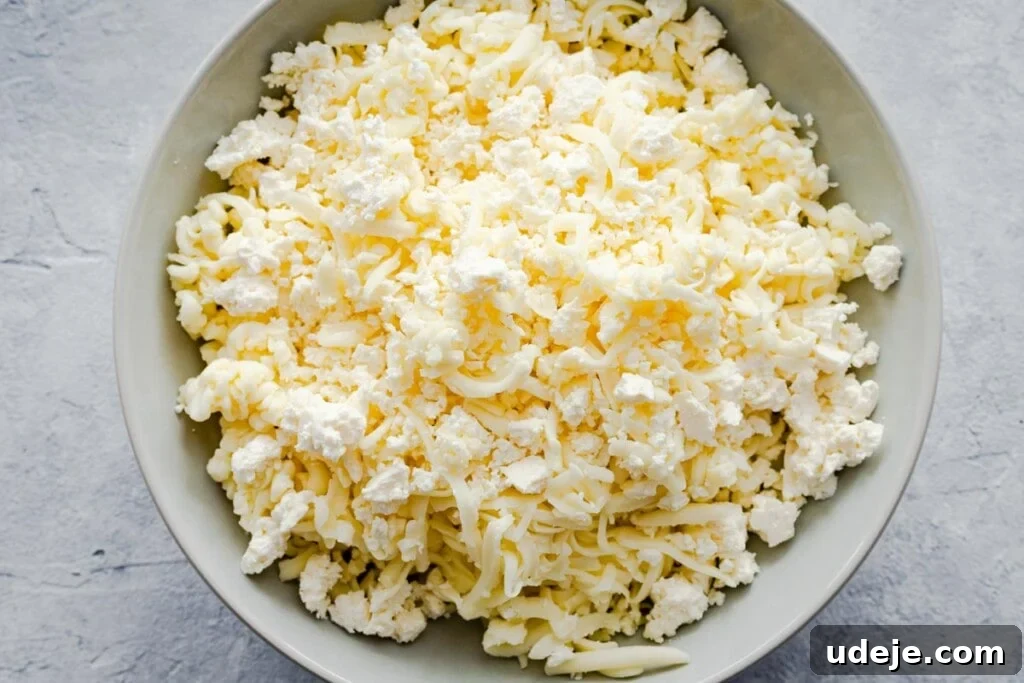
For the sumptuous cheese topping, combine your crumbled feta cheese with the grated mozzarella. This combination offers both the desired tang and the perfect melt. If you opted for Akawi cheese, simply grate or finely crumble it. Ensure the cheeses are well mixed so that each bite offers a balanced blend of flavors and textures.
Finally, Shape and Bake: To Golden Perfection
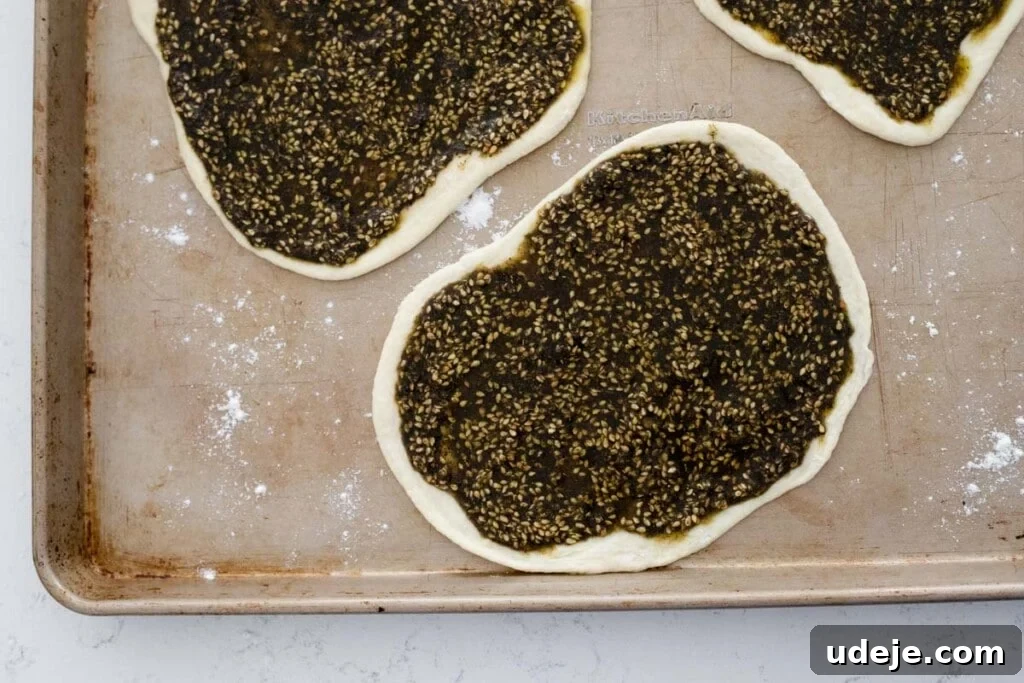
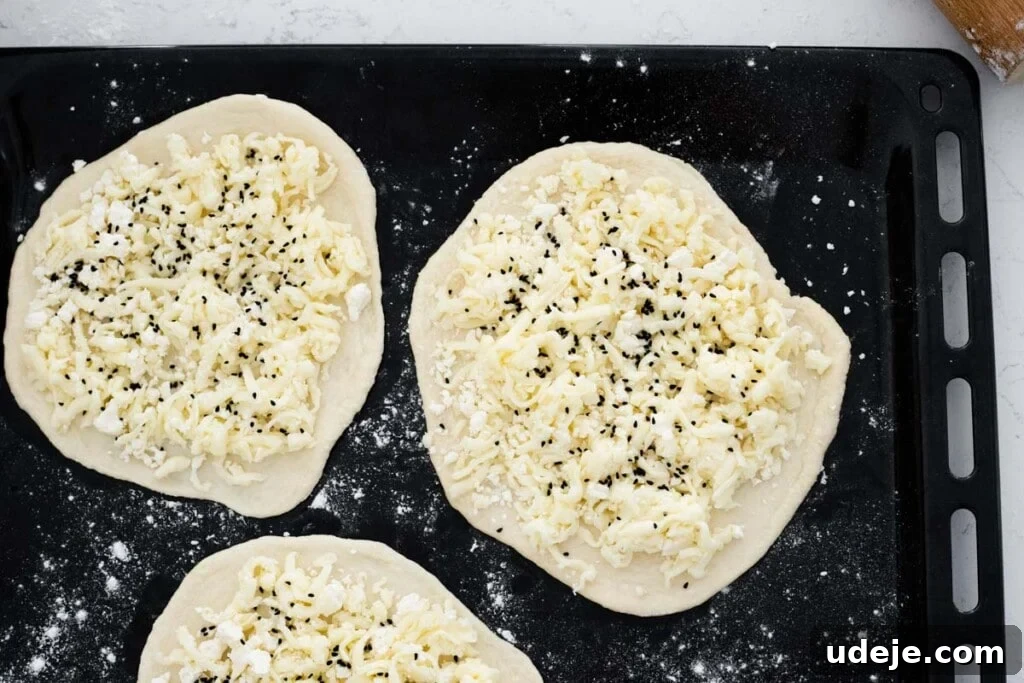
Once your dough has risen beautifully, gently divide it into approximately 10 medium-sized, equal balls. Lightly flour your work surface and your rolling pin. Take each dough ball and roll it out into a thin, round flatbread. Aim for a relatively thin consistency, as the dough will puff up slightly in the oven, creating that lovely fluffy texture. Transfer the rolled dough rounds to a lightly floured baking sheet. Now comes the exciting part: generously add your chosen toppings. For the cheese manakish, remember to sprinkle liberally with nigella and/or sesame seeds for that authentic touch and added flavor complexity.
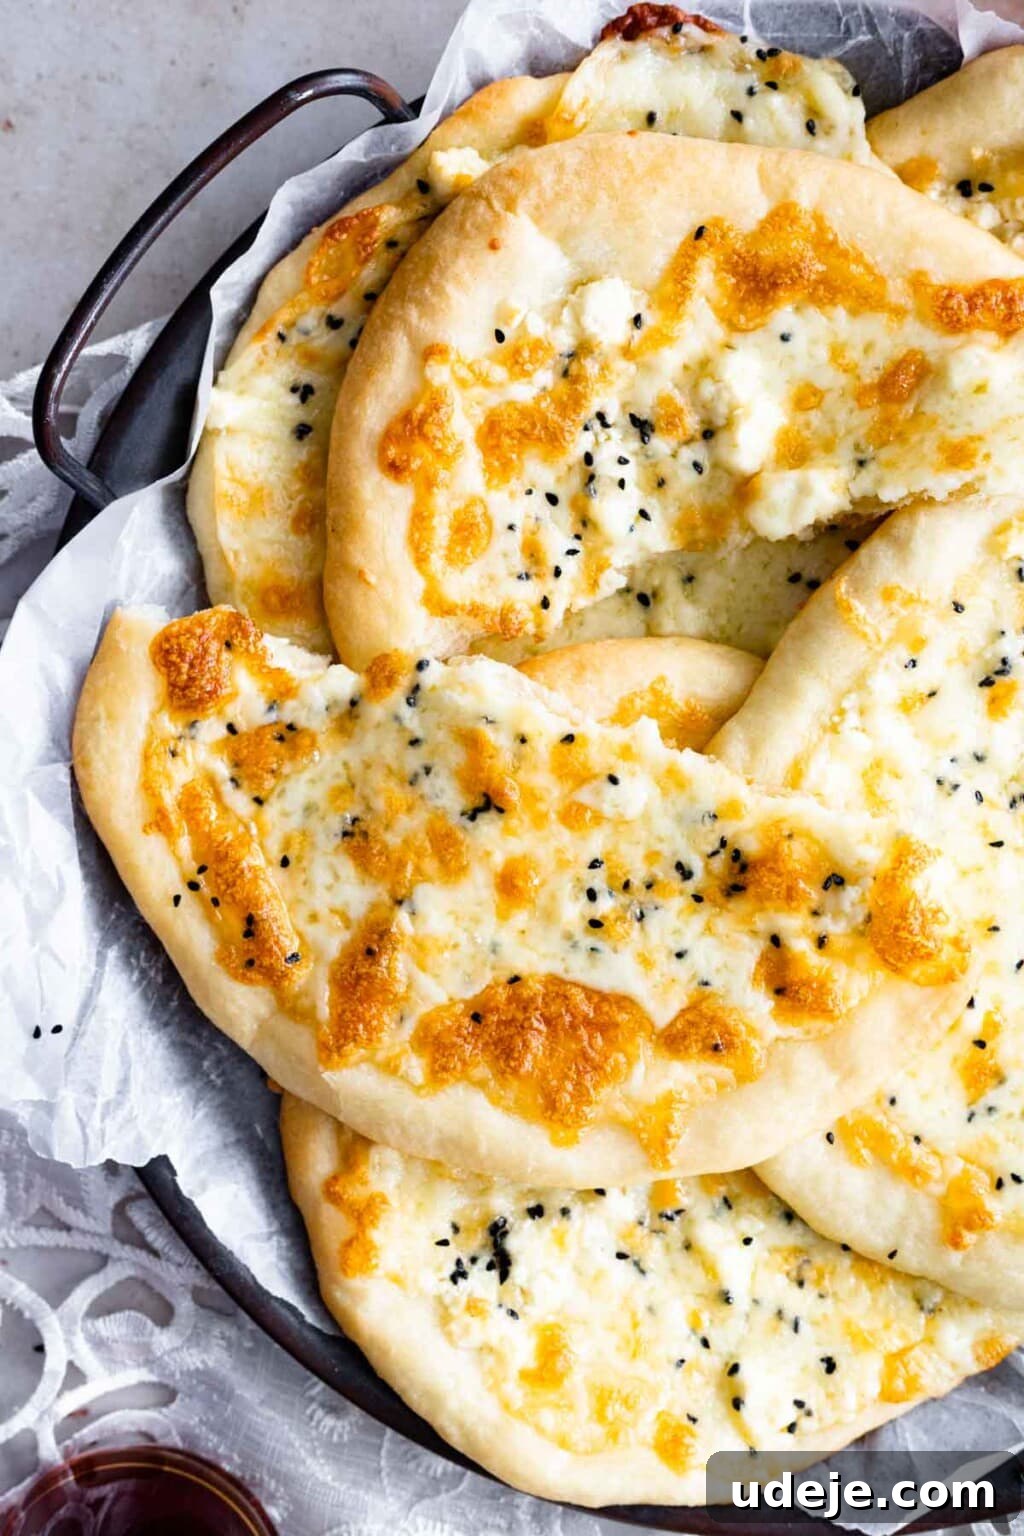
Bake the manakish in your preheated oven for 12-15 minutes, or until the bottom of the flatbreads turns a beautiful light golden brown. For cheese manakish, you can optionally broil the top for an additional few minutes to achieve a lovely golden-brown crust and extra-gooey cheese; however, watch them very closely, as they can burn quickly under the broiler. Crucially, once baked, immediately transfer the manakish to a serving platter and cover them with a clean kitchen towel. This essential step traps the steam, keeping the flatbreads wonderfully soft and preventing them from drying out.
For those who crave an extra crispy bottom, consider preheating a pizza steel or a cast iron skillet in your oven before baking. Once hot, carefully transfer the manakish directly onto the steel or skillet. This method provides intense direct heat, resulting in an exceptionally crisp base that perfectly complements the soft interior. I’ve personally found that a cast iron skillet works just as wonderfully as a pizza steel for achieving this desired texture.
Manakish Are Perfect For Your Freezer: Meal Prep Made Easy!
One of the many wonderful qualities of manakish is their freezer-friendliness, making them ideal for meal prepping or having a quick, delicious option on hand. Whenever I dedicate time to making manakish, I always double the recipe, ensuring I have a stash in my freezer. They are absolutely perfect for school lunches, quick breakfasts, or unexpected guests. To freeze them, allow the baked manakish to cool completely. Then, place them in an airtight container or a freezer bag, separating layers with parchment paper to prevent sticking. They can be safely frozen for up to 3 months. When you’re ready to enjoy them, simply thaw them in the oven until warmed through and the crust is crisp again. It’s a convenient way to enjoy homemade goodness with minimal fuss.
Pro Tips for Manakish Mastery
- Dough Consistency: The dough should be soft and slightly tacky, but not sticky. If it’s too sticky, add a little more flour, one tablespoon at a time. If it’s too dry, add a tiny bit of water.
- Even Rolling: Aim for uniform thickness when rolling out the dough. This ensures even baking and a consistent texture throughout the flatbread.
- Quality of Ingredients: As mentioned, the quality of your za’atar and olive oil will significantly impact the flavor. Invest in good quality products for the best results.
- Don’t Overload Toppings: While tempting, overloading the manakish with too much topping can make them soggy or difficult to handle. A generous but balanced amount is key.
- Monitor Broiling: If you choose to broil your cheese manakish, stay vigilant. The cheese can go from perfectly golden to burnt in a matter of seconds.
- Serve Fresh: Manakish are best enjoyed fresh and warm from the oven.
If you tried these recipes, please consider leaving a star ⭐️⭐️⭐️⭐️⭐️ rating in the recipe card below and/or a review in the comments section further down the page – I’d love to hear from you! You can also hop on over to Instagram and say hello!

Manakish (Cheese and Za’atar)
10 servings
10
15
40
55
Amina Al-Saigh
Leave a Review
Pin Recipe
Ingredients
For the dough:
- 2 1/2 cups flour, plus 2 more tablespoons
- 1 tablespoon sugar
- 1 tablespoon instant yeast
- 1 cup warm water
- 1/4 cup olive oil
- 1 teaspoon salt
For the Cheese Topping:
- 340 grams fresh mozzarella, or replace with Akawi cheese
- 200 grams feta cheese, or replace with Akawi cheese
- 1.5 tablespoons nigella seeds, (also known as Kolonji)
For the Za’atar Topping:
- 1/4 cup olive oil, extra virgin
- 7 tablespoons Za’atar, (found at middle eastern stores)
Instructions
To make the dough:
-
Start by mixing the yeast in the 1 cup of warm water. Make sure it’s not hot water or the yeast will not activate. Set aside for 3 minutes until foamy.
-
In a bowl, add 1 cup of the flour along with the sugar and the yeast and water mixture. Mix well with a spoon, cover with plastic wrap and set aside for 10 minutes.
-
After 10 minutes, add the rest of the flour (1 ½ cups plus 2 tablespoons), 1/4 cup olive oil and the salt and mix well until a shaggy dough forms.
-
Using your hands, knead the dough for 3-4 minutes, then smooth it out and set aside to rise for about 30 minutes, covered.
-
Preheat your oven to 375F (190°C) while the dough rises.
For the toppings and baking:
-
Mix together the Za’atar and the olive oil in a bowl until it forms a spreadable paste and set aside.
-
Mix together the mozzarella cheese and feta cheese (or Akawi cheese) in another bowl and set aside.
-
Once the dough is ready, separate it into 10 equal-sized balls. Using a floured rolling pin and a floured surface, flatten each dough ball into a very thin, medium-sized flatbread. The dough will rise slightly in the oven, so rolling them thin is important for the desired texture.
-
Transfer the dough rounds to a floured baking sheet. You may need to use 2-3 baking sheets to fit them all, or bake them in batches.
-
Spread the Za’atar mixture evenly on 5 of the manakish rounds, making sure to cover the entire surface, leaving a 1/4 inch border.
-
Spread the cheese mixture on the remaining 5 manakish, also leaving a 1/4 inch border. Sprinkle these generously with nigella seeds (and/or sesame seeds).
-
Place the baking sheets in the preheated oven on the bottom rack and bake for 12-15 minutes until the bottom is lightly golden. You can bake more than one sheet at a time by placing one on the bottom rack and one on the middle rack. Once the bottom rack manakish are cooked, switch the middle rack sheet pan to the bottom for a few more minutes until cooked through.
-
For the cheese manakish, you can broil the top for just a few minutes to lightly brown the cheese. Keep a very close eye on them during this step as they brown quickly.
-
Remove the baked manakish from the oven and immediately transfer them to a platter. Cover them with a clean kitchen towel or plastic bag to keep them soft and prevent them from drying out until serving.
-
Serve your delicious manakish warm with fresh vegetables like sliced tomatoes, cucumbers, fresh mint leaves, and olives for a complete Middle Eastern breakfast or snack.
Notes
- This recipe yields approximately 10 medium-sized manakish, with the topping amounts calculated for 5 of each type (cheese and za’atar). If you wish to make only cheese or only za’atar manakish, remember to double the quantities for your chosen topping.
- For a larger yield or for smaller, bite-sized portions, you can divide the dough into more pieces to create smaller manakish. Adjust baking time accordingly.
- Traditionally, Akawi cheese is the standard for cheese manakish. However, the mozzarella and feta mixture suggested here is a fantastic and widely available substitute that delivers superb flavor and melt.
- To make a delightful mixed cheese and Za’atar manakish, simply combine the za’atar (without olive oil) directly into the cheese mixture before spreading it on the dough.
- Manakish are excellent for freezing. Once they have cooled completely, place them in an airtight container or freezer bag, using parchment paper between layers to prevent them from sticking. They can be stored in the freezer for up to 3 months. To reheat, simply warm them in a preheated oven until soft and warmed through.
Did you make this recipe?
Please leave a star rating and review below!